ChevyParts
My Garage
My Account
Cart
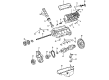
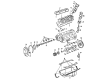
OEM Chevrolet Express 3500 Camshaft
Cam- Select Vehicle by Model
- Select Vehicle by VIN
Select Vehicle by Model
orMake
Model
Year
Select Vehicle by VIN
For the most accurate results, select vehicle by your VIN (Vehicle Identification Number).
15 Camshafts found


Chevrolet Express 3500 Camshaft Part Number: 12689035
$312.99 MSRP: $546.18You Save: $233.19 (43%)Ships in 1-2 Business Days

Chevrolet Express 3500 Camshaft Part Number: 12672469
$146.58 MSRP: $255.74You Save: $109.16 (43%)


Chevrolet Express 3500 Camshaft Part Number: 12625439
$384.94 MSRP: $634.15You Save: $249.21 (40%)


Chevrolet Express 3500 Camshaft Part Number: 12561721
$507.99 MSRP: $836.81You Save: $328.82 (40%)Ships in 1-3 Business Days

Chevrolet Express 3500 Camshaft Part Number: 12560967
$507.99 MSRP: $836.81You Save: $328.82 (40%)Ships in 1-3 Business Days
Chevrolet Express 3500 Camshaft Part Number: 12721599
$147.74 MSRP: $243.31You Save: $95.57 (40%)Ships in 1-3 Business Days
Chevrolet Express 3500 Camshaft Part Number: 12642853
$230.92 MSRP: $380.33You Save: $149.41 (40%)
Chevrolet Express 3500 Camshaft Part Number: 12638804
$240.78 MSRP: $396.63You Save: $155.85 (40%)Ships in 1-3 Business Days
Chevrolet Express 3500 Camshaft Part Number: 12552296
$347.29 MSRP: $606.05You Save: $258.76 (43%)Ships in 1-3 Business Days


Chevrolet Express 3500 Camshaft Part Number: 98077453
$478.53 MSRP: $756.33You Save: $277.80 (37%)

Chevrolet Express 3500 Camshaft Part Number: 12556291
$330.31 MSRP: $519.71You Save: $189.40 (37%)


Chevrolet Express 3500 Camshaft Part Number: 12626660
$167.72 MSRP: $263.88You Save: $96.16 (37%)
Chevrolet Express 3500 Camshaft Part Number: 14066308
Chevrolet Express 3500 Camshaft Part Number: 10241264
Chevrolet Express 3500 Camshaft Part Number: 12646602
$241.54 MSRP: $379.97You Save: $138.43 (37%)
Chevrolet Express 3500 Camshaft
Want to cut long-term maintenance and repair costs? Choose OEM Camshaft. Those parts deliver top durability you can trust. On our site, you'll find a huge catalog of genuine Chevrolet Express 3500 parts. Prices are unbeatable, so you can keep more in your pocket. Every OEM Chevrolet Express 3500 Camshaft includes a manufacturer's warranty. You can also get an easy return policy that keeps buying risk free. Fast delivery, get your car on the road quickly. It's simple to search, compare, and order. Stop guessing about quality or fit. Order today and save with parts that last.
Chevrolet Express 3500 Camshaft Parts and Q&A
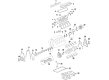
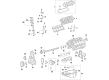
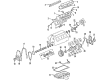
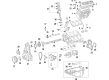
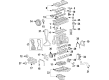
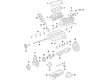
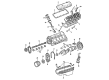
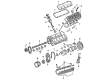
- Q: How to replace the camshaft on Chevrolet Express 3500?A:Before replacing the Camshaft remove the radiator support and engine front cover along with valve lifters and Camshaft sensor bolt plus sensor. Ensure the marks on the Crankshaft and Camshaft sprockets align during engine rotation before moving the Crankshaft after Timing Chain removal since this prevents valve or piston assembly damage. You must remove the Camshaft sprocket before repositioning the Timing Chain while installing the Camshaft retainer bolts and retainer with the precaution to protect Camshaft bearings because all Camshaft journals share a unified diameter. Initial the Camshaft removal by placing three m8-1.25 x 100 mm bolts into the front Camshaft holes then use these bolts as a rotation tool to extract the Camshaft from the engine block before removing the bolts. Check for any cleaning needs on the Camshaft along with performing an inspection of both the bearings and Camshaft. Before placement, apply clean engine oil to the Camshaft's journals and bearings before reinstalling the three same bolts for Camshaft insertion into the engine block with bolt removal to follow. Reduce installation friction by setting the retainer plate with its gasket against the engine block while maintaining a debris-free gasket surface. The procedure includes placing the Camshaft retainer bolted with 25 nm (18 ft. Lbs.) torque then mounting the Camshaft sprocket and setting the Timing Chain before tightening the Camshaft sprocket bolts to 35 nm (26 ft. Lbs.). Check the condition of the Camshaft sensor o-ring seal and then proceed. The Camshaft sensor should receive clean engine oil for lubrication before installation alongside its bolt. Torque the bolt to a 25 nm (18 ft. Lbs.) setting. You should install valve lifters after mounting the front cover and radiator support.
- Q: What tools are required to service and repair the camshaft on Chevrolet Express 3500?A:These tools serve to service and repair the Camshaft: balancer remover and installer (J 23523-F). Balancer remover and installer (J 23523-F). Evacuate the ac system when present then disconnect the negative battery cable and drain the engine oil. First remove the valve lifters followed by engine cooling fan and Fan Shroud and Radiator grille and hood latch bracket before taking out the Radiator and A/C Condenser if installed and Water Pump. Proceed with bolt removal from the Crankshaft Pulley followed by pulley removal then vehicle lifter and complete Oil Pan removal. First rotate the number one Piston to top dead center (TDC) position then align the timing marks between Camshaft and crankshaft sprockets. Remove the crankshaft position sensor reluctor ring along with the engine front cover. Begin by removing the Camshaft sprocket bolts before continuing to remove the Camshaft sprocket and Camshaft Timing Chain, then use a t-30 torx socket to break free the Camshaft retainer plate and its bolts followed by Camshaft removal. Inspect all components for signs of wear while cleaning down all sealing areas. Begin set-up by first installing the front engine components then the Camshaft. After lifting the vehicle you must install all fasteners to the Oil Pan before lowering it. Install the crankshaft balancer and then the Water Pump before adding the A/C Condenser and finally the Radiator, hood latch bracket, radiator grille, engine cooling fan and upper Fan Shroud using the balancer remover and installer tool (J 23523-F). Follow the sequence to install valve lifters, lower Intake Manifold, valve Rocker Arms, push valve rods then connect the engine's battery negative cable and replace the oil filter.


Related Chevrolet Express 3500 Parts
 Chevrolet Express 3500 Coolant Filter
 Chevrolet Express 3500 Dipstick
 Chevrolet Express 3500 Exhaust Valve
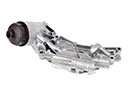 Chevrolet Express 3500 Oil Cooler
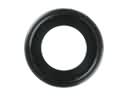 Chevrolet Express 3500 Oil Drain Plug Gasket
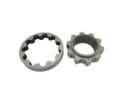 Chevrolet Express 3500 Oil Pump Rotor Set
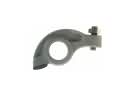 Chevrolet Express 3500 Rocker Arm
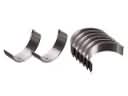 Chevrolet Express 3500 Rod Bearing
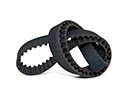 Chevrolet Express 3500 Timing Belt
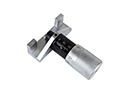 Chevrolet Express 3500 Timing Belt Tensioner
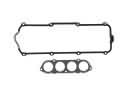 Chevrolet Express 3500 Valve Cover Gasket
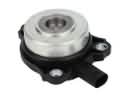 Chevrolet Express 3500 Variable Timing Adjuster Magnet