ChevyParts
My Garage
My Account
Cart
OEM Chevrolet Express 3500 Radiator
Cooling Radiator- Select Vehicle by Model
- Select Vehicle by VIN
Select Vehicle by Model
orMake
Model
Year
Select Vehicle by VIN
For the most accurate results, select vehicle by your VIN (Vehicle Identification Number).
13 Radiators found


Chevrolet Express 3500 Radiator Part Number: 22805590
$448.44 MSRP: $673.33You Save: $224.89 (34%)Ships in 1-2 Business Days
Chevrolet Express 3500 Radiator, Radiator Part Number: 84494241
$246.11 MSRP: $385.14You Save: $139.03 (37%)Ships in 1-2 Business Days
Chevrolet Express 3500 Radiator Part Number: 84916454
$364.30 MSRP: $570.12You Save: $205.82 (37%)
Chevrolet Express 3500 Radiator Part Number: 84310389
$281.78 MSRP: $425.00You Save: $143.22 (34%)Ships in 1-3 Business DaysChevrolet Express 3500 Radiator Part Number: 84462085
$320.59 MSRP: $483.55You Save: $162.96 (34%)Ships in 1-3 Business DaysChevrolet Express 3500 Radiator Part Number: 84494240
$380.08 MSRP: $573.26You Save: $193.18 (34%)Ships in 1-2 Business Days


Chevrolet Express 3500 Radiator Part Number: 15762438
Chevrolet Express 3500 Radiator Part Number: 15766914

Chevrolet Express 3500 Radiator Part Number: 15762441

Chevrolet Express 3500 Radiator Part Number: 15766917
Chevrolet Express 3500 Radiator Part Number: 89019165
Chevrolet Express 3500 Radiator Part Number: 15762434
Chevrolet Express 3500 Radiator Part Number: 15766913
Chevrolet Express 3500 Radiator
Want to cut long-term maintenance and repair costs? Choose OEM Radiator. Those parts deliver top durability you can trust. On our site, you'll find a huge catalog of genuine Chevrolet Express 3500 parts. Prices are unbeatable, so you can keep more in your pocket. Every OEM Chevrolet Express 3500 Radiator includes a manufacturer's warranty. You can also get an easy return policy that keeps buying risk free. Fast delivery, get your car on the road quickly. It's simple to search, compare, and order. Stop guessing about quality or fit. Order today and save with parts that last.
Chevrolet Express 3500 Radiator Parts and Q&A
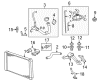
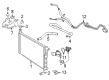
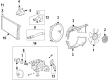
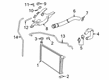
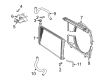
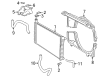
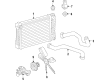
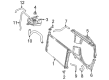
- Q: How to replace a radiator and ensure proper installation on Chevrolet Express 3500?A:New insulators must be installed when replacing a Radiator to stop the new Radiator from becoming loose because of damaged or improperly sized used insulators. Start by taking off the air cleaner assembly before moving to the coolant recovery reservoir. The j 38185 hose clamp pliers will help detach the Radiator inlet clamp before removing the inlet hose . Begin the Radiator outlet heater hose removal process by using j 38185 through the outlet heater hose clamp at the Radiator until the clamp becomes loose. Recommended task is to eliminate the automatic transmission cooler lines and engine oil cooler lines. Begin Radiator disassembly by removing all the Fan Shroud bolts from both sides and the top of the Fan Shroud before extracting the Radiator along with its insulators (1, 3). Thoroughly inspect the Radiator equipment alongside its insulators along with hoses and clamps and mounting hardware. Replace broken or damaged components when necessary. Begin installing with the Radiator insulators (1, 3) followed by placing the Radiator. Secure the Fan Shroud screws which anchor to the top of the Radiator support at 6 n.m (53 lb in torque) then direct the Fan Shroud screws which point to the sides until they also obtain 6 n.m (53 lb in torque). Connect the lines which supply engine oil cooler and automatic transmission oil cooler fluid. Fasten the Radiator inlet hose by using the j 38185 tool. The installer should use j 39529 to install both the outlet heater hose and its clamp. Put back the coolant recovery reservoir and the air cleaner assembly into place. Check the automatic transmission fluid level together with engine oil level before completing the inspection.

Related Chevrolet Express 3500 Parts
 Chevrolet Express 3500 Coolant Pipe
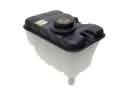 Chevrolet Express 3500 Coolant Reservoir
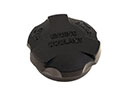 Chevrolet Express 3500 Coolant Reservoir Cap
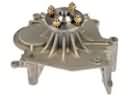 Chevrolet Express 3500 Cooling Fan Bracket
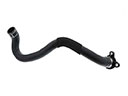
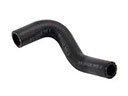 Chevrolet Express 3500 Cooling Hose
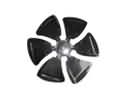 Chevrolet Express 3500 Fan Blade
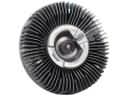 Chevrolet Express 3500 Fan Clutch
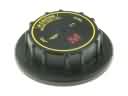 Chevrolet Express 3500 Radiator Cap
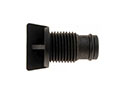 Chevrolet Express 3500 Radiator Drain Plug
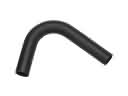 Chevrolet Express 3500 Radiator Hose
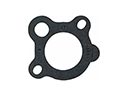 Chevrolet Express 3500 Thermostat Gasket
 Chevrolet Express 3500 Water Pump Gasket