ChevyParts
My Garage
My Account
Cart
OEM Buick Rendezvous Oil Pan
Oil Drain Pan- Select Vehicle by Model
- Select Vehicle by VIN
Select Vehicle by Model
orMake
Model
Year
Select Vehicle by VIN
For the most accurate results, select vehicle by your VIN (Vehicle Identification Number).
4 Oil Pans found

Buick Rendezvous Oil Pan Part Number: 12593455
$134.19 MSRP: $220.95You Save: $86.76 (40%)Ships in 1-3 Business Days
Buick Rendezvous Oil Pan Part Number: 24508996
$187.21 MSRP: $294.57You Save: $107.36 (37%)Ships in 1-3 Business Days
Buick Rendezvous Oil Pan Part Number: 12577512
$23.44 MSRP: $36.72You Save: $13.28 (37%)
Buick Rendezvous Oil Pan Part Number: 12613020
Buick Rendezvous Oil Pan
Want to cut long-term maintenance and repair costs? Choose OEM Oil Pan. Those parts deliver top durability you can trust. On our site, you'll find a huge catalog of genuine Buick Rendezvous parts. Prices are unbeatable, so you can keep more in your pocket. Every OEM Buick Rendezvous Oil Pan includes a manufacturer's warranty. You can also get an easy return policy that keeps buying risk free. Fast delivery, get your car on the road quickly. It's simple to search, compare, and order. Stop guessing about quality or fit. Order today and save with parts that last.
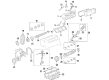
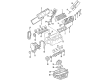
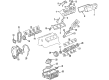
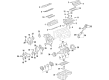
The Buick Rendezvous Oil Pan is one of the crucial parts and plays a vital role in the performance of the mid-size crossover SUV, Buick Rendezvous which was available between 2002-2007. This is an oil pan that stores engine oil, thus providing lubri-cation to the moving parts of the engine as is required to enhance a longer life span of the product. Intended for different operation modes, Buick Rendezvous Oil Pan employs the wet sump system; and an oil pump is located to pull the oil with the help of a pickup tube. The most Buick Rendezvous models are equipped with durable cast aluminum oil pan and help both increase the car's efficiency and safety due to the constant supply of oil. The oil pan is designed to meet specific Rendezvous models and particularly the v6 engineered car with a 4 speed automatic transmission. It is for this reason that the oil pan is a critical subassembly that makes a significant contribution to the pleasant aspect of driving a vehicle due to the improvement of the vehicle's performance and smooth running. Also, the Buick Rendezvous Oil Pan gains significance in the structure of automotive products because of its durability and possible suitability for various road conditions preferred by Buick consumers. In focusing on the objective of optimizing both performance and safety at the same time, the Buick Rendezvous Oil Pan demonstrates how the brand has maintained high-quality standard to secure the Rendezvous as one of the best crossover vehicles in the market today.
Buick Rendezvous Oil Pan Parts and Q&A
- Q: How to replace the oil pan on Buick Rendezvous?A:In order to replace the Oil Pan with a new one, first install the engine support fixture (J40623-B) and remove the right side Engine Mount. Drain crankcase and remove Oil Filter, right front tire and wheel, and right front engine splash shield. Shake off clips of engine harness for the Wheel Speed Sensor from the lower Control Arm of the right while removing cotter pin from the ball-stud and wound ball-stud nut without removing. Let the j41820 ball stud/joint separator (J41820) help separate the pac ball stud from the Steering Knuckle by rotating the pac ball study nut counter clockwise. Next, you remove the A/C Compressor bolts and put the A/C Compressor to one side, then the transaxle brace bolts in the cases where you had a regular production option (RPO) m76 and then pull the transaxle brace. Repeat the procedure on the transaxle brace bolts with the rpo m15. Remove the Starter, disconnect the engine harness electrical connecter from the oil pressure sensor, remove retainers securing the Brake Line to frame. Support the cradle with suitable adjustable jack, and loosen the left side cradle bolts, and remove your right front and rear cradle bolts. Remove the Oil Pan side bolts and the Oil Pan bolts and remove the Oil Pan and gasket, cleaning the surfaces sealing with it. Install a new Oil Pan Gasket and apply sealer gm p/n 12378521 (Canadian P/N 88901148) to both sides of the crankshaft rear main bearing cap in the event you are reinstalling the rear main bearing cap. Install Oil Pan followed by Oil Pan bolts, which are to be tighten up to 25 nm (18 ft. Lbs.); Oil Pan side bolts are to be installed front and to be tighten up to 50 nm (37 ft. Lbs.). Reinstall the right-side cradle bolts on the front and back and tighten the left side bolts on the cradle and take out the adjustable jack. Secure the Brake Line retainers, reconnect the engine harness electricity connector to the oil pressure sensor and hook up the Starter. If provided with rpo m15, cinch on the transaxle brace and bolts, tighten to 43 nm (32 ft.lbs.) and do again for rpo m76. Mount the A/C Compressor and tighten its bolts to 50 nm (37 ft. Lbs.). Lining up the ball stud cotter pin hole parallel with the knuckle, the ball stud is installed into the knuckle and the ball stud nut is tightened to 55 nm (40 ft. Lbs.). If needed, adjust the ball stud nut to align the slot with the cotter pin hole, in such a way, that the cotter pin ends do not interact with the abs sensor connector or drive axle. Install a new cotter pin and bend the ends of it and reinstall the engine harness clips for the Wheel Speed Sensor to the right lower Control Arm. Finally, replace the right front splash shield, tire and wheel, oil filter, right side Engine Mount and remove engine support fixture (J40623-B).

Related Buick Rendezvous Parts
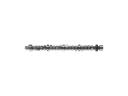 Buick Rendezvous Camshaft
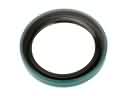 Buick Rendezvous Crankshaft Seal
 Buick Rendezvous Exhaust Valve
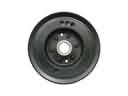 Buick Rendezvous Harmonic Balancer
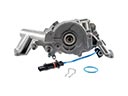 Buick Rendezvous Oil Pump
 Buick Rendezvous Rocker Shaft Spring Kit
 Buick Rendezvous Timing Chain Guide
 Buick Rendezvous Timing Chain Tensioner
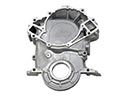 Buick Rendezvous Timing Cover
 Buick Rendezvous Timing Cover Gasket
 Buick Rendezvous Valve Cover Grommet
 Buick Rendezvous Valve Stem Seal