ChevyParts
My Garage
My Account
Cart
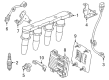
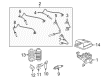
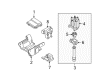
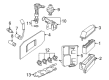
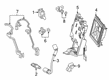
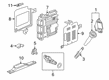
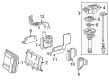
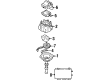
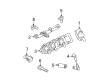
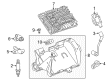
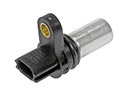
OEM Cadillac Ignition Coil
Ignition Coil Resistor- Select Vehicle by Model
- Select Vehicle by VIN
Select Vehicle by Model
orMake
Model
Year
Select Vehicle by VIN
For the most accurate results, select vehicle by your VIN (Vehicle Identification Number).
34 Ignition Coils found


Cadillac Ignition Coil Part Number: 25198623
$129.66 MSRP: $266.44You Save: $136.78 (52%)Product Specifications- Other Name: Coil Assembly-Ignition; Coil, Ignition Coil
- Replaces: 55579072, 25195107


Cadillac Ignition Coil Part Number: 12632479
$65.35 MSRP: $118.28You Save: $52.93 (45%)Ships in 1-2 Business DaysProduct Specifications- Other Name: Coil, Ignition; Direct Ignition Coil; Coil On Plug Coil; Coil, Ignition Coil
- Replaces: 12618542, 12590990, 12610626


Cadillac Ignition Coil Part Number: 10495089
$29.57 MSRP: $53.52You Save: $23.95 (45%)Product Specifications- Other Name: Coil, Distributor Pick Up
- Replaces: 01987964, 1987964


Cadillac Ignition Coil Part Number: 12611424
$79.39 MSRP: $167.24You Save: $87.85 (53%)Product Specifications- Other Name: Coil, Ignition; Direct Ignition Coil; Coil; Coil, Ignition Coil
- Replaced by: 12739916


Cadillac Ignition Coil Part Number: 25202791
$58.77 MSRP: $123.80You Save: $65.03 (53%)Ships in 1-2 Business DaysProduct Specifications- Other Name: Coil Assembly-Ignition; Coil, Ignition Coil
- Replaces: 12652405, 12687140, 12654078


Cadillac Spark Plug Part Number: 19418102
$83.97 MSRP: $176.88You Save: $92.91 (53%)Ships in 1 Business DayProduct Specifications- Other Name: Coil Assembly, Ignition; Ignition Coil; Coil, Ignition Coil
- Replaces: 12629037, 12613057, 12583514

Cadillac Ignition Coil Part Number: 19421260
$85.38 MSRP: $154.54You Save: $69.16 (45%)Ships in 1-3 Business DaysProduct Specifications- Other Name: Coil Assembly, Ignition; Coil, Ignition Coil
- Replaces: 12597745

Cadillac Ignition Coil Part Number: 12498335
$102.86 MSRP: $183.68You Save: $80.82 (44%)Product Specifications- Other Name: Coil, Ignition Coil; Coil
- Replaces: 01985473, 1985473

Cadillac Ignition Coil Part Number: 12712681
$46.02 MSRP: $75.81You Save: $29.79 (40%)Product Specifications- Other Name: Coil, Ignition; Coil, Ignition Coil

Cadillac Ignition Coil Part Number: 55515866
$31.27 MSRP: $51.50You Save: $20.23 (40%)Ships in 1-3 Business DaysProduct Specifications- Other Name: Coil Assembly-Ignition; Coil, Ignition Coil
- Replaced by: 12725605

Cadillac Ignition Coil Part Number: 19418992
$87.14 MSRP: $138.36You Save: $51.22 (38%)Ships in 1-2 Business DaysProduct Specifications- Other Name: Coil, Ignition Coil; Coil Kit, Ignition Coil
- Replaces: 10457730

Cadillac Ignition Coil Part Number: 12498336
$75.70 MSRP: $155.56You Save: $79.86 (52%)Product Specifications- Other Name: Coil, Ignition Coil; Coil
- Replaces: 01985474, 1985474

Cadillac Ignition Coil Part Number: 90584336
$109.52 MSRP: $205.67You Save: $96.15 (47%)Ships in 1-2 Business DaysProduct Specifications- Other Name: Coil, Ignition; Coil; Coil, Ignition Coil
- Replaces: 09118114, 9118114

Cadillac Ignition Coil Part Number: 12708496
$78.58 MSRP: $165.53You Save: $86.95 (53%)Product Specifications- Other Name: Coil Assembly-Ignition; Coil, Ignition Coil
- Replaced by: 12726023

Cadillac Ignition Coil Part Number: 19418995
$41.68 MSRP: $117.44You Save: $75.76 (65%)Ships in 1-2 Business DaysProduct Specifications- Other Name: Coil, Ignition Coil; Coil; Coil Kit, Ignition Coil
- Replaces: 01115468, 01115315, 1115315, 12498334, 1115468
Cadillac Ignition Coil Part Number: 12670154
$57.12 MSRP: $101.99You Save: $44.87 (44%)Product Specifications- Other Name: Coil Assembly-Ignition; Coil, Ignition Coil
- Replaces: 12594176

Cadillac Pole Piece Part Number: 1976925
Product Specifications- Other Name: Pole Piece & Plate, Distributor; Ignition Coil; Pickup Coil; Pole Piece & Plate; Coil
- Replaced by: 19110917


Cadillac Ignition Coil Part Number: 1115317
Product Specifications- Other Name: Coil-Ignition; Coil; Coil, Ignition Coil
Cadillac Ignition Coil Part Number: 12498046
Product Specifications- Other Name: Coil, Ignition Coil; Coil
- Replaces: 1115455, 01115455

Cadillac Ignition Coil Part Number: 12689268
$61.67 MSRP: $96.60You Save: $34.93 (37%)Product Specifications- Other Name: Coil Assembly-Ignition; Coil, Ignition Coil
| Page 1 of 2 |Next >
1-20 of 34 Results
Cadillac Ignition Coil
Choose OEM Ignition Coil, you're making the optimal decision for superior quality and perfect performance. You can feel confident because each component goes through stringent quality checks. Every part is carefully built to comply with Cadillac's factory specifications. You'll enjoy a smooth, worry-free installation that fits just right. At ChevyPartsDeal.com, you'll find it easy to get top-quality OEM Cadillac Ignition Coil. You can shop at highly competitive prices and protect your budget. All our genuine Cadillac parts include a dependable manufacturer's warranty. You'll also appreciate our straightforward return policy and swift delivery services for extra convenience.
Cadillac Ignition Coil takes battery power flying into the energy of sparks and each journey is an active and reliable one. Cadillac thrives on thick lines, plush seats, and dashboards which gleam with user-friendly display screens and loyalists are observed to regularly comment on the Ignition Coil, the stitched leather as well as the polished trim, accentuate a feeling of smooth movement instead of the robotics. In boulevard and highway, Cadillac is a rolling advertisement of the dream, a fusion of centuries-old traditions with the current electric dreams, including house built Celestiq and its glass roof which changes color at the touch of a button. Since silent EV models to hushpuppy V8 legends, Cadillac has maintained comfort, style, and swagger in harmony, persuading the drivers that refinement does not mean they will lack excitement, either commuting to downtown or driving along long interstates. The Ignition Coil in the ignition system transforms the battery mild twelve volts into a scalding burst of over thirty thousand volts which is transmitted through primary and secondary windings and then jumps across the plugs to spark the fuel mix in the compressed air to just the right crankshaft angle. The designs are as old as the classic breaker point housings, all the way down to the modern COP towers that reduce the weight but give cranking voltage with improving thermal stability. Regardless of what kind of layout the engine of a particular driver bears, the Ignition Coil is nevertheless the determining break that converts accumulated chemical energy into rhythmic explosion that keeps pistons moving mile after mile.
Cadillac Ignition Coil Parts and Q&A
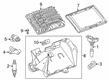
- Q: How to replace the ignition coil for Bank 1 on Cadillac CTS?A:The process of replacing an Ignition Coil for bank 1 begins with Intake Manifold removal. Begin by disconnecting the engine wiring harness electrical connector(s) from the Ignition Coil(s) then remove the Ignition Coil bolt(s) to remove the Ignition Coil(s). Reposition the ignition coils and install their bolt(s) while tightening them to 10 nm (89 lb in). Connect all engine wiring harness electrical connectors to ignition coils before reinstalling the Intake Manifold.
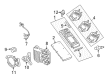
- Q: How to Replace an Ignition Coil Safely and Efficiently on Cadillac Escalade?A:To replace Ignition Coil, begin by removing the sight shield in the intake manifold if necessary. If changing the back two ignition coils of the right side, then follow the next steps; otherwise, jump to the later steps. Always disable the high voltage system prior to any high voltage component or connection working to ensure personal protection equipment (PPE) are on. This procedure involves the process of disabling high voltage, testing for it's presence, and recognizing conditions where high voltage is present all the time. Inability to follow these procedures can yield grave injury or death. Start with service disconnect, after that, disconnect engine wiring harness electrical connector from the drive motor generator power inverter module cover. The drive motor generator power inverter module cover bolt and the cover need to be loosened and removed. Take off also the generator control module 3 phase cable clip nut and the clip from the engine bracket as well as pasturing the cables in a new position. Take off the right wheelhouse liner, drop the vehicle, and remove the engine bracket nut from the Ignition Coil bracket stud to remove the bracket. Remove the Ignition Coil wire harness electrical plug and pull back the boot of the spark plug wire, with twisting it a half turn. Set aside Ignition Coil bolts and remove the Ignition Coil off bracket. Note that two manufacturers manufacture the ignition coils hwnd: the melco (R) Ignition Coil has square shapes while delphi (R) Ignition Coil has round shapes. The melco(R) Ignition Coil bracket and the delphi(R) bracket are square and round respectively. The melco(R) Ignition Coil bracket is square in shape while the delphi(R) Ignition Coil bracket is round in shape. To install, when mounting the Ignition Coil on Ignition Coil bracket, insert the bolts for the ignition coils and tighten them to 10 nm (89 lb in). After that, without starting the engine, reinsulate the spark plug wire to the Ignition Coil by ensuring that it is properly done by pushing sideway to each boot in installation of any boot that is loose. Connect the Ignition Coil wiring horse electrical connector to the Ignition Coil. If it is one of the rear two ignition coils on the right side being replaced next steps are; otherwise, go to the final steps. Mount the engine bracket to the Ignition Coil bracket stud and tighten with nut, put it at 9 nm (80 lb in) of torque. Jack up the vehicle to an intermediate height and screw in the engine bracket bolts and tighten them to 50 nm (37 lb ft). Reinstall the right wheelhouse liner, connect the generator control module 3 phase cables to the bracket channel, and attach the cable clip to the tab on the engine bracket with the clip nut attached and tightened to 9 nm (80 lb in). Reassembly the drive motor generator power inverter module cover and secure the cover bolt 1.5 nm (13 lb in). Connect the engine wiring harness electrical connector to the drive motor generator power inverter module cover and install intake manifold sight shield as required. Finally, perform the service reconnect.


Related Cadillac Parts
 Cadillac Camshaft Position Sensor
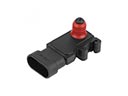 Cadillac MAP Sensor
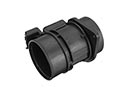 Cadillac Mass Air Flow Sensor
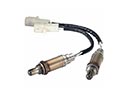 Cadillac Oxygen Sensor
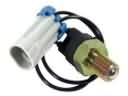 Cadillac Back Up Light Switch
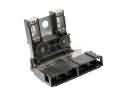 Cadillac Battery Fuse
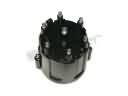 Cadillac Distributor Cap
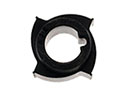 Cadillac Distributor Reluctor
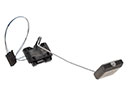 Cadillac Fuel Tank Sending Unit
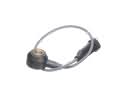 Cadillac Knock Sensor
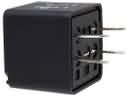 Cadillac Relay
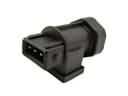 Cadillac Vehicle Speed Sensor