ChevyParts
My Garage
My Account
Cart
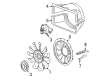
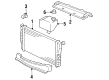
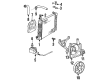
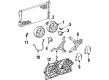
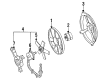
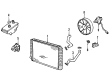
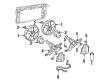
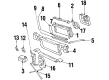
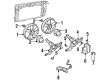
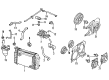
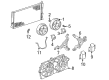
OEM Chevrolet Cooling Fan Bracket
Raidator Fan Bracket- Select Vehicle by Model
- Select Vehicle by VIN
Select Vehicle by Model
orMake
Model
Year
Select Vehicle by VIN
For the most accurate results, select vehicle by your VIN (Vehicle Identification Number).
44 Cooling Fan Brackets found


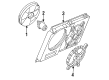
Chevrolet Rear Shroud Bracket, Driver Side Part Number: 15122830
Product Specifications- Other Name: Bracket, Radiator Fan Shroud
- Position: Driver Side


Chevrolet Rear Shroud Bracket, Passenger Side Part Number: 15122831
Product Specifications- Other Name: Bracket, Radiator Fan Shroud
- Position: Passenger Side

Chevrolet Mount Bracket Part Number: 14076063
Product Specifications- Other Name: Bracket, Engine Air Cooling (Electrical)

Chevrolet Lower Mount Part Number: 10055083
Product Specifications- Other Name: Bracket, Engine Air Cooling (Electrical); Bracket, Engine Air Cooling(Electrical)
- Position: Lower


Chevrolet Mount Bracket Part Number: 22114637
Product Specifications- Other Name: Bracket Kit, Engine Air Cooling (Electrical)

Chevrolet Mount Bracket Part Number: 22075312
Product Specifications- Other Name: Bracket Kit, Engine Air Cooling (Electrical); Cooling Fan Bracket


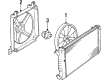
Chevrolet Fan Blade Part Number: 22073435
Product Specifications- Other Name: Bracket Kit, Engine Air Cooling (Electrical); Radiator Fan Assembly

Chevrolet Mount Bracket, Driver Side Part Number: 12363322
Product Specifications- Other Name: Bracket Kit, Engine Air Cooling (Electrical); Cooling Fan Bracket; Bracket Kit, Engine Air Cooling(Electrical)
- Position: Driver Side

Chevrolet Motor Bracket Part Number: 14089160
Product Specifications- Other Name: Bracket Kit, Engine Air Cooling (Electrical); Bracket Kit, Engine Air Cooling(Electrical)

Chevrolet Mount Bracket Part Number: 22075437
Product Specifications- Other Name: Bracket Kit, Engine Air Cooling (Electrical); Cooling Fan Bracket

Chevrolet Fan Bracket Assembly Part Number: 22091878
Product Specifications- Other Name: Bracket Kit, Engine Air Cooling (Electrical); Bracket Kit, Engine Air Cooling(Electrical)

Chevrolet Mount Bracket, Driver Side Part Number: 22136410
Product Specifications- Other Name: Bracket, Engine Air Cooling (Electrical); Cooling Fan Bracket
- Position: Driver Side

Chevrolet Fan Bracket Part Number: 22054241
Product Specifications- Other Name: Bracket Kit, Engine Air Cooling (Electrical)
Chevrolet Mount Bracket, Driver Side Part Number: 22136411
Product Specifications- Other Name: Bracket Kit, Engine Air Cooling (Electrical); Cooling Fan Bracket
- Position: Driver Side
Chevrolet Shroud Bracket Part Number: 22074984
Product Specifications- Other Name: Bracket Kit, Engine Air Cooling (Electrical); Bracket Kit, Engine Air Cooling(Electrical)
Chevrolet Mount Bracket Part Number: 22120124
Product Specifications- Other Name: Bracket Kit, Engine Air Cooling (Electrical); Cooling Fan Bracket

Chevrolet Fan Motor Bracket Part Number: 22125219
Product Specifications- Other Name: Bracket, Engine Air Cooling (Electrical); Cooling Fan Bracket; Bracket; Bracket, Engine Air Cooling(Electrical)
Chevrolet Mount Bracket, Passenger Side Part Number: 12362576
Product Specifications- Other Name: Bracket Kit, Engine Air Cooling (Electrical); Cooling Fan Bracket; Fan Shroud
- Position: Passenger Side
Chevrolet Shroud Part Number: 22137225
Product Specifications- Other Name: Bracket, Engine Air Cooling (Electrical); Fan Shroud; Bracket, Engine Air Cooling(Electrical)

Chevrolet Mount Bracket, Driver Side Part Number: 22137623
Product Specifications- Other Name: Bracket Kit, Engine Air Cooling (Electrical); Cooling Fan Bracket; Fan Shroud
- Position: Driver Side
| Page 1 of 3 |Next >
1-20 of 44 Results
Chevrolet Cooling Fan Bracket
Choose OEM Cooling Fan Bracket, you're making the optimal decision for superior quality and perfect performance. You can feel confident because each component goes through stringent quality checks. Every part is carefully built to comply with Chevrolet's factory specifications. You'll enjoy a smooth, worry-free installation that fits just right. At ChevyPartsDeal.com, you'll find it easy to get top-quality OEM Chevrolet Cooling Fan Bracket. You can shop at highly competitive prices and protect your budget. All our genuine Chevrolet parts include a dependable manufacturer's warranty. You'll also appreciate our straightforward return policy and swift delivery services for extra convenience.
The Chevrolet Cooling Fan Bracket ensures that the engine fan remains in place so that your car is kept cool even in a long driving trip during summer. The company has a reputation of cars that are both practical and head turning pretty, and its current product range demonstrates that Chevrolet will never cease to innovate. Powerful but fuel-efficient engines will provide you with the acceleration to pull out, and option Super Cruise allows many new models to drive, brake and accelerate without using their hands on compatible highways. On the inside, it has an intuitive touch screens, comfy seats and hard crash safety that create a Chevy that seems like a smart and safe partner today, whether you are going to school or work or an adventure across the country. Cooling Fan Bracket is another small, yet an important mount in this stable arrangement that supports the radiator fan, fixes it against vibration, and directs the flow of air to directly enter the engine core. You can change it yourself in an afternoon. This is done by first parking the Chevy, then switching off the ignition, disconnection of battery and allowing the engine to cool. Loosen and unbolt the damaged bracket then remove the plastic shroud over the radiator. Pull it out and be sure not to snag any wires or hoses. Insert the new bracket into the frame, align the holes, manually connect the bolts and screw them till they fit evenly with a wrench. Install the shroud back in, reconnect the clips and battery, get the motor going and listen to a smooth and rattle free fan.
Related Chevrolet Parts
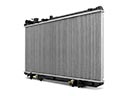 Chevrolet Radiator
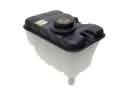 Chevrolet Coolant Reservoir
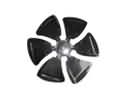 Chevrolet Fan Blade
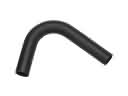 Chevrolet Radiator Hose
 Chevrolet Water Pump Gasket
 Chevrolet Automatic Transmission Oil Cooler Line
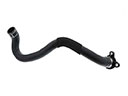 Chevrolet Coolant Pipe
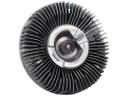 Chevrolet Cooling Fan Clutch
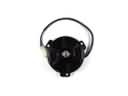 Chevrolet Fan Motor
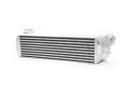 Chevrolet Intercooler
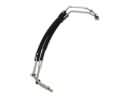 Chevrolet Oil Cooler Hose
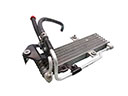 Chevrolet Transmission Oil Cooler