ChevyParts
My Garage
My Account
Cart
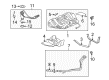
OEM Chevrolet Cobalt Fuel Rail
Engine Fuel Rail- Select Vehicle by Model
- Select Vehicle by VIN
Select Vehicle by Model
orMake
Model
Year
Select Vehicle by VIN
For the most accurate results, select vehicle by your VIN (Vehicle Identification Number).
4 Fuel Rails found


Chevrolet Cobalt Fuel Rail, Green Line Part Number: 12602482
$167.94 MSRP: $349.62You Save: $181.68 (52%)Ships in 1-2 Business Days


Chevrolet Cobalt Fuel Rail Part Number: 12593231
$142.55 MSRP: $267.70You Save: $125.15 (47%)Ships in 1-2 Business Days
Chevrolet Cobalt Fuel Rail Part Number: 12615400
$410.92 MSRP: $771.68You Save: $360.76 (47%)

Chevrolet Cobalt Fuel Rail Part Number: 12591233
Chevrolet Cobalt Fuel Rail
Want to cut long-term maintenance and repair costs? Choose OEM Fuel Rail. Those parts deliver top durability you can trust. On our site, you'll find a huge catalog of genuine Chevrolet Cobalt parts. Prices are unbeatable, so you can keep more in your pocket. Every OEM Chevrolet Cobalt Fuel Rail includes a manufacturer's warranty. You can also get an easy return policy that keeps buying risk free. Fast delivery, get your car on the road quickly. It's simple to search, compare, and order. Stop guessing about quality or fit. Order today and save with parts that last.
Chevrolet Cobalt Fuel Rail Parts and Q&A
- Q: How to replace the fuel rail assembly on Chevrolet Cobalt?A:The first step before replacing the Fuel Rail assembly should be to drain the fuel system pressure. Start by unclipping the outlet duct of the air cleaner before you unfasten the fuel feed line quick connect fitting from the Fuel Rail then cover or plugging all fuel line openings to block possible contamination. You should disconnect the engine harness electrical connector from the Fuel Injector harness before unlocking the connector clip from the Intake Manifold. Detach the fuel rails by pulling it upwards and backwards while removing all Fuel Rail bolts until the fuel injectors step free from the cylinder head ports with caution towards electrical connector terminals and spray tips. When removing the Fuel Rail it is sometimes necessary to also extract the fuel injectors. New lower o-rings must be used on recycled fuel injectors before installing them into the cylinder head ports using downward orientation. The injector tip o-rings should receive lubrication before the installation process. Using a gentle hand, put the fuel injectors into each port while installing the Fuel Rail bolts with torque at 10 n.m (89 lb in). Reinstall the engine harness electrical connector onto the Fuel Injector harness while fitting the Fuel Injector harness connector clip onto the Intake Manifold. Remove the caps from the fuel line and Fuel Rail before joining the fuel feed line quick connect fitting with the Fuel Rail. Turn on the ignition while keeping the engine off for 2 seconds then switch it off for 10 seconds and repeat the check as a leak detection test. Do this while connecting the negative Battery Cable. Put back the air cleaner outlet duct as the last step.

Related Chevrolet Cobalt Parts
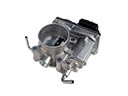 Chevrolet Cobalt Throttle Body
 Chevrolet Cobalt Air Filter
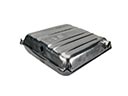 Chevrolet Cobalt Fuel Tank
 Chevrolet Cobalt Intake Manifold
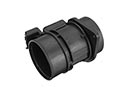 Chevrolet Cobalt Mass Air Flow Sensor
 Chevrolet Cobalt Daytime Running Light Relay
 Chevrolet Cobalt Fuel Injector
 Chevrolet Cobalt Fuel Injector O-Ring
 Chevrolet Cobalt Fuel Pump Gasket
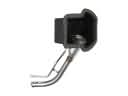 Chevrolet Cobalt Fuel Tank Filler Neck
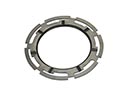 Chevrolet Cobalt Fuel Tank Lock Ring
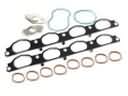 Chevrolet Cobalt Intake Manifold Gasket