ChevyParts
My Garage
My Account
Cart
OEM Cadillac Escalade EXT CV Joint
CV Joint Axle- Select Vehicle by Model
- Select Vehicle by VIN
Select Vehicle by Model
orMake
Model
Year
Select Vehicle by VIN
For the most accurate results, select vehicle by your VIN (Vehicle Identification Number).
5 CV Joints found

Cadillac Escalade EXT Inner CV Joint, Front Part Number: 84814583
$76.12 MSRP: $125.40You Save: $49.28 (40%)Ships in 1-3 Business Days

Cadillac Escalade EXT C.V. Joint, Front Part Number: 22928970
$133.87 MSRP: $220.54You Save: $86.67 (40%)Ships in 1-2 Business Days
Cadillac Escalade EXT Inner CV Joint, Front Part Number: 26062617
Cadillac Escalade EXT C.V. Joint, Front Part Number: 26058362

Cadillac Escalade EXT Inner CV Joint, Front Part Number: 15295246
Cadillac Escalade EXT CV Joint
Want to cut long-term maintenance and repair costs? Choose OEM CV Joint. Those parts deliver top durability you can trust. On our site, you'll find a huge catalog of genuine Cadillac Escalade EXT parts. Prices are unbeatable, so you can keep more in your pocket. Every OEM Cadillac Escalade EXT CV Joint includes a manufacturer's warranty. You can also get an easy return policy that keeps buying risk free. Fast delivery, get your car on the road quickly. It's simple to search, compare, and order. Stop guessing about quality or fit. Order today and save with parts that last.
Cadillac Escalade EXT CV Joint Parts and Q&A
- Q: How to Service and Repair the CV Joint Boot on Cadillac Escalade EXT?A:In order to service and repair the constant velocity joint boot, start by collecting the required tools: snap ring pliers (J 8059), drive axle seal clam pliers (J 35910), drive axle clamp swage tool (J 36652-1), and axle swage tool (J 36652-2). There is reason to be careful with the wheel drive shaft, it can be cut with a help of a hand grinder cutting through a swage ring and the side cutters will take the small boot clamp away. Slide the boot down halfshaft bar, and clean the CV Joint face. Find and open the snap ring ears using the snap ring pliers, pull CV Joint and boot out of the halfshaft bar, eliminating the old boot. Use a brass drift to slide the CV Joint cage to one side and pull out all the (6) chrome alloy balls. Clean the inner/exterior race assemblies, the CV Joint cage and the chrome alloy balls, confirming their wear or damage. Grease the inner and outer race groves, align and place the inner race in the cage, while the cage is placed in the outer race. Mount the chrome alloy balls, and pack the CV Joint boot and assembly with grease, mounting the small boot clamp using the drive axle seal clamp pliers and tightening up to 136 n.m (100 lb ft). Put the new swage ring on and slide it down the boot in such a way that retaining ring side of the CV Joint inner race faces the halfshaft bar before sliding the CV Joint on the halfshaft bar. Clamp the cvj boot to the external cvj race tightly by using the drive axle clamp swage tool (or Axle Swage Tool) and align, then bind the bolts alternately until it is locked. Finally, replace the wheel drive shaft.
- Q: What Tools Are Required to Replace the Front Wheel Drive Shaft Inner CV Joint and Seal on Cadillac Escalade EXT?A:The task of replacing wheel drive shaft inner joint and seal demands three specific waco tools: j 35910 seal clamp tool (J 35910) along with j 36652 drive axle clamp swage tool (J 36652) followed by j 36652-98 axle swage tool (J 36652-98). First cut the swage ring with a hand grinder to take out the tripot housing from the halfshaft and wash away all contaminants before allowing it to dry. The process begins with removing the small boot retaining clamp using side cutters followed by extraction of the spacer ring together with tripot spider assembly and tripot boot from the halfshaft bar. A wire brush removes rust from the halfshaft bar enabling an inspection for damage to needle rollers and needle bearings as well as trunnion components. Replace all damaged parts with the recommended service kits. To ensemble the system place the new small seal clamp onto the joint seal then compress it onto the halfshaft bar with the j 35910 tool which must be tightened to 136 nm (100 ft. Lbs.). Position the correct number of convolutions on the convolute retainer tool over the inboard joint seal according to the model specifications. Fitting the tripot spider assembly to the spacer ring requires packing the tripot seal and housing with supplied grease before assembling the tripot housing with its seal. Use the j 36652-01 base in a vise for the 1500 models (not including 1500 HD) except the 1500 hd, 2500, 3500, hummer h2 models should use the j 36652-98. Insert the inboard halfshaft assembly end into the selected base then place the top tool section into position before aligning the swage ring and clamp and tightening the bolts by hand. Following alignment of the tripot boot and housing along with the swage ring the bolts should be tightened in a weaved pattern to ensure the tool makes full contact. The team should examine the inboard stroke placement using specified dimensions for all models before removing the convolute retainer device from the boot.


Related Cadillac Escalade EXT Parts
 Cadillac Escalade EXT 4WD Actuator
 Cadillac Escalade EXT Axle Shaft
 Cadillac Escalade EXT CV Boot
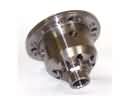 Cadillac Escalade EXT Differential
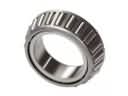 Cadillac Escalade EXT Differential Bearing
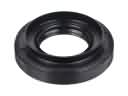 Cadillac Escalade EXT Differential Seal
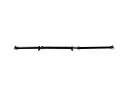 Cadillac Escalade EXT Drive Shaft
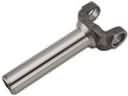 Cadillac Escalade EXT Driveshaft Yokes
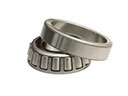 Cadillac Escalade EXT Pinion Bearing
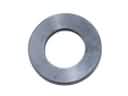 Cadillac Escalade EXT Pinion Washer
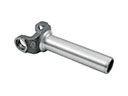 Cadillac Escalade EXT Slip Yoke
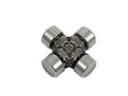 Cadillac Escalade EXT Universal Joint