ChevyParts
My Garage
My Account
Cart
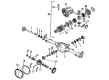
OEM Oldsmobile Differential Cover
- Select Vehicle by Model
- Select Vehicle by VIN
Select Vehicle by Model
orMake
Model
Year
Select Vehicle by VIN
For the most accurate results, select vehicle by your VIN (Vehicle Identification Number).
2 Differential Covers found


Oldsmobile Differential Cover, Rear Part Number: 26067595
Product Specifications- Other Name: Cover, Rear Axle Housing; Axle Cover; Housing Cover; Cover
- Position: Rear
- Replaces: 26008172


Oldsmobile Axle Cover, Rear Part Number: 12471370
Product Specifications- Other Name: Cover, Rear Axle Housing; Rear Cover; Axle Housing Rear Cover; Cover
- Position: Rear
- Replaces: 26045427, 26045428
Oldsmobile Differential Cover
Choose OEM Differential Cover, you're making the optimal decision for superior quality and perfect performance. You can feel confident because each component goes through stringent quality checks. Every part is carefully built to comply with Oldsmobile's factory specifications. You'll enjoy a smooth, worry-free installation that fits just right. At ChevyPartsDeal.com, you'll find it easy to get top-quality OEM Oldsmobile Differential Cover. You can shop at highly competitive prices and protect your budget. All our genuine Oldsmobile parts include a dependable manufacturer's warranty. You'll also appreciate our straightforward return policy and swift delivery services for extra convenience.
The Oldsmobile Differential Cover keeps the axle gears intact and keeps the oil untouched making the driver have a long term confidence. Born in 1897, Oldsmobile was commended because it constructed comfortable and reliable cars within the reach of normal families. The Curved Dash prototype demonstrated that a moving assembly line could reduce the price, and later versions came with the Hydra-Matic automatic transmission which made drivers shift without using the clutch. In the 1950s and 1960s the marque combined Rocket V8 engine with slick bodies and hushed cabins and demonstrated that innovation would go quick and be classy. In decades, Oldsmobile perfected engines, paid attention to safety, and made road trips comfortable and safe, and these principles can be reflected in the robust Differential Cover that contributes to the enhanced coolness and the solidity around the ring and pinion gears. The bolt on shield at the back of the axle is called a Differential Cover, the primary purpose of the Differential Cover is to seal the gear oil and to protect the various parts of the differential against debris. Installing Oldsmobile Differential Cover begins with parking on a flat surface, ensuring that the brake is put in place, and axle stands are put in place. Empty the gear oil, then wipe off the old cover and scrape up the gasket. Wipe off the housing, apply a new gasket or bead of RTV and attach the replacement cover by holding it in place and finger tightening the bolts. Install flange work in crisscross pattern to final torque, refitting plugs, refill with proper oil, wiping area, make a short drive, checking and retorque in case of any seep.
Related Oldsmobile Parts
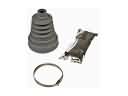 Oldsmobile CV Boot
 Oldsmobile CV Joint
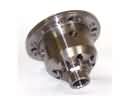 Oldsmobile Differential
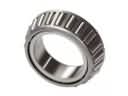 Oldsmobile Differential Bearing
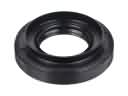 Oldsmobile Differential Seal
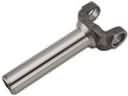 Oldsmobile Driveshaft Yokes
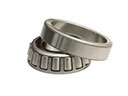 Oldsmobile Pinion Bearing
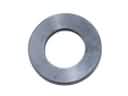 Oldsmobile Pinion Washer
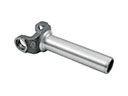 Oldsmobile Slip Yoke
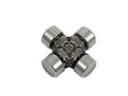 Oldsmobile Universal Joint