ChevyParts
My Garage
My Account
Cart
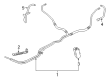
OEM GMC Transmission Oil Cooler Hose
- Select Vehicle by Model
- Select Vehicle by VIN
Select Vehicle by Model
orMake
Model
Year
Select Vehicle by VIN
For the most accurate results, select vehicle by your VIN (Vehicle Identification Number).
104 Transmission Oil Cooler Hoses found


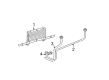
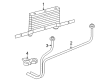
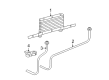
GMC Inlet Pipe, Upper Part Number: 15809053
$39.94 MSRP: $69.68You Save: $29.74 (43%)Ships in 1-2 Business DaysProduct Specifications- Other Name: Pipe, Transmission Fluid Cooler Upper; Outlet Pipe; Pipe, Transmission Oil Cooler
- Position: Upper
- Replaces: 15052885, 15710122, 15190203


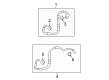
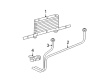
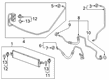
GMC Outlet Hose Part Number: 25880046
$63.52 MSRP: $110.84You Save: $47.32 (43%)Ships in 1 Business DayProduct Specifications- Other Name: Hose Assembly-Transmission Fluid Cooler Outlet; Hose, Transmission Oil Cooler
- Replaces: 25790140


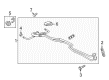
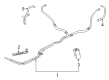
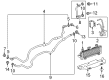
GMC Cooler Line Part Number: 84075818
$65.72 MSRP: $114.68You Save: $48.96 (43%)Product Specifications- Other Name: Pipe, Transmission Oil Cooler; Transmission Oil Cooler Line; Line
- Replaces: 23398276, 23232593, 84013521


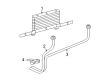
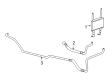
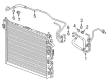
GMC Inlet Pipe, Upper Part Number: 20835125
$73.62 MSRP: $128.48You Save: $54.86 (43%)Ships in 1-3 Business DaysProduct Specifications- Other Name: Pipe Assembly-Transmission Fluid Cooler Upper; Outlet Pipe; Pipe, Transmission Oil Cooler
- Position: Upper
- Replaces: 21998956, 20759971


GMC Inlet Hose Part Number: 25880047
$78.84 MSRP: $137.58You Save: $58.74 (43%)Ships in 1-2 Business DaysProduct Specifications- Other Name: Hose Assembly-Transmission Fluid Cooler Inlet; Hose, Transmission Oil Cooler
- Replaces: 25796190


GMC Outlet Pipe Part Number: 25999419
$104.42 MSRP: $182.21You Save: $77.79 (43%)Ships in 1-3 Business DaysProduct Specifications- Other Name: Pipe Assembly-Transmission Fluid Cooler; Pipe, Transmission Oil Cooler
- Replaces: 15908473


GMC Inlet Pipe Part Number: 25999418
$111.91 MSRP: $195.31You Save: $83.40 (43%)Ships in 1-2 Business DaysProduct Specifications- Other Name: Pipe Assembly-Transmission Fluid Cooler; Pipe, Transmission Oil Cooler
- Replaces: 25941147


GMC Tube Assembly Part Number: 23370658
$113.66 MSRP: $198.34You Save: $84.68 (43%)Product Specifications- Other Name: Pipe, Transmission Oil Cooler; Transmission Oil Cooler Line
- Replaces: 23234834, 23292386, 23228721, 23208673


GMC Inlet Pipe Part Number: 25999420
$115.04 MSRP: $200.73You Save: $85.69 (43%)Ships in 1-2 Business DaysProduct Specifications- Other Name: Pipe Assembly-Transmission Fluid Cooler; Pipe, Transmission Oil Cooler
- Replaces: 15908472, 25947969

GMC Tube Assembly Part Number: 84036743
$161.00 MSRP: $280.99You Save: $119.99 (43%)Product Specifications- Other Name: Pipe, Transmission Oil Cooler; Transmission Oil Cooler Line
- Replaced by: 85043951


GMC Outlet Pipe Part Number: 20985357
$79.03 MSRP: $134.54You Save: $55.51 (42%)Ships in 1-2 Business DaysProduct Specifications- Other Name: Pipe Assembly-Transmission Fluid Cooler; Pipe, Transmission Oil Cooler
- Replaces: 20916869


GMC Inlet Pipe, Upper Part Number: 25999416
$28.66 MSRP: $47.21You Save: $18.55 (40%)Ships in 1-2 Business DaysProduct Specifications- Other Name: Pipe Assembly-Transmission Fluid Cooler Upper
- Position: Upper
- Replaces: 15779545, 25947967


GMC Outlet Pipe, Upper Part Number: 25999415
$36.00 MSRP: $59.30You Save: $23.30 (40%)Ships in 1 Business DayProduct Specifications- Other Name: Pipe Assembly-Transmission Fluid Cooler Upper; Pipe, Transmission Oil Cooler
- Position: Upper
- Replaces: 25808930


 Product Specifications
- Other Name: Pipe, Transmission Oil Cooler; Transmission Oil Cooler Line


GMC Oil Cooler Pipe Part Number: 23100571
$8.31 MSRP: $13.19You Save: $4.88 (37%)Ships in 1-3 Business DaysProduct Specifications- Other Name: Pipe Assembly-Transmission Fluid Cooler Inlet; Line; Pipe, Transmission Oil Cooler

GMC Inlet Pipe Part Number: 84190270
$35.98 MSRP: $88.98You Save: $53.00 (60%)Ships in 1-2 Business DaysProduct Specifications- Other Name: Pipe Assembly-Transmission Fluid Cooler Inlet; Pipe, Transmission Oil Cooler
- Replaces: 84042576

GMC Hose & Tube Assembly Part Number: 84354534
$42.11 MSRP: $104.04You Save: $61.93 (60%)Ships in 1-2 Business DaysProduct Specifications- Other Name: Pipe, Transmission Oil Cooler; Line
- Replaces: 85631092, 84544496, 85029325, 84304600, 84148282

GMC Cooler Pipe Part Number: 24289109
$42.61 MSRP: $105.26You Save: $62.65 (60%)Product Specifications- Other Name: Pipe, Transmission Oil Cooler; Transmission Oil Cooler Line; Line
- Replaced by: 85075442


GMC Inlet Pipe Part Number: 23336282
$49.02 MSRP: $121.15You Save: $72.13 (60%)Ships in 1-2 Business DaysProduct Specifications- Other Name: Pipe Assembly-Transmission Fluid Cooler Inlet; Pipe, Transmission Oil Cooler
- Replaces: 22795970


GMC Tube Assembly Part Number: 23370657
$77.08 MSRP: $120.73You Save: $43.65 (37%)Product Specifications- Other Name: Pipe, Transmission Oil Cooler; Transmission Oil Cooler Line
- Replaces: 23141324, 23228719, 23115735, 23292385, 23234833, 84886682
| Page 1 of 6 |Next >
1-20 of 104 Results
GMC Transmission Oil Cooler Hose
Choose OEM Transmission Oil Cooler Hose, you're making the optimal decision for superior quality and perfect performance. You can feel confident because each component goes through stringent quality checks. Every part is carefully built to comply with GMC's factory specifications. You'll enjoy a smooth, worry-free installation that fits just right. At ChevyPartsDeal.com, you'll find it easy to get top-quality OEM GMC Transmission Oil Cooler Hose. You can shop at highly competitive prices and protect your budget. All our genuine GMC parts include a dependable manufacturer's warranty. You'll also appreciate our straightforward return policy and swift delivery services for extra convenience.
GMC Transmission Oil Cooler Hose maintains the temperatures of the gearbox to ensure that the power is not ruptured by the long trips. GMC was born out of a company that was founded in 1901 and it builds rigs that have to carry heavy loads. Frames, muscles, bed tricks such as the MultiPro tailgate display an attitude of work-first which does not subscribe to fluff. The brawn is offset by quiet interiors that allow commuters to replace highway noise with a peaceful discussion. Active devices like surround vision and hitch guidance ensure that the driver is alert when trailers are swinging and the parking areas are congested. Constant torture on punishing tracks ensures every truck goes away with its million miles worth of heavy loads instead of posing in the showrooms. This is the reason why GMC maintains high loyalty among crews who make a nick on the wheels. Steel underpinnings shake the potholes away and adaptive dampers smooth the ride up on long interstate routes. Cabin tech maintains a fast pace in updating; hence drivers enjoy clear graphics and Bluetooth connections which simply work. The Transmission Oil Cooler Hose diverts hot fluid off the transmission, forces it through the cooler and into a rush to the chilled fluid in order to prevent clutch glaze and gear slip on towing. Constructed using rugged walls that shake off vibration and road dirt, the Transmission Oil Cooler Hose is imbued to cracks, thus ensuring fluid flow remains the same even when the odometer is climbing. The fittings are designed to be installed quickly using hand tools and this reduces the time spent when swaps are eventually required. It prevents general transmission life by locking temperatures in the sweet spot and maintains shifting crunchy over loaded hills.
GMC Transmission Oil Cooler Hose Parts and Q&A
- Q: How to replace the Transmission Oil Cooler Hose on GMC Yukon?A:The first step for replacing the transmission fluid cooler hose/pipe requires front bumper fascia removal. Take out the fasteners from the front upper fascia support bracket to enable its backward tipping motion. Removal of the transmission fluid cooler hose must occur first from connecting to both the auxiliary Oil Cooler and Radiator. The first step includes raising the vehicle then removing the engine protection shield from its position. After disconnecting transmission cooling lines workers should remove right differential carrier mounting nuts together with washers by hand due to necessary proper bolt torques for accurate diagnosis. The right front shock rear mounting bolt at the lower Control Arm must be removed first before moving the oil-cooling lines toward the rear of the vehicle. The first step for installation requires fitting the transmission Oil Cooler lines to the vehicle without using air-powered tools. Tighten the right shock rear mounting bolt of the lower Control Arm to 50n.m (37 lb ft) before moving on to tighten the right differential carrier mounting nuts and washers to 100n.m (75 lb ft). You must first lower the automobile before connecting the transmission fluid cooler line to both the Radiator and the auxiliary Oil Cooler while reinstalling the engine protection shield. The last step involves reinstallation of the front upper fascia support bracket together with the front bumper fascia.
- Q: How to Change the Transmission Oil Cooler Hose on GMC Sierra 1500?A:The first step to replace the transmission fluid cooler hose/pipe begins with removing the front grill assembly. The transmission fluid cooler hose needs to be removed from both the auxiliary Oil Cooler and the Radiator during the first step. The first step requires vehicle elevation and subsequent removal of the transmission cooling line bracket retaining bolt followed by draining all transmission and oil cooling lines from the vehicle. During installation you should connect the transmission Oil Cooler lines first to the vehicle before connecting them to the transmission while also fastening and tightening the transmission cooler line bracket bolt to 22 nm (16 lb ft). The installation requires you to lower the vehicle while attaching both the transmission fluid cooler hose to the Radiator and auxiliary Oil Cooler. The last installation step involves solving the front grill assembly.


Related GMC Parts
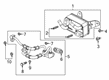
 GMC Automatic Transmission Oil Cooler Line
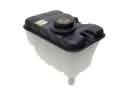 GMC Coolant Reservoir
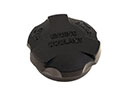 GMC Coolant Reservoir Cap
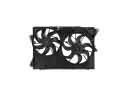 GMC Cooling Fan Assembly
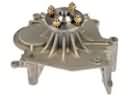 GMC Cooling Fan Bracket
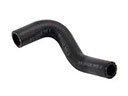 GMC Cooling Hose
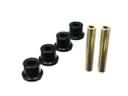 GMC Crossmember Bushing
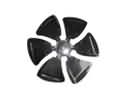 GMC Fan Blade
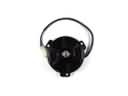 GMC Fan Motor
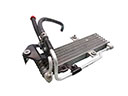 GMC Transmission Oil Cooler
 GMC Water Pump Gasket
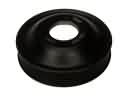 GMC Water Pump Pulley