ChevyParts
My Garage
My Account
Cart
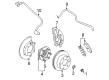
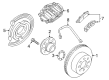
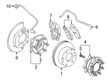
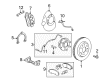
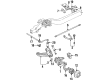
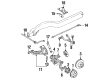
OEM GMC Savana 2500 Brake Calipers
Caliper- Select Vehicle by Model
- Select Vehicle by VIN
Select Vehicle by Model
orMake
Model
Year
Select Vehicle by VIN
For the most accurate results, select vehicle by your VIN (Vehicle Identification Number).
20 Brake Calipers found


GMC Savana 2500 Caliper Part Number: 19331021
$170.23 MSRP: $328.77You Save: $158.54 (49%)Ships in 1-2 Business Days
GMC Savana 2500 Caliper Part Number: 19331022
$171.88 MSRP: $331.97You Save: $160.09 (49%)
GMC Savana 2500 Caliper, Rear Driver Side Part Number: 84755503
$100.82 MSRP: $200.55You Save: $99.73 (50%)GMC Savana 2500 Caliper, Rear Passenger Side Part Number: 84046263
$100.82 MSRP: $200.56You Save: $99.74 (50%)Ships in 1-2 Business Days
GMC Savana 2500 Caliper, Driver Side Part Number: 18040100
$171.88 MSRP: $331.97You Save: $160.09 (49%)Ships in 1-2 Business DaysGMC Savana 2500 Caliper, Passenger Side Part Number: 85605662
$86.68 MSRP: $172.42You Save: $85.74 (50%)Ships in 1-2 Business Days
GMC Savana 2500 Caliper, Driver Side Part Number: 87834254
$193.95 MSRP: $385.84You Save: $191.89 (50%)Ships in 1-2 Business DaysGMC Savana 2500 Caliper, Driver Side Part Number: 85605661
$93.41 MSRP: $169.06You Save: $75.65 (45%)Ships in 1-2 Business DaysGMC Savana 2500 Caliper, Passenger Side Part Number: 87834253
$193.95 MSRP: $385.84You Save: $191.89 (50%)GMC Savana 2500 Caliper, Rear Passenger Side Part Number: 84755504
$100.82 MSRP: $200.56You Save: $99.74 (50%)Ships in 1-3 Business Days
GMC Savana 2500 Caliper, Passenger Side Part Number: 85569602
$97.62 MSRP: $192.52You Save: $94.90 (50%)Ships in 1-2 Business Days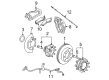
GMC Savana 2500 Caliper, Passenger Side Part Number: 84803425
$141.11 MSRP: $263.41You Save: $122.30 (47%)Ships in 1-2 Business DaysGMC Savana 2500 Caliper, Driver Side Part Number: 85569601
$73.14 MSRP: $143.80You Save: $70.66 (50%)Ships in 1-2 Business DaysGMC Savana 2500 Caliper, Front Driver Side Part Number: 84394384
$121.79 MSRP: $218.46You Save: $96.67 (45%)


GMC Savana 2500 Caliper Part Number: 15751173
GMC Savana 2500 Caliper Part Number: 15751174

GMC Savana 2500 Caliper, Front Part Number: 18014745
GMC Savana 2500 Caliper, Front Part Number: 18014744
GMC Savana 2500 Caliper, Front Driver Side Part Number: 18014747
GMC Savana 2500 Caliper, Front Passenger Side Part Number: 18014748
GMC Savana 2500 Brake Calipers
Want to cut long-term maintenance and repair costs? Choose OEM Brake Calipers. Those parts deliver top durability you can trust. On our site, you'll find a huge catalog of genuine GMC Savana 2500 parts. Prices are unbeatable, so you can keep more in your pocket. Every OEM GMC Savana 2500 Brake Calipers includes a manufacturer's warranty. You can also get an easy return policy that keeps buying risk free. Fast delivery, get your car on the road quickly. It's simple to search, compare, and order. Stop guessing about quality or fit. Order today and save with parts that last.
GMC Savana 2500 Brake Calipers Parts and Q&A
- Q: How to replace the rear brake calipers on GMC Savana 2500?A:Before beginning replacement of the rear brake caliper inspect the brake master cylinder reservoir for its fluid level. Drain fluid from the reservoir if its level exceeds the midway point between maximum and minimum marks. Lift your vehicle safely. Take the tire and wheel system out to work on the brakes. Press the caliper pistons back with a c-clamp placed over the top of the housing while squeezing the clamped end against the back of the outboard pads. Tighten the c-clamp until the pistons fully move towards the rear. Use compressed air to clean the brake hose and protect fluid from leaking out when you install a rubber seal. Untighten and remove the brake hose to caliper bolt while abandoning the two copper brake hose gaskets. First remove the brake caliper guide pin bolts before taking the brake caliper off the vehicle. Inspect the caliper assembly. Install Brake Pads by putting a c-clamp to hold brake pistons in position at the bottom of the caliper bores while protecting them with old pads, metal plate, or wood. Hold up the inner side of the caliper boot with a small flat tool to let air escape below the piston level. Position the brake caliper on its mounting bracket and apply brake cleaner to threads of guide pin bolts before installing threadlocker gm p/n 12345493 onto the bolts for installation. Secure the guide pin bolts into their positions at 34 n.m (25 lb ft) for the 15 series and 72 n.m (53 lb ft) for the 25/35 series. Insert 2 new copper brake hose gaskets into the brake fitting and then connect the brake hose by tightening its bolt to 40 n.m (30 lb ft). Squeeze the brake to remove air from the lines then attach the tire assembly with wheel. Drop the vehicle below ground level and refill the master brake reservoir through its top opening.
- Q: How to service and repair rear brake calipers (15 Series) on GMC Savana 2500?A:To work on the rear brake caliper for 15 series vehicles start by taking out the component but keep fingers away from the Piston during compressed air use. Insert a thin wooden tool between the fitting port and Piston to shield the Piston during compressed air assists in brake hose removal. Remove both Piston boot and Piston seal before removing the brake caliper bleed screw and its cap. Examine the brake caliperbores and related seal groove for defects sent by wear and rust then replace the housing when serious problems exist. Look for damaged surfaces on the brake caliper mounting bracket. Replace it when needed. Disassemble the brake system parts. Clean all surfaces with denatured alcohol and dry them with filtered non-lubricated compressed air. Make sure all passages within the brake caliper and bleeder valve operate smoothly. After installation secure the brake caliper bleed screw to 12 nm (106 inch lbs.) then put on the bleed screw cap. Apply brake fluid to the new Piston seal and brake caliper bore seal groove before installation without twisting the seal during the process. Use brake fluid on the brake caliper bore and Piston before placing the boot on and making sure the fold points toward the Piston opening. Push the cylinder down through its bore groove until it reaches the bottom and keep the boot firmly positioned within the slot. Place the brake caliper unit in its proper position on the vehicle.


Related GMC Savana 2500 Parts
 GMC Savana 2500 ABS Sensor
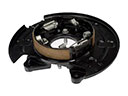 GMC Savana 2500 Brake Backing Plate
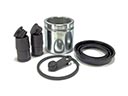 GMC Savana 2500 Brake Caliper Repair Kit
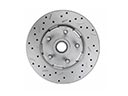 GMC Savana 2500 Brake Disc
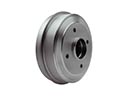 GMC Savana 2500 Brake Drum
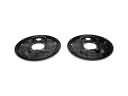 GMC Savana 2500 Brake Dust Shields
 GMC Savana 2500 Brake Pad
 GMC Savana 2500 Hydraulic Hose
 GMC Savana 2500 Spindle Nut
 GMC Savana 2500 Wheel Bearing Dust Cap
 GMC Savana 2500 Wheel Hub Bolt
 GMC Savana 2500 Wheel Speed Sensor