ChevyParts
My Garage
My Account
Cart
OEM GMC Distributor
Ignition Distributor- Select Vehicle by Model
- Select Vehicle by VIN
Select Vehicle by Model
orMake
Model
Year
Select Vehicle by VIN
For the most accurate results, select vehicle by your VIN (Vehicle Identification Number).
10 Distributors found

GMC Distributor Part Number: 1103521
$109.22 MSRP: $156.28You Save: $47.06 (31%)
GMC Distributor Assembly Part Number: 19179576
$300.83 MSRP: $554.62You Save: $253.79 (46%)Ships in 1-2 Business DaysProduct Specifications- Other Name: Distributor Assembly, (Remanufacture); Distributor
- Replaces: 1104052, 1104059, 01104052, 01104059


GMC Distributor Assembly Part Number: 12598210
Product Specifications- Other Name: Distributor; Distributor, Ignition
- Replaces: 01104078, 1104050, 1104078, 01104050, 01104057, 93441559, 1104057
GMC Distributor Part Number: 1103620


GMC Distributor Part Number: 1103570
Product Specifications- Other Name: Distributor, Ignition
GMC Distributor Part Number: 1103546
Product Specifications- Other Name: Dist
GMC Distributor Part Number: 1103520
Product Specifications- Other Name: Dist
GMC Distributor Part Number: 1103482
GMC Distributor Part Number: 1103480
GMC Distributor Assembly Part Number: 94672691
Product Specifications- Other Name: Starter; Distributor; Distributor, Ignition
- Replaces: 01104051, 1103977, 1104051, 1104079, 1104058, 12570425, 01104079, 01104058, 93441558
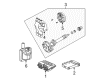
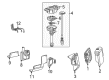
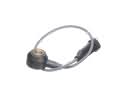
GMC Distributor
Choose OEM Distributor, you're making the optimal decision for superior quality and perfect performance. You can feel confident because each component goes through stringent quality checks. Every part is carefully built to comply with GMC's factory specifications. You'll enjoy a smooth, worry-free installation that fits just right. At ChevyPartsDeal.com, you'll find it easy to get top-quality OEM GMC Distributor. You can shop at highly competitive prices and protect your budget. All our genuine GMC parts include a dependable manufacturer's warranty. You'll also appreciate our straightforward return policy and swift delivery services for extra convenience.
GMC Distributor ensures the accurate spark flow to each cylinder to ensure engines start without shaking. GMC started in 1901 under the name Rapid Motor Vehicle Company and continues to pursue usable power even today. It developed General Motors into a symbol that workers are confident to make deliveries when the sun is shining to carry lumber and when the sun is setting to carry groceries. Strong powertrains, steel ladder frame and stress-tested suspension make the lineup absorb any abuse on the job site or off-road. The rear view cameras, forward notifications, and hitch steering can be found on all trims to ensure drivers know in which areas there are blind spots. The MultiPro tailgate folds and changes into six configurations and transforms the bed into a step, desk or load stop. The acoustic glass and dense seals ensure cabins remain silent, and thus, long highway pulls are peaceful. The process of reliability testing is inexhaustible and that cycle of relentless testing makes GMC the leader in boasting about its durability. Within the ignition system, the Distributor rotor rotates under its cover, takes high voltage off one coil, and transfers the charge to all the spark plugs via special wires at the optimal degree of crank-shaft rotation. Hardened shafts slide in tight bushings with helical gears running at the same speed as cams, centrifugal and vacuum advance weights swing to either add or trim ignition lead as throttle and rpm vary. When wear is at last apparent, a new Distributor cap and rotor are clapped on in a few minutes, and crisp starting and clean power are again assured.
GMC Distributor Parts and Q&A
- Q: How to service and repair the distributor on GMC Savana 2500?A:The distributor repair process needs the removal of the engine cover as its first step. Normal wear shows as cap discoloration combined with white deposits nearby the terminals together with rotor cap yellowing coupled with darkening from carbon accumulation under the rotor segment. Driveability issues will determine the need for replacement. Look for cracks and small holes along with carbon tracks between the terminal traces on the cap. Use the DMM lead connected to the cap terminal to inspect all other terminals and the center carbon ball until testing all secondary terminals. Move the DMM base lead between each terminal while performing these tests. Check and replace the ignition cap when you find resistance readings other than infinity. Terminal inspections should take place for excessive corrosion leading to terminal cleaning before cap replacement if corrosion reaches high levels but normal buildup is expected. The rotor segment requires replacement if significant looseness is detected. Examine the housing for signs of cracks while testing shaft-to-bushing looseness with the shaft inserted into its place before installing a new housing assembly if the shaft shows noticeable movement. Finally, reinstall the engine cover.
- Q: How to overhaul the distributor on GMC Sierra 1500?A:Prior to dismantling the Distributor start by marking holes in the Distributor driven gear, shaft and rotor for correct assembly. The white paint mark on the Distributor's lower stem must line up with the predrilled hole in the bottom of the gear to position the v6 engine rotor segment correctly. If not, replace the Distributor. Detach rotor screws then take the rotor while writing down the rotor screw hole locations and rotor locator pin hole positions. Fit the square-cut hole of the vane wheel to the cmp sensor before discarding both the cmp sensor screws and the cmp sensor itself. Examine the dimple found below the roll pin hole of one Distributor drive gear side for correct placement when putting components together. A v-block or equivalent fixture should support the drive gear while you use an appropriate punch to extract the roll pin before you remove the gear and its parts including a round washer a tang washer a shim washer and an oil seal. Place the cmp sensor into the square-cut hole of the vane wheel before installing new screws torqued to 2.2 n.m (19 lb in). After that mark the distribution rotor's mounting holes. Screw in the Distributor rotor using index marks while tightening its screws to 1.9 n.m (17 lb in) torque setting. Place the shim washer at the Distributor shaft's bottom before installing the tang washer and round washer. Route the driven gear based on index marks to match the displayed v6 engine configuration while making sure the Distributor's white marker faces the pre-drilled indent on the gear's bottom surface. When the driven gear gets positioned improperly the dimple will appear at a 180-degree position relative to the rotor segment. Before installation place the Distributor drive gear in a v-block while using a suitable punch to install the roll pin. Then install a new oil seal under the mounting flange before putting back the Distributor.


Related GMC Parts
 GMC Knock Sensor
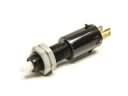 GMC Brake Light Switch
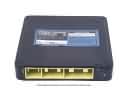 GMC Engine Control Module
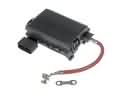 GMC Fuse Box
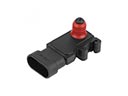 GMC MAP Sensor
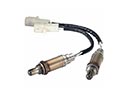 GMC Oxygen Sensor
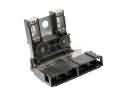 GMC Battery Fuse
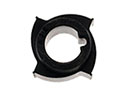 GMC Distributor Reluctor
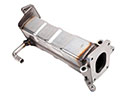 GMC EGR Cooler
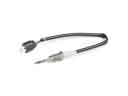 GMC Exhaust Gas Temperature Sensor
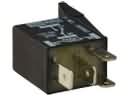 GMC Headlight Relay
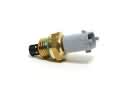 GMC Intake Manifold Temperature Sensor