ChevyParts
My Garage
My Account
Cart
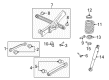
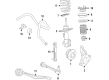
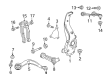
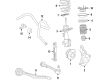
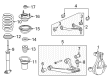
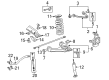
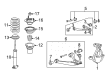
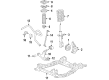
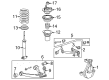
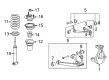
OEM Cadillac Control Arm
Suspension Arm- Select Vehicle by Model
- Select Vehicle by VIN
Select Vehicle by Model
orMake
Model
Year
Select Vehicle by VIN
For the most accurate results, select vehicle by your VIN (Vehicle Identification Number).
225 Control Arms found


Cadillac Upper Control Arm, Rear Part Number: 20917465
$48.96 MSRP: $97.41You Save: $48.45 (50%)Ships in 1-2 Business DaysProduct Specifications- Other Name: Arm, Rear Axle Control Arm; Suspension Control Arm; Link, Rear Axle Control Arm; Control Arm
- Position: Rear Upper


Cadillac Lower Control Arm, Rear Part Number: 22868629
$52.53 MSRP: $91.66You Save: $39.13 (43%)Ships in 1-2 Business DaysProduct Specifications- Other Name: Arm, Rear Axle Control Arm; Suspension Trailing Arm; Suspension Control Arm; Control Arm
- Position: Rear Lower


Cadillac Lower Control Arm, Passenger Side Part Number: 23317368
$88.50 MSRP: $154.47You Save: $65.97 (43%)Product Specifications- Other Name: Link Assembly-Front Lower Control Rear; Control Arm
- Position: Passenger Side


Cadillac Upper Control Arm, Driver Side Part Number: 22927215
$94.70 MSRP: $165.27You Save: $70.57 (43%)Product Specifications- Other Name: Arm, Steering Knuckle Upper & Lower Control; Control Arm
- Position: Driver Side


Cadillac Lower Control Arm, Front Driver Side Part Number: 20888439
$111.82 MSRP: $195.10You Save: $83.28 (43%)Product Specifications- Other Name: Arm Assembly-Front Lower Control Front; Suspension Control Arm; Control Arm
- Position: Driver Side


Cadillac Lower Control Arm, Driver Side Part Number: 84008848
$134.79 MSRP: $235.25You Save: $100.46 (43%)Product Specifications- Other Name: Arm, Steering Knuckle Upper & Lower Control; Control Arm
- Position: Driver Side
- Replaces: 23121590, 84248218


Cadillac Upper Control Arm, Driver Side Part Number: 84628487
$140.25 MSRP: $244.75You Save: $104.50 (43%)Product Specifications- Other Name: Arm, Steering Knuckle Control Arm and Ball Joint Assembly; Suspension Control Arm Assembly.
- Position: Driver Side
- Replaces: 23420263, 23125968, 84479374, 84304206, 22840983


Cadillac Upper Control Arm, Passenger Side Part Number: 84628488
$159.29 MSRP: $277.97You Save: $118.68 (43%)Ships in 1-2 Business DaysProduct Specifications- Other Name: Arm, Steering Knuckle Control Arm and Ball Joint Assembly; Suspension Control Arm Assembly.
- Position: Passenger Side
- Replaces: 23420264, 23125969, 84479375, 84304207


Cadillac Upper Control Arm Part Number: 25905442
$166.52 MSRP: $290.58You Save: $124.06 (43%)Ships in 1-2 Business DaysProduct Specifications- Other Name: Arm, Steering Knuckle Control Arm and Ball Joint Assembly; Suspension Control Arm Assembly.
- Position: Upper
- Replaces: 15049881, 15110013, 15224737


Cadillac Lower Control Arm, Passenger Side Part Number: 84114506
$203.99 MSRP: $355.97You Save: $151.98 (43%)Product Specifications- Other Name: Arm, Steering Knuckle Control Arm and Ball Joint Assembly; Suspension Control Arm Assembly.
- Position: Passenger Side
- Replaces: 22853474


Cadillac Lower Control Arm, Driver Side Part Number: 84114505
$203.99 MSRP: $355.97You Save: $151.98 (43%)Product Specifications- Other Name: Arm, Steering Knuckle Control Arm and Ball Joint Assembly; Suspension Control Arm Assembly.
- Position: Driver Side
- Replaces: 22994468, 22853473


Cadillac Lower Control Arm, Passenger Side Part Number: 20869200
$290.22 MSRP: $506.43You Save: $216.21 (43%)Ships in 1-2 Business DaysProduct Specifications- Other Name: Arm, Steering Knuckle Control Arm and Ball Joint Assembly; Suspension Control Arm Assembly.
- Position: Passenger Side
- Replaces: 25868822, 25788113


Cadillac Lower Control Arm, Driver Side Part Number: 20869199
$290.22 MSRP: $506.43You Save: $216.21 (43%)Ships in 1-2 Business DaysProduct Specifications- Other Name: Arm, Steering Knuckle Control Arm and Ball Joint Assembly; Suspension Control Arm Assembly.
- Position: Driver Side
- Replaces: 25868821, 25788112


Cadillac Lower Control Arm, Passenger Side Part Number: 22979576
$292.22 MSRP: $509.92You Save: $217.70 (43%)Ships in 1-2 Business DaysProduct Specifications- Other Name: Arm, Steering Knuckle Control Arm and Ball Joint Assembly; Suspension Control Arm Assembly.; Arm, Steering Knuckle Lower Control
- Position: Passenger Side
- Replaces: 22833483, 20928343, 20838573, 20903480

Cadillac Lower Control Arm, Driver Side Part Number: 22979575
$292.22 MSRP: $509.92You Save: $217.70 (43%)Ships in 1-2 Business DaysProduct Specifications- Other Name: Arm, Steering Knuckle Control Arm and Ball Joint Assembly; Suspension Control Arm Assembly.; Arm, Steering Knuckle Lower Control
- Position: Driver Side
- Replaces: 20838574, 20903481, 22833484, 20928344


Cadillac Lower Control Arm, Passenger Side Part Number: 20869202
$317.05 MSRP: $553.26You Save: $236.21 (43%)Product Specifications- Other Name: Arm, Steering Knuckle Control Arm and Ball Joint Assembly; Suspension Control Arm Assembly.
- Position: Passenger Side
- Replaces: 15948968, 22952194, 25788115, 25868824

Cadillac Lower Control Arm, Driver Side Part Number: 20869201
$317.05 MSRP: $553.26You Save: $236.21 (43%)Product Specifications- Other Name: Arm, Steering Knuckle Control Arm and Ball Joint Assembly; Suspension Control Arm Assembly.
- Position: Driver Side
- Replaces: 15948967, 22952193, 25868823, 25788114


Cadillac Upper Control Arm, Rear Driver Side Part Number: 10308991
$129.32 MSRP: $220.17You Save: $90.85 (42%)Ships in 1-2 Business DaysProduct Specifications- Other Name: Arm, Rear Axle Control Arm; Control Arm
- Position: Driver Side
- Replaces: 10436130


Cadillac Upper Control Arm, Passenger Side Part Number: 25812726
$173.34 MSRP: $298.01You Save: $124.67 (42%)Ships in 1-2 Business DaysProduct Specifications- Other Name: Arm Assembly-Front Upper Control *Forged Steel; Suspension Control Arm and Ball Joint Assembly.; Arm, Steering Knuckle Upper & Lower Control
- Position: Passenger Side


Cadillac Upper Control Arm, Driver Side Part Number: 25812725
$173.34 MSRP: $298.01You Save: $124.67 (42%)Ships in 1-2 Business DaysProduct Specifications- Other Name: Arm Assembly-Front Upper Control *Forged Steel; Suspension Control Arm and Ball Joint Assembly.; Arm, Steering Knuckle Upper & Lower Control
- Position: Driver Side
- Replaces: 15096197
| Page 1 of 12 |Next >
1-20 of 225 Results
Cadillac Control Arm
Choose OEM Control Arm, you're making the optimal decision for superior quality and perfect performance. You can feel confident because each component goes through stringent quality checks. Every part is carefully built to comply with Cadillac's factory specifications. You'll enjoy a smooth, worry-free installation that fits just right. At ChevyPartsDeal.com, you'll find it easy to get top-quality OEM Cadillac Control Arm. You can shop at highly competitive prices and protect your budget. All our genuine Cadillac parts include a dependable manufacturer's warranty. You'll also appreciate our straightforward return policy and swift delivery services for extra convenience.
Cadillac Control Arm maintains wheels steady and ride on bumpy roads and over sharp corners. Ever since 1902 Cadillac has pursued aggressive design, stretching big fins, deep creases and now glowing LEDs. The badge is the understated swagger marked with no screaming and beckoning drivers to indulge in premium leather, user-friendly displays, and silent cabins. Electric models are being rolled out next to the heavyweight V8 cruiser and one lineup can be sprinting, gliding and still appear special. The company has ranged between standard Eldorado and the glass-topped Celestiq that brings a blend of the heritage and technology that make daily commuting a show. Owners brag of assured highway pulls, surefooted turns, and seats that cool even after the playlist is over. The combination of opulence and energetic performance has Cadillac on the top of every list. The Control Arm is a hinged joint between frame and wheel hub which is bushed or ball jointed beneath that polish. It allows the suspension to go up and down with potholes, maintains its alignment, and prevents the tires from polishing the money away. Contemporary Control Arm castings replace the stamped steel with aluminum or iron to lose weight and reduce flex. The Control Arm pair is performance-modified to match the tuned geometry of the stout joints such that a stock Cadillac can enter a corner without fanfare.
Cadillac Control Arm Parts and Q&A
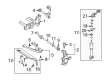
- Q: How to remove and install the lower control arm on Cadillac Escalade?A:To remove the component, first loosen the wheel lug nuts, raise the vehicle, and securely support it on jackstands placed under the frame rails before removing the wheel. Next, disconnect the stabilizer bar link from the control arm and remove the shock absorber lower mounting fasteners. For 4WD models, remove the drive axle, and if working on a model with torsion bar front suspension, remove the torsion bar. Use rope or wire to support the upper control arm and steering knuckle from the top of the shock absorber. To disconnect the lower control arm from the steering knuckle, loosen the ball joint nut a few turns without removing it, then install a ball joint separator to break the ball joint loose from the knuckle; a hammer and drift can also be used if necessary. After removing the nut, take out the lower control arm pivot bolts and nuts, noting the installation direction, and pull the lower arm from its frame brackets. For installation, position the arm in the frame brackets and install the bolts and nuts without tightening them yet. Attach the ball joint to the steering knuckle, install a new nut, and tighten it to the specified torque. The remainder of the installation follows the reverse order of removal, ensuring all fasteners are tightened to the correct torque values. The pivot bolt nuts should be tightened with the vehicle at normal ride height, which can be done after lowering the vehicle or by simulating the height with a floor jack. Finally, install the wheel and lug nuts, lower the vehicle, and tighten the lug nuts to the specified torque. If working on a model with torsion bar front suspension, check and adjust the ride height, and have the front end alignment checked and adjusted if necessary.
- Q: How to remove the front control arm on Cadillac DeVille?A:To remove the control arm, start by loosening the wheel lug nuts and raising the front of the vehicle. Support it securely on jackstands and apply the parking brake. Remove the wheel. If working on a 2000 and later DeVille or a Seville, detach the stabilizer bar link(s) from the control arm(s). Remove the cotter pin and loosen the balljoint stud-to-steering knuckle nut. Use a balljoint separator or strike the steering knuckle boss with a hammer to separate the balljoint from the knuckle. Detach the road sensing suspension position sensor if applicable. Remove the control arm-to-frame fasteners and detach the control arm. Carefully inspect the control arm bushings for wear or damage. To install the control arm, position it in the suspension support and install the fasteners without tightening them completely. Insert the balljoint stud into the steering knuckle boss, tighten the nut, and install a new cotter pin. Install the stabilizer bar-to-control arm bolt, spacer, bushings, and washers if necessary. Connect the road sensing suspension position sensor if applicable. Use a floor jack to raise the outer end of the control arm to simulate normal ride height, then tighten the control arm fasteners. Finally, install the wheel and lower the vehicle, tightening the lug nuts.


Related Cadillac Parts
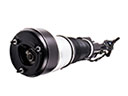 Cadillac Air Suspension
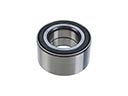 Cadillac Wheel Bearing
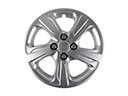 Cadillac Wheel Cover
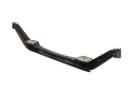 Cadillac Axle Beam
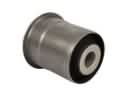 Cadillac Axle Support Bushings
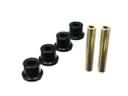 Cadillac Crossmember Bushing
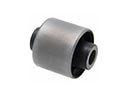 Cadillac Differential Mount
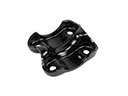 Cadillac Leaf Spring Plate
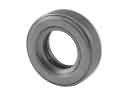 Cadillac Strut Bearing
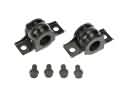 Cadillac Sway Bar Bracket
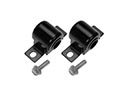 Cadillac Sway Bar Bushing
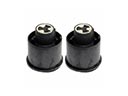 Cadillac Trailing Arm Bushing