ChevyParts
My Garage
My Account
Cart
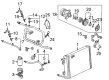
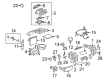
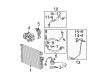
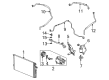
OEM Saturn HVAC Pressure Switch
Air Pressure Switch- Select Vehicle by Model
- Select Vehicle by VIN
Select Vehicle by Model
orMake
Model
Year
Select Vehicle by VIN
For the most accurate results, select vehicle by your VIN (Vehicle Identification Number).
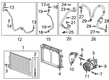
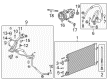
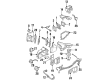
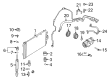
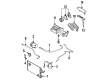
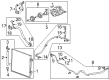
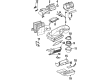
16 HVAC Pressure Switches found


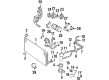
Saturn Expansion Valve Part Number: 52458184
$13.43 MSRP: $25.22You Save: $11.79 (47%)Ships in 1-3 Business DaysProduct Specifications- Other Name: Valve, Oil Test; Cut-Out Switch; Control Valve; Valve Cap; Valve Core; Pressure Switch; Adapter; Seal Kit; Switch
- Replaces: 52458183


Saturn Pressure Relief Valve, Green Line Part Number: 13587668
$49.45 MSRP: $104.15You Save: $54.70 (53%)Ships in 1-3 Business DaysProduct Specifications- Other Name: Sensor Assembly-A/C Refrigerant Pressure; A/C Compressor Cut-Out Switch; HVAC Pressure Switch; HVAC System Switch
- Replaces: 13502759, 13502758, 22678731, 22634172


Saturn Pressure Sensor Part Number: 3041827
$7.25 MSRP: $14.06You Save: $6.81 (49%)Ships in 1-3 Business DaysProduct Specifications- Other Name: Core, A/C valves, switches, adapters; HVAC pressure and system switches.
- Replaces: 24436648


Saturn Pressure Relief Valve Part Number: 13587697
$36.24 MSRP: $68.07You Save: $31.83 (47%)Ships in 1-2 Business DaysProduct Specifications- Other Name: Sensor Assembly-A/C Refrigerant Pressure; Compressor Cut-Out Switch; Control Valve; System Valve Core; HVAC Switch
- Replaces: 22624066, 22654048, 22601618, 22664328, 96448991, 95018104, 96345744, 22571286


Saturn Relief Valve Part Number: 10245619
$10.82 MSRP: $20.32You Save: $9.50 (47%)Ships in 1-3 Business DaysProduct Specifications- Other Name: Valve, Air Conditioner Compressor Pressure Relief; A/C Compressor Control Valve; A/C System Valve Core
- Replaces: 22670753

Saturn Pressure Relief Valve Part Number: 88972205
$10.21 MSRP: $19.17You Save: $8.96 (47%)Ships in 1-2 Business DaysProduct Specifications- Other Name: Valve, A/C Compressor Pressure Relief; Cut-Out Switch; Control Valve; System Valve Core; HVAC Pressure Switch.; Relief Valve; Pressure Valve
- Replaces: 06560606, 09118283, 6560606, 9118283

Saturn Pressure Relief Valve Part Number: 25831534
$10.06 MSRP: $18.90You Save: $8.84 (47%)Ships in 1-2 Business DaysProduct Specifications- Other Name: Valve, A/C Compressor Pressure Relief; Cut-Out Switch; HVAC Pressure Switch

Saturn Pressure Valve Part Number: 22671653
$27.17 MSRP: $51.02You Save: $23.85 (47%)Ships in 1-2 Business DaysProduct Specifications- Other Name: Pressure Sensor Valve; A/C Compressor Cut-Out Switch; HVAC Pressure Switch; HVAC System Switch

Saturn Temperature Switch Part Number: 15783645
$63.43 MSRP: $115.08You Save: $51.65 (45%)Ships in 1-2 Business DaysProduct Specifications- Other Name: Switch Kit, Air Conditioner Compressor (Internal Parts); A/C Compressor Cut-Out Switch; HVAC System Switch; Switch Kit, A/C Compressor (Internal Parts)

Saturn Pressure Relief Valve Part Number: 9118283
$10.21 MSRP: $19.17You Save: $8.96 (47%)Ships in 1-2 Business DaysProduct Specifications- Other Name: Valve, A/C Compressor Pressure Relief; A/C Compressor Cut-Out Switch; HVAC Pressure Switch; HVAC System Switch; Pressure Valve; Switch
- Replaced by: 88972205


Saturn Pressure Switch Part Number: 21030824
Product Specifications- Other Name: Switch, Air Conditioner Electric Temperature Control; A/C Compressor Cut-Out; HVAC Pressure Switch.


Saturn Temperature Sensor Part Number: 10397366
Product Specifications- Other Name: Sensor, Air Conditioner Electric Temperature And Motor Control

Saturn Pressure Switch Part Number: 9131721
Product Specifications- Other Name: Sensor, A/C Cycling & Fan Control; Refrigerant Pressure; Compressor Cut-Out Switch; HVAC Pressure Switch.

Saturn Pressure Relief Valve Part Number: 21031128
Product Specifications- Other Name: Valve, A/C Compressor Pressure Relief; Cut-Out Switch; HVAC Pressure Switch

Saturn Pressure Relief Valve Part Number: 15835930
Product Specifications- Other Name: Valve, A/C Compressor Pressure Relief; Cut-Out Switch; Control Valve; System Valve Core; HVAC Pressure Switch.
- Replaces: 22689755

Saturn Pressure Relief Valve Part Number: 10337355
Product Specifications- Other Name: Valve, A/C Compressor Pressure Relief; Cut-Out Switch; HVAC Pressure Switch
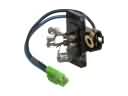
Saturn HVAC Pressure Switch
Choose OEM HVAC Pressure Switch, you're making the optimal decision for superior quality and perfect performance. You can feel confident because each component goes through stringent quality checks. Every part is carefully built to comply with Saturn's factory specifications. You'll enjoy a smooth, worry-free installation that fits just right. At ChevyPartsDeal.com, you'll find it easy to get top-quality OEM Saturn HVAC Pressure Switch. You can shop at highly competitive prices and protect your budget. All our genuine Saturn parts include a dependable manufacturer's warranty. You'll also appreciate our straightforward return policy and swift delivery services for extra convenience.
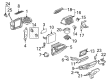
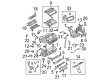
The Saturn HVAC Pressure Switch is installed in the air-conditioning line and detects the refrigerant pressure to ensure that the compressor is only operated under conditions considered to be safe and that cooling is maintained at a constant level. More than whacky styling, Saturn owners received polymer body panels that shrug off the dings, a rigid spaceframe, and engines cast using the lost-foam process that leaves behind weight reduction without compromising strength. The brand also introduced an elastic wiring architecture that ensures replacement of sensors remains easy; hence, replacing an HVAC Pressure Switch only takes minutes rather than hours. Paint in factories was glossy and lasted years, and O-ringed fittings could not be toppled by seepage; hence, few refrigerant top-offs and longer compressor life. All these touches created an image of reliability that has an impact in the situation when a couple requires cold air on a hot afternoon. The spare HVAC Pressure Switch is even small enough to fit in the Saturn glovebox. Prepare the job, beginning by parking level, closing the key, and disconnecting the negative cable, an activity every Saturn fan should have made part of the muscle memory. Follow the aluminum A/C line until you see the next HVAC Pressure Switch and wipe the space, then use a small screwdriver to loosen the harness clip to avoid confusing the wires. Turn the old unit by hand and use a rag to wipe away any spilled oil, fit a new O-ring that has been smeared lightly with refrigerant oil, screw in the new switch finger tight, then turn it one-quarter turn, reconnect the power, start the cabin fan, and ensure that it is ice-cold air.
Related Saturn Parts
 Saturn Blower Motor Resistor
 Saturn A/C Clutch
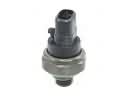 Saturn A/C Compressor Cut-Out Switches
 Saturn A/C Condenser
 Saturn A/C Hose
 Saturn A/C Orifice Tube
 Saturn A/C Switch
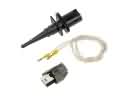 Saturn Air Temperature Sensor
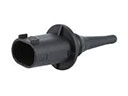 Saturn Ambient Temperature Sensor
 Saturn Blend Door Actuator
 Saturn Evaporator
 Saturn HVAC Control Module