ChevyParts
My Garage
My Account
Cart
OEM Saturn Heater Control Valve
HVAC Heater Control Valve- Select Vehicle by Model
- Select Vehicle by VIN
Select Vehicle by Model
orMake
Model
Year
Select Vehicle by VIN
For the most accurate results, select vehicle by your VIN (Vehicle Identification Number).
1 Heater Control Valve found

Saturn Water Valve Part Number: 24465911
Product Specifications- Other Name: Valve Assembly-Heater Water Bypass
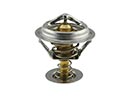
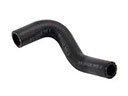
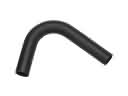
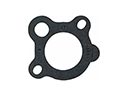
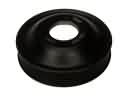
Saturn Heater Control Valve
Choose OEM Heater Control Valve, you're making the optimal decision for superior quality and perfect performance. You can feel confident because each component goes through stringent quality checks. Every part is carefully built to comply with Saturn's factory specifications. You'll enjoy a smooth, worry-free installation that fits just right. At ChevyPartsDeal.com, you'll find it easy to get top-quality OEM Saturn Heater Control Valve. You can shop at highly competitive prices and protect your budget. All our genuine Saturn parts include a dependable manufacturer's warranty. You'll also appreciate our straightforward return policy and swift delivery services for extra convenience.
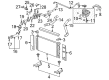
The Saturn Heater Control Valve controls the heat of the cabin by controlling the flow of coolant to the heater core providing fast heating and cold day reassurance. Saturn, a creation of General Motors in 1985, was the first car to take a new approach into the vehicle construction, which could be depended on by ordinary people. Soon the owners were raving about Saturn dent resistant polymer body panels that shake off dings in the parking lot that adds years to the life of every individual vehicle and make them look cleaner. Lost foam casting in the engine was applied by the company to cut lighter but strong parts, therefore the acceleration of the car was lively compared to the fuel economy that remained high. This was a high tech process of painting, which affixed the color deep within the panels, which made that look of the showroom shine every year thereafter. The innovations and friendly marketing approach created a strong community that continues to talk about the brand. To install a new Saturn Heater Control Valve, the first thing to do is to park on a level surface and allow the engine to cool down and the radiator cap to be loosened to relieve pressure. Find the valve on the heater hoses and record the hose orientation and clamp and disconnect the hoses to a drain pan. Take out the old Saturn Heater Control Valve, align the flow arrow on the new one, and slide it in place and make sure the clamps are well fastened. Refill and bleed the cooling system, idle the engine while you ensure there is no leakage, then retorque clamps after short test run to ensure the Heater Control Valve closes well.