ChevyParts
My Garage
My Account
Cart
OEM Hummer Tie Rod End
Steering Rod End- Select Vehicle by Model
- Select Vehicle by VIN
Select Vehicle by Model
orMake
Model
Year
Select Vehicle by VIN
For the most accurate results, select vehicle by your VIN (Vehicle Identification Number).
3 Tie Rod Ends found

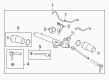
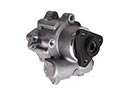
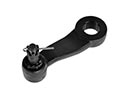
Hummer Outer Tie Rod Part Number: 15907712
$71.82 MSRP: $179.65You Save: $107.83 (61%)Ships in 1-2 Business DaysProduct Specifications- Other Name: Rod Kit, Steering Linkage Outer Tie; Steering Tie Rod End; Outer Tie Rod End; Tie Rod End; Rod Kit, Steering Tie Rod Outer
- Position: Outer

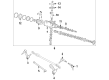
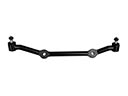
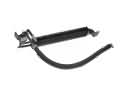
Hummer Linkage, Steering Connecting Part Number: 86511721
$97.05 MSRP: $169.35You Save: $72.30 (43%)Ships in 1-2 Business DaysProduct Specifications- Other Name: Rod Assembly-Steering Linkage Outer Tie; Rod, Steering Tie Rod Outer
- Replaced by: 85819772


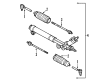
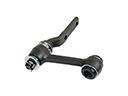
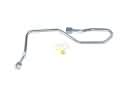
Hummer Outer Tie Rod Part Number: 15217992
Product Specifications- Other Name: Rod Kit, Steering Linkage Outer Tie; Steering Tie Rod End; Outer Tie Rod End; Tie Rod End; Rod Kit, Steering Tie Rod Outer
- Position: Outer
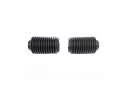
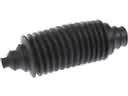
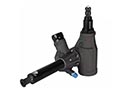
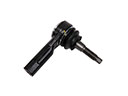
Hummer Tie Rod End
Choose OEM Tie Rod End, you're making the optimal decision for superior quality and perfect performance. You can feel confident because each component goes through stringent quality checks. Every part is carefully built to comply with Hummer's factory specifications. You'll enjoy a smooth, worry-free installation that fits just right. At ChevyPartsDeal.com, you'll find it easy to get top-quality OEM Hummer Tie Rod End. You can shop at highly competitive prices and protect your budget. All our genuine Hummer parts include a dependable manufacturer's warranty. You'll also appreciate our straightforward return policy and swift delivery services for extra convenience.
Hummer Tie Rod End transforms your steering signal in to the fine art of wheel control that keeps the huge truck straight on the rough trails. The Hummer is born with military family background; it drives through mud, over the rock terrain and crosses through streams courtesy of its high ground clearance, and four wheel drive that can transform according to the sand or snow conditions. A powerful V8 gives it power, skid plates cover important components and tow hooks are there when rapid rescues are required. Large windows allow the driver to have panoramic views as the seat is spacious and cushions bumps and the simple dashboard controls allow adventure-seekers to concentrate on the horizon. It may be a steep hill that is being climbed or the loose gravel struggling over a hill, or a forest road, but a Hummer turns rugged roads into pavement and its boldly styled look sets it apart everywhere it goes. The Tie Rod End is a greased ball joint that connects steering rack to every knuckle and should remain tight, to ensure that sure-footed feeling and a new Hummer Tie Rod End keeps the wheels going where they belong. To install a new Tie Rod End the first step involves parking on a level surface, placing the brake up, lifting the front and removing a wheel. Identify the location of the old part, loosen the jam nut, remove the cotter pin and rotate the castle nut. Using a separator, pop the joint then unscrew the worn-out piece. Install the until it fits to the same mark, install the stud, torque the nut, install a cotter pin, grip the jam nut, install the wheel, drop the rig and perform a final check on straight tracking.