ChevyParts
My Garage
My Account
Cart
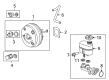
OEM GMC Yukon XL 1500 Brake Master Cylinder
- Select Vehicle by Model
- Select Vehicle by VIN
Select Vehicle by Model
orMake
Model
Year
Select Vehicle by VIN
For the most accurate results, select vehicle by your VIN (Vehicle Identification Number).
15 Brake Master Cylinders found


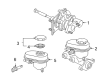
GMC Yukon XL 1500 Master Cylinder Part Number: 19420962
$192.14 MSRP: $347.75You Save: $155.61 (45%)Ships in 1-2 Business Days
GMC Yukon XL 1500 Master Cylinder Part Number: 19420798
$153.44 MSRP: $305.24You Save: $151.80 (50%)


GMC Yukon XL 1500 Overhaul Kit Part Number: 19209252


GMC Yukon XL 1500 Master Cylinder Part Number: 19209250


GMC Yukon XL 1500 Master Cylinder Part Number: 19209249


GMC Yukon XL 1500 Master Cylinder Part Number: 19209239


GMC Yukon XL 1500 Master Cylinder Part Number: 19209236


GMC Yukon XL 1500 Master Cylinder Part Number: 19209189

GMC Yukon XL 1500 Master Cylinder Part Number: 19432944
$156.87 MSRP: $281.38You Save: $124.51 (45%)GMC Yukon XL 1500 Overhaul Kit Part Number: 19209251
GMC Yukon XL 1500 Master Cylinder Part Number: 25865166

GMC Yukon XL 1500 Master Cylinder Part Number: 18047524
GMC Yukon XL 1500 Master Cylinder Part Number: 19209234
GMC Yukon XL 1500 Master Cylinder Part Number: 19209199
GMC Yukon XL 1500 Master Cylinder Part Number: 19209191
GMC Yukon XL 1500 Brake Master Cylinder
Want to cut long-term maintenance and repair costs? Choose OEM Brake Master Cylinder. Those parts deliver top durability you can trust. On our site, you'll find a huge catalog of genuine GMC Yukon XL 1500 parts. Prices are unbeatable, so you can keep more in your pocket. Every OEM GMC Yukon XL 1500 Brake Master Cylinder includes a manufacturer's warranty. You can also get an easy return policy that keeps buying risk free. Fast delivery, get your car on the road quickly. It's simple to search, compare, and order. Stop guessing about quality or fit. Order today and save with parts that last.
GMC Yukon XL 1500 Brake Master Cylinder Parts and Q&A
- Q: How to service and repair the Brake Master Cylinder on GMC Yukon XL 1500?A:Fixing the top-end of the Brake Master Cylinder starts with locking the mounting flange in a workbench vise to reveal its back section. Install suitable fittings on the master cylinder ports to connect hoses by first removing the reservoir components. Set up transparent hoses to connect the fittings which enter the master cylinder reservoir. Pour clean delco supreme 110 (GM P/N 12377967) brake fluid or dot-3 equivalent from a sealed container until it reaches the half mark inside the reservoir while keeping brake hose ends completely dipped in the fluid. With a rounded tool press down and let go the primary Piston a few times while noting fluid exit from supply ports. Pressing the primary Piston becomes more challenging and its range shifts downward when you release air from both pistons. Push the primary Piston several times until bleeding fluid shows no air bubbles through the ports. Reinsert the master cylinder cover before placing each fitting back on the hose ports. Then remove the reservoir assemblies and bind all leakage areas with clean cloth before taking off the vise.
- Q: How to overhaul the brake master cylinder on GMC Yukon XL 1500?A:Secure the mounting flange in a bench vise before starting your Brake Master Cylinder overhaul work while you keep access to the rear of the primary Piston. Before you take out the master cylinder cap you need to clean around the reservoir area but keep the area free of dust. Analyze the cap and diaphragm for any flaws in shape, cuts, fractures, blemishes or deformed parts to replace them as needed. Disengage the master cylinder reservoir part and press the primary Piston towards the cylinder using a rounded tool. Take out the Piston retainer and seal assembly afterward. Connect both cylinder intake ports and the back port while blowing non-lubricated filtered air into the front port using low pressure to eliminate all three seals and components. Take out the primary Piston assembly plus its Piston retainer and seals from the secondary Piston. Before building the master cylinder unit you need to thoroughly clean its interior and exterior with denatured alcohol along with the secondary Piston and return spring. Inspect every part for damage including cracks, scores, pits, or corrosion and replace the whole assembly if finding any problems. Run each part through non-lubed filtered air and insert delco supreme 110 fluid (GM P/N 12377967) or equivalent dot-3 brake fluid into the master cylinder bore, secondary Piston, return spring, and all overhaul components from a sanitized supply container. Fit the new primary seal components over the secondary Piston seal and install the return spring and secondary Piston lubricated assembly into the bore before adding the lubricated primary Piston in place. You should use a smooth tool to compress the primary Piston while installing the new Piston retainer followed by reconnecting all components of the master cylinder before reinstalling it.


Related GMC Yukon XL 1500 Parts
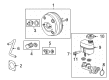
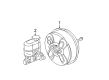
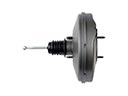 GMC Yukon XL 1500 Brake Booster
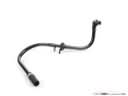 GMC Yukon XL 1500 Brake Booster Vacuum Hose
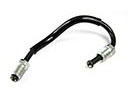 GMC Yukon XL 1500 Brake Line
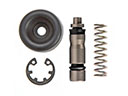 GMC Yukon XL 1500 Brake Master Cylinder Repair Kit
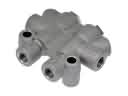 GMC Yukon XL 1500 Brake Proportioning Valve
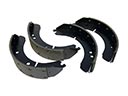 GMC Yukon XL 1500 Brake Shoe Set
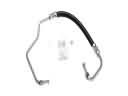 GMC Yukon XL 1500 Hydraulic Hose
 GMC Yukon XL 1500 Parking Brake Cable
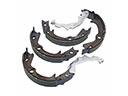 GMC Yukon XL 1500 Parking Brake Shoes
 GMC Yukon XL 1500 Spindle Nut
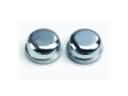 GMC Yukon XL 1500 Wheel Bearing Dust Cap
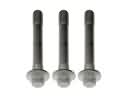 GMC Yukon XL 1500 Wheel Hub Bolt