ChevyParts
My Garage
My Account
Cart
OEM Chevrolet Venture Rack And Pinion
Steering Rack And Pinion- Select Vehicle by Model
- Select Vehicle by VIN
Select Vehicle by Model
orMake
Model
Year
Select Vehicle by VIN
For the most accurate results, select vehicle by your VIN (Vehicle Identification Number).
3 Rack And Pinions found

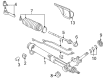
Chevrolet Venture Gear Assembly Part Number: 26065032
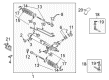
$668.34 MSRP: $1056.33You Save: $387.99 (37%)Ships in 1-3 Business DaysChevrolet Venture Gear Assembly Part Number: 26098001

Chevrolet Venture Steering Gear Part Number: 19330434
Chevrolet Venture Rack And Pinion
Want to cut long-term maintenance and repair costs? Choose OEM Rack And Pinion. Those parts deliver top durability you can trust. On our site, you'll find a huge catalog of genuine Chevrolet Venture parts. Prices are unbeatable, so you can keep more in your pocket. Every OEM Chevrolet Venture Rack And Pinion includes a manufacturer's warranty. You can also get an easy return policy that keeps buying risk free. Fast delivery, get your car on the road quickly. It's simple to search, compare, and order. Stop guessing about quality or fit. Order today and save with parts that last.
Rack And Pinion is one of the most crucial parts of Chevrolet Venture Steering and one of the most recognized for its quality and performance in the Chevrolet Venture. This sophisticated system converts the rotational movement of the steering wheel into smooth and clean lateral movement of the front wheels. The Chevrolet Venture made between 1997 and 2005 uses a power assisted rack and pinion management that employs hydraulic force to make the task of turning the helm easier, thus, underlining the fact that the minivan benefits from easy steering that does not fatigue the driver. It can fit in almost all the models of the Chevrolet Venture from the Base, the LS to the LT type thus underlining its flexibility. Apart from enhancing the handling of the car the rack and pinion design is also vital in improving safety because of its efficiency in determining the degree of responsiveness of the steering column. Additional performance options like helical gears are available, although, gears with straight teeth are more efficient. Any leakage or wear of the Chevrolet Venture Rack And Pinion should be promptly repaired to avoid frequent problems during use. The Chevrolet Venture minivan is well appreciated by families for its lower body and additional eight-seats option together with its solid rack and pinion system. In summary, the Chevrolet Venture Rack And Pinion is one of the best models for car lovers, which establishes the firm's reputation in the market.
Chevrolet Venture Rack And Pinion Parts and Q&A
- Q: How to replace the Rack and Pinion steering gear on Chevrolet Venture?A:Within raising and supporting the vehicle, remove the damper, disconnect the brake and driveshafts, remove wheels and tires. The stabilizer shaft, Tie Rod Ends from the Steering Knuckles, and the steering intermediate shaft from the Rack And Pinion should be disconnected. Use a utility stand to hold the frame up and take the rear bolts off the frame but do not drop the rear too low to cause damage to engine parts. Lower the frame and powertrain using utility stand, then disconnect Rack And Pinion from the power steering cooler pipe and pressure hose. Remove the Rack And Pinion bolts and nuts and pull out the Rack And Pinion by means of the left side wheel opening. For installation, enter the new Rack And Pinion corresponding frame from the left side wheel opening and turn on the Rack And Pinion bolts in a clean and non-rusted condition, with a 2 nm (18 lb in) torque/drag before seating. If not, replace them. Finally, tighten the Rack And Pinion nuts to 80 nm (59 lb ft), connect the Rack And Pinion pressure hose and cooler pipe, tightening both to 27 nm (20 lb ft), and the cooler pipe retaining clip. Lift the frame and powertrain with utility stand, install frame rear bolts, and secure bolt at 165 nm (122 lb ft) torque. Pull out the utility stand, then install steering intermediate shaft, tie rod ends, and stabilizer shafts before placing the vehicle in the ground position. Fill the system, drain it, clean it, bleed off the air, inspect and leak it, and adjust to the toe if necessary.

Related Chevrolet Venture Parts
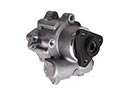 Chevrolet Venture Power Steering Pump
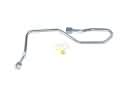 Chevrolet Venture Power Steering Hose
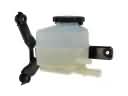 Chevrolet Venture Power Steering Reservoir
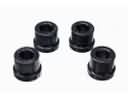 Chevrolet Venture Rack & Pinion Bushing
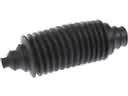 Chevrolet Venture Rack and Pinion Boot
 Chevrolet Venture Radius Heat Shield
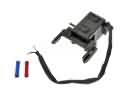 Chevrolet Venture Shift Interlock Solenoid
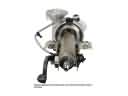 Chevrolet Venture Steering Column
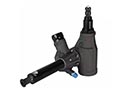 Chevrolet Venture Steering Gearbox
 Chevrolet Venture Tie Rod
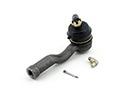 Chevrolet Venture Tie Rod End
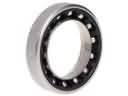 Chevrolet Venture Upper Steering Column Bearing