ChevyParts
My Garage
My Account
Cart
OEM Chevrolet Venture Evaporator
A/C Evaporator Core- Select Vehicle by Model
- Select Vehicle by VIN
Select Vehicle by Model
orMake
Model
Year
Select Vehicle by VIN
For the most accurate results, select vehicle by your VIN (Vehicle Identification Number).
3 Evaporators found

Chevrolet Venture Evaporator Core Part Number: 10318580
$170.51 MSRP: $320.20You Save: $149.69 (47%)Ships in 1-2 Business Days


Chevrolet Venture Evaporator Core Part Number: 52494507
$201.75 MSRP: $361.88You Save: $160.13 (45%)
Chevrolet Venture Evaporator Core Part Number: 10323437
Chevrolet Venture Evaporator
Want to cut long-term maintenance and repair costs? Choose OEM Evaporator. Those parts deliver top durability you can trust. On our site, you'll find a huge catalog of genuine Chevrolet Venture parts. Prices are unbeatable, so you can keep more in your pocket. Every OEM Chevrolet Venture Evaporator includes a manufacturer's warranty. You can also get an easy return policy that keeps buying risk free. Fast delivery, get your car on the road quickly. It's simple to search, compare, and order. Stop guessing about quality or fit. Order today and save with parts that last.
Evaporator is an important component of the A/C system of Chevrolet Venture vehicles well-known for its reliability and performance. Being a vital component in the Chevrolet Venture minivan, this evaporator helps in cooling and dehumidifying the cars interior thus making it highly efficient and safe. Used mainly in the Chevrolet Venture, the evaporator is a mechanism that is installed under the dashboard to heat and cool, air passing over the metal fins and turning the liquid refrigerant to gas. This not only lowers the temperate of the air but also eliminates additional humidity which many cause problem such as formation of mold and bad odors. The Evaporator fits on different models of the Venture so that the drivers can produce the premier results at all times. Its design has remained the same, what it does is that it absorb heat and removes moisture, for a comfortable drive. Cleaning of Evaporator should be done regularly because with time problems such as leaks and age and debris accumulation may affect the evaporator. One of the features typical for the automotive market which defines the Evaporator's specificity is the car construction and its efficiency as the decisive indicators affecting the reliability of the Chevrolet Venture. Such as the features of comfort that make the Evaporator boost the performance of this minivan and the aspects of safety that makes the model a cornerstone of choice for families and individual owners.
Chevrolet Venture Evaporator Parts and Q&A
- Q: How to service and repair the auxiliary air conditioning evaporator on Chevrolet Venture?A:The first step to service or repair the auxiliary air conditioning Evaporator requires using the tools including a halogen leak detector (J 39400-A). Start the service by separating the auxiliary hvac module assembly followed by the removal of screws securing the auxiliary txv line clamp and finally separating the clamp from its position. Take off the sealing washers from the a/c lines connected to the auxiliary txv and cap or tape the open lines to stop contamination before removal. Remove the bolts which lock the auxiliary txv to the Evaporator core before detaching the txv device along with any sealing washers. Detach first the screws and the actuator of the auxiliary temperature actuator from the hvac module before removing the screws from the auxiliary blower motor housing. You must first separate the auxiliary hvac module case halves after unscrewing its fasteners to reach the auxiliary Evaporator core. The required amount of pag oil must be added to the new Evaporator core during its installation. Reassemble the two parts of the lower hvac module case by inserting the new auxiliary Evaporator core and tightening all fasteners to their correct positions. Screw the auxiliary hvac module case at 1.6 nm torque before attaching the auxiliary blower motor housing and its screws that should be tightened to 1.6 nm as well. You should install the auxiliary temperature actuator together with its screws before final tightening at 1.6 nm (14 lb in). The auxiliary Evaporator core installation requires new sealing washers followed by removal of a/c line caps or tape. Install the auxiliary txv to the Evaporator core while tightening its mounting bolts to 3.5 nm (31 lb in). The new sealing washers should be installed on the auxiliary txv line block fitting then fasten it to the Evaporator core using a retaining bolt tightened to 11 nm (97 lb in). Reinstall the auxiliary hvac module assembly after you attach the clamp to the assembly and tighten its screws to 1.6 nm (14 lb in). Perform a leak test on each fitting through the halogen leak detector (J 39400-A).
- Q: How to replace the air conditioning evaporator core on Chevrolet Venture?A:First disconnect the Evaporator temperature sensor connector from the air inlet housing before starting replacement of the air conditioning Evaporator core. First detach the air inlet housing screws then remove the airflow component from its position on the hvac module. After securing the bracket screws on the right side hvac module assembly remove the bracket itself including the upper screw which rests underneath the bracket. Start by removing the upper hvac module retaining screw then proceed with taking away the sound barrier seal and heater outlet duct screws before extracting the duct. Follow this order to remove screws from the cover of the Heater Core and then take out the Heater Core followed by the pipe retaining screw. The lower hvac module assembly retaining screw resides beneath the Heater Core so you need to remove it together with all lower retaining screws to separate the upper and lower hvac module halves. Remove the upper hvac module case half Evaporator core while you take off both the Evaporator temperature sensor and txv mounting screws to free the txv from the core before discarding its sealing washers. Install the specified amount of pag oil directly to the new Evaporator core before attaching it to the Evaporator line using correct fasteners at right locations while tightening the screws to 3.2 nm (28 lb in). Mount the Evaporator temperature sensor at a distance of 3.5 centimeters (1.4 inches) from the side while the bottom corner measures 5.0 centimeters (2.0 inches) and direct the wires toward the opening in the upper hvac module case to prevent pinching. Install the upper hvac module case half by inserting the Evaporator core then position the components before tightening the lower hvac module assembly retaining screws to 0.9 nm (8 lb in). This installation process must end with securing the lower retaining screw at the same torque value. The Heater Core requires 0.9 nm (8 lb in) torque for its retaining screw installation alongside the Heater Core cover and screws with the same torque of 0.9 nm (8 lb in). After screwing the heater outlet duct to 0.9 nm (8 lb in), you should install the hvac module assembly to dash panel sound barrier seal and secure the upper retaining screw to 0.9 nm (8 lb in). The hvac module assembly retrieval process ends with the air inlet housing attachment to the module before air inlet retainer screw installation to 0.9 nm (8 lb in) and placement of the Evaporator temperature sensor connector to the inlet housing followed by module assembly installation.


Related Chevrolet Venture Parts
 Chevrolet Venture Cabin Air Filter
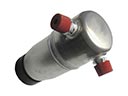 Chevrolet Venture A/C Accumulator
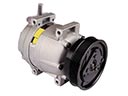 Chevrolet Venture A/C Compressor
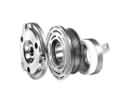 Chevrolet Venture A/C Compressor Clutch
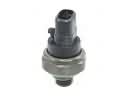 Chevrolet Venture A/C Compressor Cut-Out Switches
 Chevrolet Venture A/C Condenser
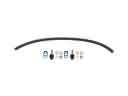 Chevrolet Venture A/C Hose
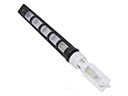 Chevrolet Venture A/C Orifice Tube
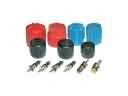 Chevrolet Venture A/C System Valve Core
 Chevrolet Venture Air Duct
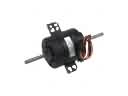 Chevrolet Venture Blower Motor
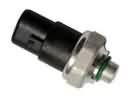 Chevrolet Venture HVAC Pressure Switch