ChevyParts
My Garage
My Account
Cart
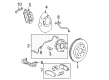
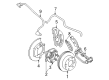
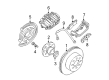
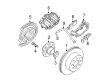
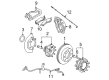
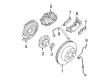
OEM Chevrolet Suburban 1500 Brake Rotor
Disc Rotor- Select Vehicle by Model
- Select Vehicle by VIN
Select Vehicle by Model
orMake
Model
Year
Select Vehicle by VIN
For the most accurate results, select vehicle by your VIN (Vehicle Identification Number).
11 Brake Rotors found


Chevrolet Suburban 1500 Rotor, Front Part Number: 19210603
$96.63 MSRP: $187.54You Save: $90.91 (49%)Ships in 1-2 Business Days


Chevrolet Suburban 1500 Rotor, Front Part Number: 22950036
$124.48 MSRP: $241.61You Save: $117.13 (49%)Ships in 1-3 Business Days


Chevrolet Suburban 1500 Rotor, Front Part Number: 15942195
$180.83 MSRP: $354.04You Save: $173.21 (49%)Ships in 1-2 Business Days


Chevrolet Suburban 1500 Brake Rotor Part Number: 25757802
$116.80 MSRP: $225.31You Save: $108.51 (49%)Ships in 1-2 Business Days


Chevrolet Suburban 1500 Rotor Part Number: 15712803
$174.66 MSRP: $333.92You Save: $159.26 (48%)Ships in 1-2 Business Days
Chevrolet Suburban 1500 Rotor Part Number: 15712801
$93.24 MSRP: $180.93You Save: $87.69 (49%)

Chevrolet Suburban 1500 Rotor Part Number: 15769474
$161.77 MSRP: $292.81You Save: $131.04 (45%)
Chevrolet Suburban 1500 Rotor, Front Part Number: 84587921
$139.90 MSRP: $271.52You Save: $131.62 (49%)Ships in 1-2 Business Days


Chevrolet Suburban 1500 Rotor, Rear Part Number: 22968231


Chevrolet Suburban 1500 Rotor Part Number: 19211496

Chevrolet Suburban 1500 Rotor Part Number: 26088273
Chevrolet Suburban 1500 Brake Rotor
Want to cut long-term maintenance and repair costs? Choose OEM Brake Rotor. Those parts deliver top durability you can trust. On our site, you'll find a huge catalog of genuine Chevrolet Suburban 1500 parts. Prices are unbeatable, so you can keep more in your pocket. Every OEM Chevrolet Suburban 1500 Brake Rotor includes a manufacturer's warranty. You can also get an easy return policy that keeps buying risk free. Fast delivery, get your car on the road quickly. It's simple to search, compare, and order. Stop guessing about quality or fit. Order today and save with parts that last.
Related Chevrolet Suburban 1500 Parts
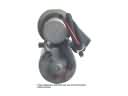 Chevrolet Suburban 1500 ABS Pump And Motor Assembly
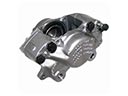 Chevrolet Suburban 1500 Brake Caliper
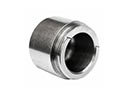 Chevrolet Suburban 1500 Brake Caliper Piston
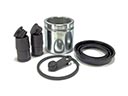 Chevrolet Suburban 1500 Brake Caliper Repair Kit
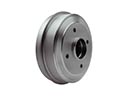 Chevrolet Suburban 1500 Brake Drum
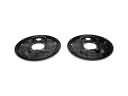 Chevrolet Suburban 1500 Brake Dust Shields
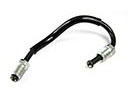 Chevrolet Suburban 1500 Brake Line
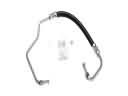 Chevrolet Suburban 1500 Hydraulic Hose
 Chevrolet Suburban 1500 Spindle Nut
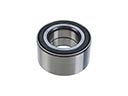 Chevrolet Suburban 1500 Wheel Bearing
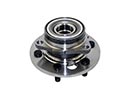 Chevrolet Suburban 1500 Wheel Hub
 Chevrolet Suburban 1500 Wheel Hub Bolt