ChevyParts
My Garage
My Account
Cart
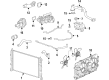
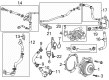
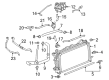
OEM Chevrolet Silverado 1500 Water Pump
H2O Pump- Select Vehicle by Model
- Select Vehicle by VIN
Select Vehicle by Model
orMake
Model
Year
Select Vehicle by VIN
For the most accurate results, select vehicle by your VIN (Vehicle Identification Number).
22 Water Pumps found


Chevrolet Silverado 1500 Water Pump Part Number: 89060527
$235.00 MSRP: $467.47You Save: $232.47 (50%)Ships in 1-3 Business Days


Chevrolet Silverado 1500 Water Pump Part Number: 12685257
$288.51 MSRP: $573.94You Save: $285.43 (50%)


Chevrolet Silverado 1500 Water Pump Part Number: 12681417
$306.70 MSRP: $575.96You Save: $269.26 (47%)


Chevrolet Silverado 1500 Water Pump Part Number: 12685731
$274.10 MSRP: $551.22You Save: $277.12 (51%)Ships in 1-2 Business Days

Chevrolet Silverado 1500 Water Pump Part Number: 12707676
$166.89 MSRP: $506.30You Save: $339.41 (68%)Ships in 1-2 Business Days
Chevrolet Silverado 1500 Water Pump Part Number: 12724892
$209.32 MSRP: $416.40You Save: $207.08 (50%)
Chevrolet Silverado 1500 Water Pump Part Number: 12708893
$209.32 MSRP: $416.40You Save: $207.08 (50%)
Chevrolet Silverado 1500 Water Pump Part Number: 12724894
$248.33 MSRP: $493.99You Save: $245.66 (50%)
Chevrolet Silverado 1500 Pump, Engine Coolant Part Number: 12738952
$179.66 MSRP: $348.00You Save: $168.34 (49%)Ships in 1-2 Business Days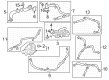
Chevrolet Silverado 1500 Water Pump Part Number: 12718538
$179.66 MSRP: $348.00You Save: $168.34 (49%)Ships in 1-3 Business Days
Chevrolet Silverado 1500 Water Pump Part Number: 40009321
$265.66 MSRP: $498.90You Save: $233.24 (47%)
Chevrolet Silverado 1500 Water Pump Part Number: 13592749
$128.93 MSRP: $233.36You Save: $104.43 (45%)Ships in 1-3 Business Days
Chevrolet Silverado 1500 Water Pump Part Number: 15076931
$139.53 MSRP: $244.78You Save: $105.25 (43%)Ships in 1-2 Business Days
Chevrolet Silverado 1500 Pump, Engine Coolant Part Number: 12712956
$248.33 MSRP: $493.99You Save: $245.66 (50%)Ships in 1-3 Business Days
Chevrolet Silverado 1500 Water Pump Part Number: 12713806
$72.11 MSRP: $128.76You Save: $56.65 (44%)


Chevrolet Silverado 1500 Water Pump Part Number: 12692045
$133.33 MSRP: $239.16You Save: $105.83 (45%)
Chevrolet Silverado 1500 Water Pump Part Number: 12670246
$86.43 MSRP: $154.33You Save: $67.90 (44%)
Chevrolet Silverado 1500 Water Pump Part Number: 15293032
$177.72 MSRP: $318.78You Save: $141.06 (45%)
Chevrolet Silverado 1500 Pump Assembly-Auxiliary Water Part Number: 13549888
$211.81 MSRP: $333.20You Save: $121.39 (37%)
Chevrolet Silverado 1500 Water Pump Part Number: 12685259
$354.90 MSRP: $636.60You Save: $281.70 (45%)
| Page 1 of 2 |Next >
1-20 of 22 Results
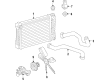
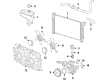
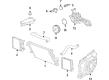
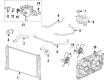
Chevrolet Silverado 1500 Water Pump
Want to cut long-term maintenance and repair costs? Choose OEM Water Pump. Those parts deliver top durability you can trust. On our site, you'll find a huge catalog of genuine Chevrolet Silverado 1500 parts. Prices are unbeatable, so you can keep more in your pocket. Every OEM Chevrolet Silverado 1500 Water Pump includes a manufacturer's warranty. You can also get an easy return policy that keeps buying risk free. Fast delivery, get your car on the road quickly. It's simple to search, compare, and order. Stop guessing about quality or fit. Order today and save with parts that last.
Chevrolet Silverado 1500 Water Pump Parts and Q&A
- Q: How to replace the water pump on a 4.3L engine on Chevrolet Silverado 1500?A:You will need a fan clutch removal tool (J41240) to work on the 4.3l engine Water Pump replacement project. Detach the air cleaner outlet duct clamp near the mass airflow sensor then disconnect the pcv hose and air cleaner adapter nut. Push the air cleaner outlet duct upwards to pop out its clasp from the Throttle Body edge. Open the cooling system drains then remove the cooling fan and belt. Move radiator outlet hose clamps from surge tank to Water Pump location and take off hose from both devices. Realign the Water Pump inlet clamp fasteners before you pull out the inlet hose assembly. Using the j41240 fan clutch tool, grasp the Water Pump Pulley and unscrew its bolts before removing all Water Pump screws to extract the Water Pump. Remove and throw away the old Water Pump gaskets before cleaning and inspecting the Water Pump. During bolt reuse apply gm p/n 12346004 sealant (Canadian P/N 10953480) to Water Pump bolt threads. Place new Water Pump gaskets properly on the pump surface and attach the Water Pump while using the right fasteners at their designated positions. Secure the Water Pump Pulley with the fan clutch remover and installer j41240 tool. Next, fasten and tighten the Water Pump bolts to 33 ft. Lbs. (45 Nm). Bring forward the hose clamp tangs on the Water Pump side and position the top clamp at the same level as the Water Pump inlet hose outer edge before installing both pieces. Attach the radiator outlet hose to its connections on the Water Pump and surge tank while setting the clamps correctly. Turn the cooling fan in place with the Drive Belt installed before sinking the mounting stud through the Throttle Body opening and lowering the air cleaner outlet duct into position. Secure the pcv hose and air cleaner adapter nut. Also tighten the maf/iat sensor air cleaner outlet duct clamp to 35 inch lbs. To finish the assembly process you should top off the cooling system and look for fluid leaks.

Related Chevrolet Silverado 1500 Parts
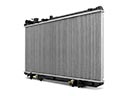 Chevrolet Silverado 1500 Radiator
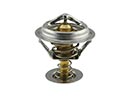 Chevrolet Silverado 1500 Thermostat
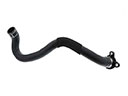 Chevrolet Silverado 1500 Coolant Pipe
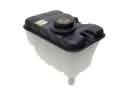 Chevrolet Silverado 1500 Coolant Reservoir
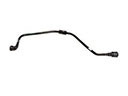 Chevrolet Silverado 1500 Coolant Reservoir Hose
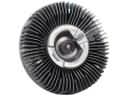 Chevrolet Silverado 1500 Fan Clutch
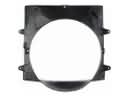 Chevrolet Silverado 1500 Fan Shroud
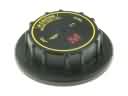 Chevrolet Silverado 1500 Radiator Cap
 Chevrolet Silverado 1500 Radiator Drain Plug
 Chevrolet Silverado 1500 Radiator fan
 Chevrolet Silverado 1500 Radiator Hose
 Chevrolet Silverado 1500 Water Hose