ChevyParts
My Garage
My Account
Cart
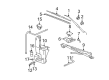
OEM Chevrolet Silverado 1500 Washer Reservoir
Windshield Washer Reservoir- Select Vehicle by Model
- Select Vehicle by VIN
Select Vehicle by Model
orMake
Model
Year
Select Vehicle by VIN
For the most accurate results, select vehicle by your VIN (Vehicle Identification Number).
8 Washer Reservoirs found


Chevrolet Silverado 1500 Washer Reservoir Part Number: 23283669
$41.89 MSRP: $69.01You Save: $27.12 (40%)Ships in 1-2 Business Days
Chevrolet Silverado 1500 Washer Reservoir Part Number: 85132955
$63.48 MSRP: $99.40You Save: $35.92 (37%)Ships in 1-3 Business Days
Chevrolet Silverado 1500 Reservoir Part Number: 20999333
$19.86 MSRP: $32.72You Save: $12.86 (40%)Ships in 1-2 Business DaysChevrolet Silverado 1500 Washer Reservoir Part Number: 84991494
$50.25 MSRP: $89.74You Save: $39.49 (44%)Ships in 1-3 Business Days
Chevrolet Silverado 1500 Washer Reservoir Part Number: 20999339
$50.00 MSRP: $89.28You Save: $39.28 (44%)Ships in 1-2 Business Days
Chevrolet Silverado 1500 Washer Reservoir Part Number: 15942521
$50.00 MSRP: $89.28You Save: $39.28 (44%)Ships in 1-2 Business Days


Chevrolet Silverado 1500 Washer Reservoir Part Number: 12487670

Chevrolet Silverado 1500 Washer Reservoir Part Number: 12487669
$47.99 MSRP: $85.70You Save: $37.71 (44%)
Chevrolet Silverado 1500 Washer Reservoir
Want to cut long-term maintenance and repair costs? Choose OEM Washer Reservoir. Those parts deliver top durability you can trust. On our site, you'll find a huge catalog of genuine Chevrolet Silverado 1500 parts. Prices are unbeatable, so you can keep more in your pocket. Every OEM Chevrolet Silverado 1500 Washer Reservoir includes a manufacturer's warranty. You can also get an easy return policy that keeps buying risk free. Fast delivery, get your car on the road quickly. It's simple to search, compare, and order. Stop guessing about quality or fit. Order today and save with parts that last.
Chevrolet Silverado 1500 Washer Reservoir Parts and Q&A
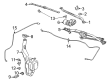
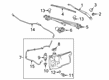
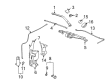
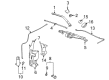
- Q: How to replace the windshield washer reservoir on Chevrolet Silverado 1500?A:When replacing the windshield washer solvent container start by jacking up the vehicle and removing both the left front wheel assembly and wheelhouse liner before you can lower it down. Before working on the vehicle you should remove the lower outer bolt from the washer container. Unplug the pump lines (1, 2) from the left side fender flange and let the washer solvent collect in a proper container. First disconnect electrical wires then lower the vehicle to the hood area and unlock the hood. Take off the windshield washer solvent cap and the auxiliary battery tray if present before removing the bolt that holds the upper windshield washer container below the battery tray. First separate the washer container from the bottom of the vehicle through the wheelhouse before taking out all the upper windshield washer solvent container bolts and its complete assembly. Put Washer Pumps and level indicator parts on new washer solvent container before attaching the windshield washer system components. Secure the washer bolt to the auxiliary battery tray if present and make sure to fasten the upper windshield solvent container bolts to 9 n.m tension. Attach the Washer Pump hoses (1, 2) after joining the electrical plugs and placing on the windshield solvent cap. Put the lower outer washer bolt in place and install both wheelhouse pieces and wheel components before adding windshield solvent to the washer container.

Related Chevrolet Silverado 1500 Parts
 Chevrolet Silverado 1500 Dash Panel Vent Portion Covers
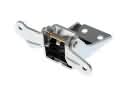 Chevrolet Silverado 1500 Door Hinge
 Chevrolet Silverado 1500 Door Striker
 Chevrolet Silverado 1500 Fuel Filler Housing
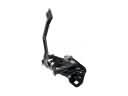 Chevrolet Silverado 1500 Hood Latch
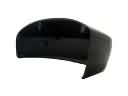 Chevrolet Silverado 1500 Mirror Cover
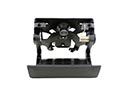 Chevrolet Silverado 1500 Tailgate Handle
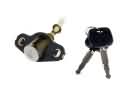 Chevrolet Silverado 1500 Trunk Lock Cylinder
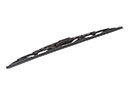 Chevrolet Silverado 1500 Windshield Wiper
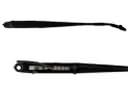 Chevrolet Silverado 1500 Wiper Arm
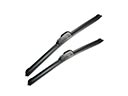 Chevrolet Silverado 1500 Wiper Blade
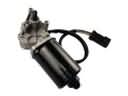 Chevrolet Silverado 1500 Wiper Motor