ChevyParts
My Garage
My Account
Cart
OEM Chevrolet Avalanche 1500 ABS Control Module
Anti Lock Brake Control Module- Select Vehicle by Model
- Select Vehicle by VIN
Select Vehicle by Model
orMake
Model
Year
Select Vehicle by VIN
For the most accurate results, select vehicle by your VIN (Vehicle Identification Number).
10 ABS Control Modules found


Chevrolet Avalanche 1500 Control Module Part Number: 19244895
$987.85 MSRP: $1593.66You Save: $605.81 (39%)Ships in 1-2 Business Days
Chevrolet Avalanche 1500 Control Module Part Number: 19244897
$761.07 MSRP: $1206.65You Save: $445.58 (37%)Ships in 1-2 Business Days


Chevrolet Avalanche 1500 Pressure Valve Part Number: 88983913


Chevrolet Avalanche 1500 Pressure Valve Part Number: 19149234


Chevrolet Avalanche 1500 Pressure Valve Part Number: 19122463

Chevrolet Avalanche 1500 Modulator Valve Part Number: 89027166

Chevrolet Avalanche 1500 Control Module Part Number: 88982365

Chevrolet Avalanche 1500 Control Module Part Number: 19244903
Chevrolet Avalanche 1500 Modulator Valve Part Number: 19121925
Chevrolet Avalanche 1500 Pressure Valve Part Number: 15269817
Chevrolet Avalanche 1500 ABS Control Module
Want to cut long-term maintenance and repair costs? Choose OEM ABS Control Module. Those parts deliver top durability you can trust. On our site, you'll find a huge catalog of genuine Chevrolet Avalanche 1500 parts. Prices are unbeatable, so you can keep more in your pocket. Every OEM Chevrolet Avalanche 1500 ABS Control Module includes a manufacturer's warranty. You can also get an easy return policy that keeps buying risk free. Fast delivery, get your car on the road quickly. It's simple to search, compare, and order. Stop guessing about quality or fit. Order today and save with parts that last.
Chevrolet Avalanche 1500 ABS Control Module Parts and Q&A
- Q: How to Replace the ABS Control Module in a Brake Pressure Modulator Valve (BPMV) System on Chevrolet Avalanche 1500?A:Beginning bpmv replacement requires a first step of cleaning the electric hydraulic control unit (EHCU) space to stop abs component contamination. Eliminate any dirt surrounding the ehcu before you detach the electric connector which is connected to the electronic brake control module (EBCM) . The process to disconnect the Brake Lines from the bpmv requires tagging and proper orderly organization of the lines. Remove the bolts holding the ehcu mounting bracket on the frame rail until the ehcu becomes accessible for removal from the vehicle. After removing bolts that secure the ehcu mounting bracket to the bpmv the next step is removing bolts from the ebcm that might require gentle force for extraction. Uses of pry tools against ebcm or bpmv are forbidden to avoid damage, while new bolts must replace all ebcm mounting hardware. The ebcm mounting surfaces must be cleaned with a new clean cloth before working with the bpmv. Install the ebcm onto the bpmv while using new ebcm bolts which need to be tightened to 5 nm (39 inch lbs.) using an x-pattern. Exclude rtv and all other sealer substances from ebcm gasket surfaces during assembly. Install the bpmv onto the ehcu bracket using new bolts that you should tighten to 9 nm (7 ft. Lbs.). Reinstall the ehcu onto the vehicle frame before tightening all ehcu bracket bolts to 25 nm (18 ft. Lbs.). The ebcm requires connection of its electrical connectors and the brake pipes need to be positioned correctly by the plastic frame bracket before they are installed onto the bpmv with fittings torqued to 25 nm (18 ft. Lbs.). Conclude the task by performing abs automated bleed procedure (W/JL4).

Related Chevrolet Avalanche 1500 Parts
 Chevrolet Avalanche 1500 ABS Sensor
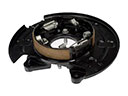 Chevrolet Avalanche 1500 Brake Backing Plate
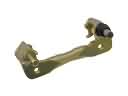 Chevrolet Avalanche 1500 Brake Caliper Bracket
 Chevrolet Avalanche 1500 Brake Calipers
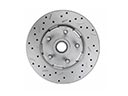 Chevrolet Avalanche 1500 Brake Disc
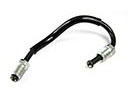 Chevrolet Avalanche 1500 Brake Line
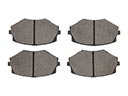 Chevrolet Avalanche 1500 Brake Pad
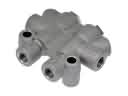 Chevrolet Avalanche 1500 Brake Proportioning Valve
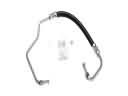 Chevrolet Avalanche 1500 Hydraulic Hose
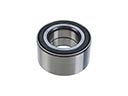 Chevrolet Avalanche 1500 Wheel Bearing
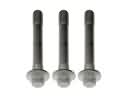 Chevrolet Avalanche 1500 Wheel Hub Bolt
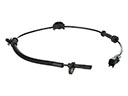 Chevrolet Avalanche 1500 Wheel Speed Sensor