ChevyParts
My Garage
My Account
Cart
OEM Cadillac SRX Trailing Arm
Trailing Control Arm- Select Vehicle by Model
- Select Vehicle by VIN
Select Vehicle by Model
orMake
Model
Year
Select Vehicle by VIN
For the most accurate results, select vehicle by your VIN (Vehicle Identification Number).
8 Trailing Arms found


Cadillac SRX Upper Control Arm, Rear Driver Side Part Number: 15267619
$121.39 MSRP: $199.96You Save: $78.57 (40%)Ships in 1-2 Business Days

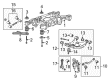
Cadillac SRX Lower Control Arm, Rear Driver Side Part Number: 15853188
$252.65 MSRP: $416.21You Save: $163.56 (40%)Ships in 1-2 Business Days

Cadillac SRX Lower Control Arm, Rear Passenger Side Part Number: 15853187
$252.65 MSRP: $416.21You Save: $163.56 (40%)Ships in 1-2 Business Days
Cadillac SRX Upper Control Arm, Rear Passenger Side Part Number: 15267620
$124.73 MSRP: $198.03You Save: $73.30 (38%)Ships in 1-2 Business Days

Cadillac SRX Lower Control Arm, Rear Driver Side Part Number: 25768320

Cadillac SRX Trailing Arm, Rear Passenger Side Part Number: 25721399
Cadillac SRX Trailing Arm, Rear Driver Side Part Number: 25716358
Cadillac SRX Trailing Arm
Want to cut long-term maintenance and repair costs? Choose OEM Trailing Arm. Those parts deliver top durability you can trust. On our site, you'll find a huge catalog of genuine Cadillac SRX parts. Prices are unbeatable, so you can keep more in your pocket. Every OEM Cadillac SRX Trailing Arm includes a manufacturer's warranty. You can also get an easy return policy that keeps buying risk free. Fast delivery, get your car on the road quickly. It's simple to search, compare, and order. Stop guessing about quality or fit. Order today and save with parts that last.
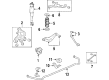
The Cadillac SRX Trailing Arm is the part of the complicated suspension system of a car that proves crucial in improving the machinery's dependability and efficacy. The Trailing Arm of the car is supposed to link the axle to the body, and small axle movement is unneeded- this component helps to enhance the car stability and its controllability. Cadillac has developed the SRX in two generations, the Trailing Arm was employed in the three row seven passengers production of 2003 to2009 and in the two row five passengers of the 2010 to 2016 models. The proposed scheme of compatibility across radically different models of SRX assumes the key role of the Trailing Arm in preserving the car's performance and safety. The Cadillac SRX Trailing Arm is designed to accommodate a semi-trailing arm suspension and more flexibility of the wheel which has its own rotation capability and it this has created more roominess in the interiors and on-road comfortableness. Pros of the Cadillac SRX like sophisticated and durable interior components, wealthy safety features and good towing facility are backed up by technicalities of the Trailing Arm. This component improves the general drive quality of the car while keeping the Cadillac SRX as one of the market's favorites in the luxury SUV category. In both arrangements of power, luxury, and safety, Cadillac SRX Trailing Arm addresses Cadillacs' drive for quality automobile manufacturing.
Cadillac SRX Trailing Arm Parts and Q&A
- Q: How to replace the trailing arm on Cadillac SRX?A:First, lift and support the vehicle to replace the Trailing Arm. Once removed, take off the tire and wheel, then disconnect the automatic level control link from the upper Control Arm. Then, unbolt the brake pipe bracket retaining nuts and bracket from mounting studs. Lift the lower Control Arm with use of a suitable jack and remove the trailing link to knuckle nut and bolt. With the jack removed, support the frame with an appropriate jack, and take out the front bolts in the frame in order to drop the front of the rear frame. Remove the trailing link to frame nut and bolt, then replace the trail link from the vehicle. For installation, start by fitting the trailing link to the vehicle loosely, followed by the fitting of the trailing link to frame bolt and nut. Lift the frame using an appropriate jack and follow fastener caution guidelines. Mount the front bolts to the frame and tighten them up to 265 nm (195 lb ft) and then remove the jack. Crank up on a suitable jack to hold the lower Control Arm to align the trailing link, knuckle, then install the link to knuckle bolt and nut. Tighten trials linking to frame nut to 150n m (111 lb ft) and trails linking to nuckle mounting bolt to 170 nm(125 lb ft). Replace the brake pipe bracket onto the mounting studs as well as tighten the retaining nuts to 10 nm (89 lb in), and finally connect the automatic level control link up to the upper Control Arm. Lastly, install the tire and wheel back and before reducing the vehicle.

Related Cadillac SRX Parts
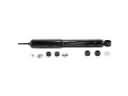 Cadillac SRX Shock Absorber
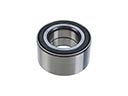 Cadillac SRX Wheel Bearing
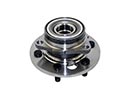 Cadillac SRX Wheel Hub
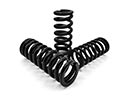 Cadillac SRX Coil Springs
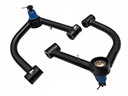 Cadillac SRX Control Arm
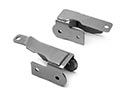 Cadillac SRX Control Arm Bracket
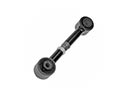 Cadillac SRX Lateral Link
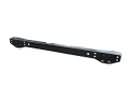 Cadillac SRX Rear Crossmember
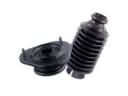 Cadillac SRX Shock and Strut Boot
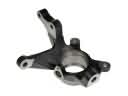 Cadillac SRX Steering Knuckle
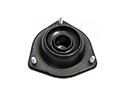 Cadillac SRX Strut Mounts
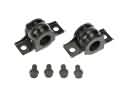 Cadillac SRX Sway Bar Bracket