ChevyParts
My Garage
My Account
Cart
OEM Cadillac Idle Control Valve
IACV- Select Vehicle by Model
- Select Vehicle by VIN
Select Vehicle by Model
orMake
Model
Year
Select Vehicle by VIN
For the most accurate results, select vehicle by your VIN (Vehicle Identification Number).
12 Idle Control Valves found


Cadillac Idle Speed Control Part Number: 88893284
$291.00 MSRP: $546.48You Save: $255.48 (47%)Ships in 1-2 Business DaysProduct Specifications- Other Name: Valve Kit, Throttle Body/Carburetor; Idle Air Control Valve

Cadillac Idle Speed Control Part Number: 19333273
$138.00 MSRP: $220.80You Save: $82.80 (38%)Ships in 1-2 Business DaysProduct Specifications- Other Name: Valve Assembly, Idle Air Control; Fuel Injection Idle Air Control Valve; Idle Air Control Valve; Valve Kit, Throttle Body/Carburetor
- Replaces: 17113188

Cadillac Idle Speed Control Part Number: 19333272
$147.86 MSRP: $210.28You Save: $62.42 (30%)Ships in 1-2 Business DaysProduct Specifications- Other Name: Valve Assembly, Idle Air Control; Fuel Injection Idle Air Control Valve; Idle Air Control Valve; Valve Kit, Throttle Body/Carburetor
- Replaces: 17111788, 17113099


Cadillac Idle Speed Control Part Number: 17112866
$155.75 MSRP: $279.38You Save: $123.63 (45%)Product Specifications- Other Name: Actuator, Multi Portion Fuel Injection Idle Air; Idle Air Control Valve; Idle Control Motor; Idle Speed Control Motor; Actuator
- Replaces: 17112599


Cadillac Idle Air Control Valve Part Number: 25527077
Product Specifications- Other Name: Valve Kit, Throttle Body/Carburetor
- Replaces: 17111288, 17111460


Cadillac Idle Speed Control Part Number: 17113209
Product Specifications- Other Name: Valve Kit, Throttle Body/Carburetor; Idle Air Control Valve


Cadillac Idle Speed Control Part Number: 17113598
Product Specifications- Other Name: Valve Kit, Throttle Body/Carburetor; Idle Air Control Valve
Cadillac Idle Air Control Valve Part Number: 17111460
Product Specifications- Other Name: Idle Speed Control
- Replaced by: 25527077

Cadillac Idle Speed Control Part Number: 17113388
Product Specifications- Other Name: Valve Kit, Throttle Body/Carburetor; Idle Air Control Valve
- Replaces: 17113208
Cadillac Idle Speed Control Motor Part Number: 17111714
Product Specifications- Other Name: Actuator, Multi Portion Fuel Injection Idle Air; Idle Control Motor; Control Kit, Multi Portion Fuel Injection Idle Air
Cadillac Control Module Part Number: 17111170
Product Specifications- Other Name: Valve Assembly, Throttle Body Injector Idle Air Control; Idle Air Control Valve; Idle Speed Control
- Replaces: 17111169

Cadillac Idle Speed Control Part Number: 9181335
Product Specifications- Other Name: Valve, Idle Air Control; Idle Air Control Valve; Valve, Throttle Body/Carburetor
Cadillac Idle Control Valve
Choose OEM Idle Control Valve, you're making the optimal decision for superior quality and perfect performance. You can feel confident because each component goes through stringent quality checks. Every part is carefully built to comply with Cadillac's factory specifications. You'll enjoy a smooth, worry-free installation that fits just right. At ChevyPartsDeal.com, you'll find it easy to get top-quality OEM Cadillac Idle Control Valve. You can shop at highly competitive prices and protect your budget. All our genuine Cadillac parts include a dependable manufacturer's warranty. You'll also appreciate our straightforward return policy and swift delivery services for extra convenience.
Cadillac Idle Control Valve ensures a smooth idle by ensuring that the engine breathes whenever the car is not moving. Cadillac is luxury that is not flashy, but embraces the practicality of the road and targets the comforts of the real world, coating the cabin with soft seats and authentic fabrics that get better with age and run crisp screens and bright crests that signal status without screaming, making the cabin atmosphere consistent regardless of years in the garage. Since the early runabouts of 1902 to the glass-roofed Celestiq flagship of the present day, Cadillac has continued to fine-tune the design, ride, and digital interfaces to be on top of trends, and it proves that innovation does not add complexity but comfort, and the badge has become a shortcut to cars that look good, drive well, and encourage any occupant to sit down and rest. The Idle Control Valve is an electrically actuated throttle-body gate that meters bypass air around the throttle plate which chatters nonstop with the ECU, positioning its pintle in or out, which makes the engine hold target rpm rather than hunt or stall, and can be stuck by dirt foulage of the passage and create surging or an astronomical idle. When adjusted properly, Cadillac engines allow the Idle Control Valve to lapse into the back drop and the drivers can experience serene, stable idle, and the Idle Control Valve plays a crucial role in this process.
Cadillac Idle Control Valve Parts and Q&A
- Q: How to replace the Idle Control Valve on Cadillac DeVille?A:The initial procedure to replace the Idle Control Valve requires removal of the electrical connector from the Idle Control Valve along with detachment of the Idle Control Valve attaching screws from the valve. The next step involves extracting the Idle Control Valve from the Throttle Body while also taking away its o-ring. Installation starts by installing an Idle Control Valve o-ring before placing the Idle Control Valve into the Throttle Body and following fastener notice in service precautions. The Idle Control Valve attaching screws must be secured to the Idle Control Valve with a torque of 3 n.m (27 lb in). The Idle Control Valve electrical connector must be reattached to its housing. The powertrain control module (PCM) controls a reset of the Idle Control Valve after the Ignition Switch has both been turned on and off. When the Idle Control Valve learn is necessary, first enable the Ignition Switch on and then off; afterward begin the engine and let it idle for 15 seconds before switching the ignition to the lock/off position, allowing 15 more seconds of standstill before restarting the engine for an idle check.
- Q: How to replace the Idle Control Valve on Cadillac Escalade?A:First you must detach the Idle Control Valve harness connector and take out the fasteners holding the valve. Do not try to move the Idle Control Valve by pushing or pulling its pintle and ensure you never use any liquid or solvent cleaner when dealing with the Idle Control Valve. After that, take out the Idle Control Valve assembly and its o-ring, clean the Idle Control Valve's o-ring sealing surface, the pintle valve seat and the air passage using carburetor cleaner and a brush made for parts cleaning, but do not use a cleaner containing methyl ethyl ketone. Look for any breaks, signs of wear or deformation on the Idle Control Valve o-ring and change it if it seems damaged. When replacing the Idle Control Valve, check that it has the same shape and exact size as the former one, because they are designed specifically for the car. Determine the distance between the tip of the Idle Control Valve pintle and the mounting flange; if it is longer than 28 mm, use your fingers to gently pull back the pintle without hurting it. Put a little engine oil on the Idle Control Valve o-ring, set the Idle Control Valve assembly in place and attach the parts with 3.0 n.m (26 lb in.) of torque. Eventually, connect the harness for the Idle Control Valve and return its pintle back to its original position.


Related Cadillac Parts
 Cadillac Air Filter
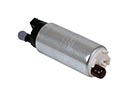 Cadillac Fuel Pump
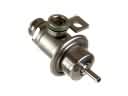 Cadillac Fuel Pressure Regulator
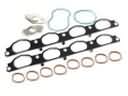 Cadillac Intake Manifold Gasket
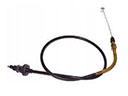 Cadillac Accelerator Cable
 Cadillac Air Duct
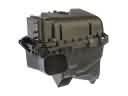 Cadillac Air Filter Box
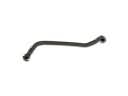 Cadillac Crankcase Breather Hose
 Cadillac Fuel Injector O-Rings
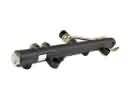 Cadillac Fuel Rail
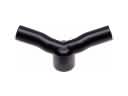 Cadillac PCV Valve Hose
 Cadillac Throttle Cable