ChevyParts
My Garage
My Account
Cart
OEM Cadillac EGR Valve
Emissions EGR Valve- Select Vehicle by Model
- Select Vehicle by VIN
Select Vehicle by Model
orMake
Model
Year
Select Vehicle by VIN
For the most accurate results, select vehicle by your VIN (Vehicle Identification Number).
52 EGR Valves found


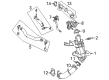
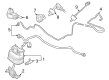
Cadillac EGR Valve Part Number: 89060435
$101.58 MSRP: $316.92You Save: $215.34 (68%)Ships in 1-2 Business DaysProduct Specifications- Other Name: Valve Assembly, EGR; EGR Vacuum Solenoid; Valve, Emission Control System
- Replaces: 12575313, 88894013, 89017647


Cadillac Vent Control Solenoid Part Number: 13575702
$40.06 MSRP: $83.42You Save: $43.36 (52%)Ships in 1-2 Business DaysProduct Specifications- Other Name: Solenoid Assembly-Evaporator Emission Canister; Vapor Canister Vent Solenoid
- Replaces: 25949889


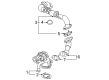
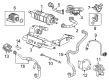
Cadillac EGR Valve Part Number: 19210659
$93.79 MSRP: $190.47You Save: $96.68 (51%)Ships in 1-2 Business DaysProduct Specifications- Other Name: Valve Kit, EGR; EGR Vacuum Solenoid; Valve, Emission Control System
- Replaces: 17112685, 17113382

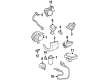
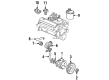
Cadillac EGR Valve Part Number: 12578040
$111.84 MSRP: $348.96You Save: $237.12 (68%)Ships in 1-2 Business DaysProduct Specifications- Other Name: Valve, Emission Control System; EGR Vacuum Solenoid
- Replaces: 17113713, 17113301, 17094028

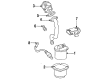
Cadillac EGR Valve Part Number: 55510254
$70.75 MSRP: $147.30You Save: $76.55 (52%)Product Specifications- Other Name: Valve-EGR; EGR Vacuum Solenoid; Valve, Emission Control System

Cadillac EGR Valve Part Number: 55510043
$108.94 MSRP: $226.80You Save: $117.86 (52%)Product Specifications- Other Name: Valve Assembly-EGR; EGR Vacuum Solenoid; Valve, Emission Control System
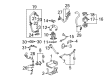
Cadillac EGR Valve Part Number: 19210658
$93.58 MSRP: $190.07You Save: $96.49 (51%)Ships in 1-2 Business DaysProduct Specifications- Other Name: Valve Kit, EGR; EGR Vacuum Solenoid; Valve, Emission Control System
- Replaces: 17113381, 17112684

Cadillac Solenoid Valve Part Number: 21994122
$35.49 MSRP: $66.65You Save: $31.16 (47%)Ships in 1-2 Business DaysProduct Specifications- Other Name: Solenoid Assembly; Evaporator Emission Canister; Intake Manifold Runner Control; Vapor Canister Purge & Vent Solenoids
- Replaces: 25675824

Cadillac Purge Valve Part Number: 12666840
$12.91 MSRP: $23.36You Save: $10.45 (45%)Ships in 1-3 Business DaysProduct Specifications- Other Name: Valve, Fuel Tank Evaporator/Purge Control; Vapor Canister Purge and Vent Solenoids.; Purge Solenoid

Cadillac Solenoid Valve Part Number: 25949410
$259.02 MSRP: $468.82You Save: $209.80 (45%)Ships in 1-2 Business DaysProduct Specifications- Other Name: Valve, Evaporation Emission System (Fuel Tank End); Vapor Canister Vent Solenoid

Cadillac EGR Valve Part Number: 17112582
$81.56 MSRP: $147.62You Save: $66.06 (45%)Ships in 1-2 Business DaysProduct Specifications- Other Name: Valve Assembly, EGR; EGR Vacuum Solenoid
- Replaced by: 19210678


Cadillac EGR Valve Solenoid Part Number: 1997173
Product Specifications- Other Name: Solenoid Assembly-EGR Control Valve Relay; EGR Vacuum Solenoid; EGR Valve; Solenoid; Solenoid, Emission Control System


Cadillac Throttle Position Sensor Part Number: 12576918
Product Specifications- Other Name: Valve, Emission Control System; EGR Vacuum Solenoid; EGR Valve; Valve, Emission Control System(EGR Control)
- Replaces: 17096188, 17113575, 12568582, 17113278, 17113615, 17093020, 17113619, 17113405, 17113618, 17113303

Cadillac EGR Valve Part Number: 17112039
Product Specifications- Other Name: Valve-EGR; EGR Vacuum Solenoid; EGR; Valve, Emission Control System
Cadillac Vacuum Control Solenoid Part Number: 1997223
Product Specifications- Other Name: Solenoid Assembly-EGR Control Valve Relay; EGR Vacuum Solenoid; Solenoid; Solenoid, Emission Control System
Cadillac EGR Valve Part Number: 19210678
$82.67 MSRP: $147.62You Save: $64.95 (44%)Product Specifications- Other Name: Valve Kit, EGR; EGR Vacuum Solenoid; Valve, Emission Control System
- Replaces: 17113506, 17112582

Cadillac EGR Valve Part Number: 19210671
$91.07 MSRP: $162.60You Save: $71.53 (44%)Product Specifications- Other Name: Valve Kit, EGR; EGR Vacuum Solenoid; Valve, Emission Control System
- Replaces: 17112236, 17113378, 17112581, 17112235

Cadillac Pressure Sensor Part Number: 55514983
$163.46 MSRP: $293.20You Save: $129.74 (45%)Product Specifications- Other Name: Valve Assembly-Exhaust Back Pressure; Exhaust Gas Differential Pressure Sensor; Pressure Valve; Valve, Emission Control System
- Replaces: 55510137


Cadillac EGR Valve Part Number: 17112059
Product Specifications- Other Name: Valve, EGR; EGR Vacuum Solenoid; Valve, Emission Control System

Cadillac Purge Valve Part Number: 25669529
Product Specifications- Other Name: Valve-Evaporator Emission Canister Vent Solenoid; Valve, Fuel Tank Evaporator/Purge Control
| Page 1 of 3 |Next >
1-20 of 52 Results
Cadillac EGR Valve
Choose OEM EGR Valve, you're making the optimal decision for superior quality and perfect performance. You can feel confident because each component goes through stringent quality checks. Every part is carefully built to comply with Cadillac's factory specifications. You'll enjoy a smooth, worry-free installation that fits just right. At ChevyPartsDeal.com, you'll find it easy to get top-quality OEM Cadillac EGR Valve. You can shop at highly competitive prices and protect your budget. All our genuine Cadillac parts include a dependable manufacturer's warranty. You'll also appreciate our straightforward return policy and swift delivery services for extra convenience.
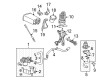
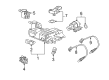
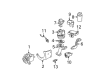
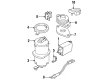
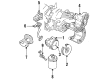
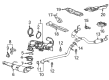
Cadillac EGR Valve diverted exhaust to combustion in order to cut nitrogen oxides and restrain peak heat. Cadillac has a history of ten years of bold style, luxurious interiors, and technology that is instinctive. Cadillac packs dashboards with clean digital displays and cushions seats with soft cloth materials that can easily deal with cross country miles. Cadillac is also going to extremes with electric flagships such as the Celestiq, which demonstrates that luxury can stroll with zero tailpipe burps. Swallowing potholes but keeping steering tight when the road turns, body roll is kept low when corners turn in unexpectedly, drivers enjoy suspension tuning. The badge is an indicator of assurance, making daily shopping an event to look forward to due to even distribution of weights and fast power supply. The EGR Valve is mounted in the engine bay and it measures backpressure, throttle position, and measures the amount of recycled gas to ensure that combustion is cooler, cleaner, and more stable even in the face of sudden load changes at highway velocities. Contemporary EGR Valve design utilizes intelligent transducers to adjust flow rather than the crude fixed jets of the early system and is accurate in a wide range of rpm and ambient temperatures. Frequent cleaning of the carbon ensures that the EGR Valve passages remain open and that the emissions of the vehicle are controlled well even during the long periods of ownership.
Cadillac EGR Valve Parts and Q&A
- Q: How to service the EGR Valve without disassembling it on Cadillac Escalade?A:The service procedure requires not dissassembling the linear exhaust gas recirculation (EGR) valve due to its assembly-only servicing requirements. Before beginning removal process maintain a record of the EGR Valve orientation because it should not face in a 180-degree direction. First disconnect the negative Battery Cable then disconnect the EGR Valve harness connector before performing any service operations since soaking the linear EGR Valve in solvent cleaners may result in damage. Start by removing the flange gasket followed by the linear EGR Valve itself before proceeding to disconnect the valve to flange attaching bolts. Prepare the linear EGR Valve gasket surface before adding it into place for installation. Install a new flange gasket followed by the linear EGR Valve into position before torquing the valve to flange bolts at 10 n.m (89 lb in.) each and finally tightening them to 25 n.m (18 lb ft) each. The last step involves harness reconnection of the EGR Valve and Battery Cable negation.
- Q: How to properly service and replace the EGR Valve on Cadillac DTS?A:A replacement of the exhaust gas recirculation (EGR) valve requires initial removal of fuel injector sight shield when required followed by disconnecting the engine harness electrical connector from the EGR Valve. The egr procedure starts by unscrewing both shield nuts from the egr bracket and then removing the bracket shield before pulling out the EGR Valve by removing its bolts. Discard the worn EGR Valve Gasket before you clean the egr mounting surface of the valve and inspect and clean egr passages inside the water pump housing. Apply new egr gasket before installing the EGR Valve which should be bolted in place with torque at 24 n.m (18 lb ft). Reestablish the egr bracket shield together with its nuts which need tightening to 10 n.m (89 lb in) before connecting the engine harness electrical connector to the EGR Valve and reinstalling the fuel injector sight shield if previously removed.


Related Cadillac Parts
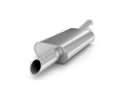 Cadillac Muffler
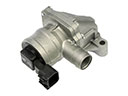 Cadillac Air Pump Check Valve
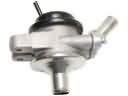 Cadillac Diverter Valve
 Cadillac EGR Tube
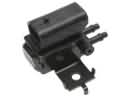 Cadillac EGR Vacuum Solenoid
 Cadillac EGR Valve Gasket
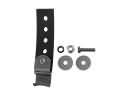 Cadillac Exhaust Hanger
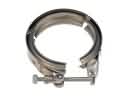 Cadillac Exhaust Manifold Clamp
 Cadillac Exhaust Pipe
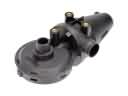 Cadillac PCV Valve
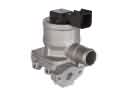 Cadillac Secondary Air Injection Check Valve
 Cadillac Tail Pipe