ChevyParts
My Garage
My Account
Cart
OEM Cadillac DTS Rocker Shaft Spring Kit
Rocker Shaft Spring Set- Select Vehicle by Model
- Select Vehicle by VIN
Select Vehicle by Model
orMake
Model
Year
Select Vehicle by VIN
For the most accurate results, select vehicle by your VIN (Vehicle Identification Number).
1 Rocker Shaft Spring Kit found

Cadillac DTS Valve Springs Part Number: 12565199
$1.68 MSRP: $2.78You Save: $1.10 (40%)Ships in 1-3 Business Days
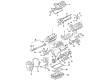
Cadillac DTS Rocker Shaft Spring Kit
Want to cut long-term maintenance and repair costs? Choose OEM Rocker Shaft Spring Kit. Those parts deliver top durability you can trust. On our site, you'll find a huge catalog of genuine Cadillac DTS parts. Prices are unbeatable, so you can keep more in your pocket. Every OEM Cadillac DTS Rocker Shaft Spring Kit includes a manufacturer's warranty. You can also get an easy return policy that keeps buying risk free. Fast delivery, get your car on the road quickly. It's simple to search, compare, and order. Stop guessing about quality or fit. Order today and save with parts that last.
Cadillac DTS Rocker Shaft Spring Kit Parts and Q&A
- Q: How to service and repair the Rocker Shaft Spring Kit and Valve Stem Oil Seal on Cadillac DTS?A:Start the valve guide seal repair process by removing both right Camshafts and supporting the vehicle at its raised position. Take these two elements out first in this order: the engine Oil Pan brace and the transaxle case torque converter cover. Put on the flywheel holder (J44214) first and drop the car afterward. You should sanitize the Spark Plug area first before taking the Spark Plug out of the engine service cylinder. Set the on-vehicle valve spring compressor base plate into the Spark Plug hole while keeping the valve shut using steady compressed air through the Spark Plug port adapter (J39313). Bring the swivel nut of the valve spring compressor j44211 next to the valve stud and attach them both before you tighten the swivel nut enough to access the valve locks. Use a magnet tool to take out these valves. Uncork the swivel nut to turn the arm around then extract the valve spring retainer and valve spring. The valve stem seal remover and installer (J38820) tool helps you remove the old valve stem seal and grip the assembly. You should discard the old seal and check the valve spring. Apply new seal by turning the valve stem seal remover and installer (J38820) while the valve stem and seal get oily treatment with engine oil. Push the retaining arm over the valve components and fasten the nut just enough to set the valve locks as you move the valve retainer remover/installer (J43059). Unfasten the swivel nut and arm from the on-vehicle valve spring compressor (J44211) device. Empty the air pressure and take off the adapter (J39313) and base plate from the Spark Plug hole. Put the new Spark Plug in place and do the same procedures at all remaining cylinders during service. Complete the procedure by reinserting the camshafts rightside up and then placing the vehicle in its elevated position. Then take away the flywheel holder (J44214), attach the torque converter cover, and fasten the Oil Pan to transaxle brace through bolt tightening at 50 nm (37 ft. Lbs.). Finally, lower the vehicle.

Related Cadillac DTS Parts
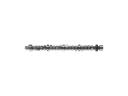 Cadillac DTS Camshaft
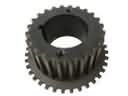 Cadillac DTS Crankshaft Gear
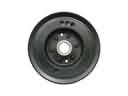 Cadillac DTS Harmonic Balancer
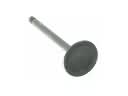 Cadillac DTS Intake Valve
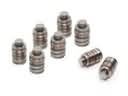 Cadillac DTS Lash Adjuster
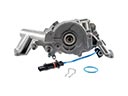 Cadillac DTS Oil Pump
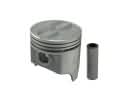 Cadillac DTS Piston
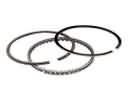 Cadillac DTS Piston Ring Set
 Cadillac DTS Timing Chain
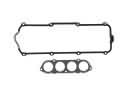 Cadillac DTS Valve Cover Gasket
 Cadillac DTS Valve Cover Grommet
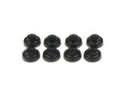 Cadillac DTS Valve Stem Seal