ChevyParts
My Garage
My Account
Cart
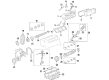
OEM Buick Rod Bearing
Engine Connecting Rod Bearing- Select Vehicle by Model
- Select Vehicle by VIN
Select Vehicle by Model
orMake
Model
Year
Select Vehicle by VIN
For the most accurate results, select vehicle by your VIN (Vehicle Identification Number).
51 Rod Bearings found


Buick Bearings Part Number: 12482060
$20.32 MSRP: $40.81You Save: $20.49 (51%)Product Specifications- Other Name: Bearing Kit, Connecting Rod; Rod Bearing; Bearing Kit, Engine Connecting Rod
- Replaces: 12360473, 12482056


Buick Bearing Set, Green Line Part Number: 12591093
$42.83 MSRP: $74.79You Save: $31.96 (43%)Ships in 1-3 Business DaysProduct Specifications- Other Name: Bearing Kit, Connecting Rod; Rod Bearing; Bearings; Bearing Kit, Engine Connecting Rod
- Replaces: 21018825


Buick Connecting Rod Bearing Part Number: 12674806
$2.26 MSRP: $3.72You Save: $1.46 (40%)Ships in 1-2 Business DaysProduct Specifications- Other Name: Bearing Kit, Engine Connecting Rod; Rod Bearing; Bearing Set; Bearings


Buick Bearings Part Number: 12636003
$10.62 MSRP: $17.49You Save: $6.87 (40%)Ships in 1-3 Business DaysProduct Specifications- Other Name: Bearing Kit, Connecting Rod
- Replaces: 12598657

Buick Bearing Part Number: 89017573
$16.45 MSRP: $25.77You Save: $9.32 (37%)Ships in 1-3 Business DaysProduct Specifications- Other Name: Bearing Kit, Connecting Rod; Rod Bearing
- Replaces: 12493712, 12493714


Buick Bearings Part Number: 89017791
$20.96 MSRP: $34.53You Save: $13.57 (40%)Ships in 1-2 Business DaysProduct Specifications- Other Name: Bearing Kit, Connecting Rod; Rod Bearing; Bearing Kit, Engine Connecting Rod
- Replaces: 12482716


Buick Connecting Rod Bearing Part Number: 12559363
$26.20 MSRP: $43.16You Save: $16.96 (40%)Ships in 1-2 Business DaysProduct Specifications- Other Name: Bearing Kit, Connecting Rod; Rod Bearing
- Replaces: 3543901, 03543901


Buick Bearing Kit, Engine Crankshaft Main Part Number: 12668646
$33.28 MSRP: $54.82You Save: $21.54 (40%)Ships in 1-2 Business DaysProduct Specifications- Other Name: Bearing Set
- Replaces: 12655137, 12652755


Buick Bearing Kit, Engine Connecting Rod Part Number: 12668645
$12.62 MSRP: $20.04You Save: $7.42 (38%)Ships in 1-3 Business DaysProduct Specifications- Other Name: Bearing Set
- Replaces: 12652806, 12657438


Buick Connecting Rod Bearing Part Number: 12643667
$11.33 MSRP: $17.76You Save: $6.43 (37%)Ships in 1-2 Business DaysProduct Specifications- Other Name: Bearing Kit, Engine Connecting Rod; Rod Bearing; Bearing; Bearings


Buick Bearing Set, Blue Part Number: 55568532
$78.19 MSRP: $122.46You Save: $44.27 (37%)Ships in 1-3 Business DaysProduct Specifications- Other Name: Bearing Kit, Engine Connecting Rod; Rod Bearing; Bearing; Bearings


Buick Main Bearings Part Number: 12668199
$19.76 MSRP: $30.95You Save: $11.19 (37%)Product Specifications- Other Name: Bearing Kit, Engine Crankshaft Main; Main Bearing; Bearing Set; Bearings
- Replaced by: 25204450

Buick Connecting Rod Bearing Part Number: 10181335
$16.33 MSRP: $32.80You Save: $16.47 (51%)Product Specifications- Other Name: Bearing Kit, Engine Connecting Rod; Rod Bearing; Bearings

Buick Connecting Rod Bearing Part Number: 12522143
$20.50 MSRP: $41.18You Save: $20.68 (51%)Product Specifications- Other Name: Bearing, Connecting Rod; Rod Bearing; Bearings; Bearing Kit, Engine Connecting Rod
- Replaces: 12329837

Buick Rod Bearings Part Number: 89017700
$15.69 MSRP: $25.84You Save: $10.15 (40%)Ships in 1-2 Business DaysProduct Specifications- Other Name: Bearing Kit, Connecting Rod; Rod Bearing
- Replaces: 12480819, 12537418, 18005399, 89017565

Buick Bearing Set Part Number: 55568531
$13.38 MSRP: $21.25You Save: $7.87 (38%)Product Specifications- Other Name: Bearing Kit, Engine Connecting Rod; Rod Bearing; Bearing; Bearings

Buick Connecting Rod Bearing Part Number: 12523924
$34.44 MSRP: $54.67You Save: $20.23 (37%)Ships in 1 Business DayProduct Specifications- Other Name: Bearing Kit, Connecting Rod; Rod Bearing
- Replaces: 12523927


Buick Thrust Bearing Part Number: 12643668
Product Specifications- Other Name: Bearing Kit, Crankshaft Thrust; Thrust Washer Crankshaft; Main Bearing
- Replaces: 12654817


Buick Bearings Part Number: 89060553
$6.22 MSRP: $9.74You Save: $3.52 (37%)Product Specifications- Other Name: Bearing Kit, Connecting Rod; Rod Bearing; Bearing Kit, Engine Connecting Rod
- Replaces: 12586085


Buick Main Bearings Part Number: 12643670
$18.35 MSRP: $28.74You Save: $10.39 (37%)Product Specifications- Other Name: Bearing Kit, Engine Crankshaft Main; Main Bearing; Bearing; Bearings
- Replaces: 12654816
| Page 1 of 3 |Next >
1-20 of 51 Results
Buick Rod Bearing
Choose OEM Rod Bearing, you're making the optimal decision for superior quality and perfect performance. You can feel confident because each component goes through stringent quality checks. Every part is carefully built to comply with Buick's factory specifications. You'll enjoy a smooth, worry-free installation that fits just right. At ChevyPartsDeal.com, you'll find it easy to get top-quality OEM Buick Rod Bearing. You can shop at highly competitive prices and protect your budget. All our genuine Buick parts include a dependable manufacturer's warranty. You'll also appreciate our straightforward return policy and swift delivery services for extra convenience.
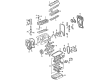
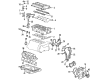
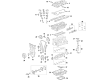
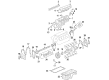
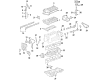
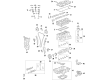
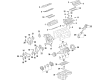
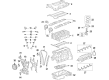
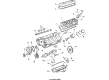
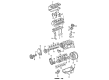
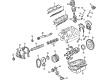
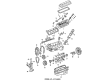
Buick Rod Bearing resulted in the maintenance of a steady oil film under load thereby keeping the engine motion smooth. Buick was founded in 1903 and its name has been established on cars that absorb shocks, silence traffic jams and provide drivers with a comfortable yet confident ride. The brand was combining vintage chrome with the new technology such as silent tuning, cell phone connection, and sharp digital clusters even before the competitors realized. The current Buick demonstrates this anxious tendency with floating the Wildcat EV concept which means the shift to sleek electric coupes without abandoning its DNA of comfort-first. Roadmasters or new crossovers alike, drivers who have grown up with such a badge perceive it as one that guarantees ride composure, simple controls, and styling which does not follow the fashions. Within any of the brand gasoline mills, a Rod Bearing is an object that rides in between crank pin and connecting rod, with a thin pressured oil sleeve, which prevents grind of metals to metals, stabilizes high RPM loads and pounding through layered bi-metallics or tri-metallics construction that scoffs off heat, debris, and sharp spikes of detonation through thousands of start-stop cycles. Properly positioned clearance allows a Rod Bearing to allow the crank to rotate freely, maintain oil temperature within limits, and provide the entire powertrain with some headroom when hard acceleration is required.
Buick Rod Bearing Parts and Q&A
- Q: What additional engine repair information can be found for the service and repair of the connecting rod bearing on Buick Regal?A:For information on repairing and servicing bearing on connecting rods, additional engine repair directions are available elsewhere. When an internal engine component is not given a special service procedure, it shows that the manufacturer has not prepared one. To do engine overhaul, important steps in unit repair include service operations, machining, cleaning, inspection and fitting, including boring and honing the cylinder, fitting connecting rod with bearings, crankshaft with bearings and camshaft bearings, disassembling the connecting rod and Piston, cylinder head, valve-related components and Oil Pump, fitting in Piston and rings and fixing thread damage, as well as valve and seat grinding tasks found during Cylinder Head assembly. Chain, belt and gears are the main parts in timing components service.
- Q: How to Service a Rod Bearing on Buick Century?A:To replace the connecting Rod Bearing, the Oil Pan, Oil Pump and the Crankshaft oil deflector are removed in the first place. Rotate the Crankshaft until the Piston and rod assembly to be maintained is at bottom dead center (BDC), making sure you mark the connecting rod and its cap with matchmarks or numbers for accuracy of reassembly. Take off the connecting rod nuts, the connecting rod cap, the lower connecting Rod Bearing, and do not forget to apply a thread protector to protect the Crankshaft journal. Next, install the connecting rod bolt guide set (J5239) allowing the Piston and connecting rod to be raised up the cylinder so to get to the upper connecting rod that is to be taken out next. Cleaning oil off the connecting rod bearings and Crankshaft connecting rod journal, inspect the connecting rod bearings, connecting rod cap, connecting rod and Crankshaft connecting rod journal. For installation, meet the connecting Rod Bearing's upper part, install the connecting rod and apply its inside surfaces with the new engine oil. By using the connecting rod bolt guide set (J5239), pull the Piston and rod assembly down to the Crankshaft and remove the guide set after which install the lower connecting Rod Bearing in the connecting rod cap, lubricate their inside surfaces with new engine oil as well. I would recheck the angle with electronic torque angle meter (J36660-A) hooked to the connecting rods and turn the nuts an additional 75 degrees while tightening to 20 nm (15 ft. Lbs.) on the lower connecting rod nut and bearing. Measure the connecting rod clearance by loading all the connecting rod bearings into the engine, and tapping each of the connecting rods parallel to the crankpin to decay clearance, follow by measuring the side clearance between the connecting rod caps with the feeler gauge or dial indicator. Lastly, fit the Crankshaft oil deflector, Oil Pump, and Oil Pan.


Related Buick Parts
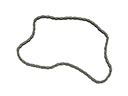 Buick Timing Chain
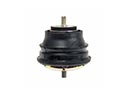 Buick Engine Mount
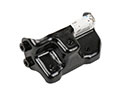 Buick Engine Mount Bracket
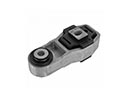 Buick Engine Mount Torque Strut
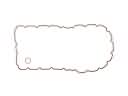 Buick Oil Pan Gasket
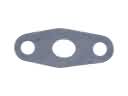 Buick Oil Pump Gasket
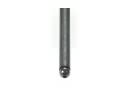 Buick Pushrod
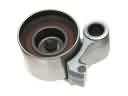 Buick Timing Belt Idler Pulley
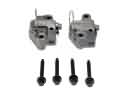 Buick Timing Chain Tensioner
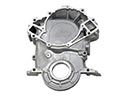 Buick Timing Cover
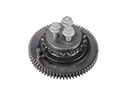 Buick Timing Idler Gear
 Buick Valve Cover Grommet