ChevyParts
My Garage
My Account
Cart
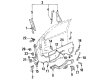
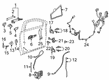
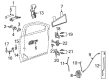
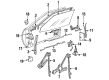
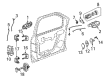
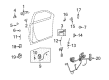
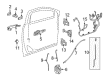
OEM Buick Door Hinge
Interior Door Hinge- Select Vehicle by Model
- Select Vehicle by VIN
Select Vehicle by Model
orMake
Model
Year
Select Vehicle by VIN
For the most accurate results, select vehicle by your VIN (Vehicle Identification Number).
192 Door Hinges found


Buick Hinge Assembly, Front Upper Passenger Side Part Number: 10218445
$57.04 MSRP: $110.64You Save: $53.60 (49%)Product Specifications- Other Name: Hinge Kit, Front Door Upper Hinge; Door Hinge
- Position: Passenger Side


Buick Lower Hinge, Front Part Number: 13583613
$51.69 MSRP: $77.98You Save: $26.29 (34%)Ships in 1-2 Business DaysProduct Specifications- Other Name: Hinge, Front Door Lower Hinge; Door Hinge; Upper Hinge; Hinge, Front Door Upper Hinge
- Position: Front Lower


Buick Lower Hinge, Rear Part Number: 13501716
$71.16 MSRP: $107.35You Save: $36.19 (34%)Ships in 1-2 Business DaysProduct Specifications- Other Name: Hinge, Rear Side Door Lower Hinge; Door Hinge
- Position: Rear Lower
- Replaces: 15932621

Buick Hinge Strap, Driver Side Part Number: 20351021
$48.49 MSRP: $94.05You Save: $45.56 (49%)Product Specifications- Other Name: Strap Assembly; Door Hinge; Hinge; Hinge, Front Door Upper Hinge
- Position: Driver Side

Buick Lower Hinge, Front Driver Side Part Number: 88937052
$146.30 MSRP: $229.00You Save: $82.70 (37%)Ships in 1-2 Business DaysProduct Specifications- Other Name: Hinge Kit, Front Side Door Lower (Door Side); Door Hinge; Hinge Kit, Door Hinge
- Position: Driver Side

Buick Lower Hinge, Front Passenger Side Part Number: 23436138
$117.23 MSRP: $176.85You Save: $59.62 (34%)Ships in 1-2 Business DaysProduct Specifications- Other Name: Hinge, Front Door Lower Hinge; Door Hinge; Hinge, Door Hinge
- Position: Passenger Side
- Replaces: 20877346, 25989940, 15119442
Buick Lower Hinge, Front Passenger Side Part Number: 88937055
$146.01 MSRP: $228.55You Save: $82.54 (37%)Ships in 1-3 Business DaysProduct Specifications- Other Name: Hinge Kit, Front Side Door Lower (Door Side); Door Hinge; Hinge Kit, Door Hinge
- Position: Passenger Side


Buick Lower Hinge, Driver Side Part Number: 88937059
$94.20 MSRP: $134.79You Save: $40.59 (31%)Ships in 1-2 Business DaysProduct Specifications- Other Name: Hinge Kit, Door Hinge; Upper Hinge
- Position: Driver Side

Buick Lower Hinge, Front Driver Side Part Number: 88937053
$133.25 MSRP: $208.58You Save: $75.33 (37%)Ships in 1-2 Business DaysProduct Specifications- Other Name: Hinge Kit, Front Side Door (Body Side); Upper Hinge; Hinge Kit, Door Hinge
- Position: Driver Side

Buick Upper Hinge, Front Passenger Side Part Number: 88937054
$139.73 MSRP: $218.71You Save: $78.98 (37%)Ships in 1-3 Business DaysProduct Specifications- Other Name: Hinge Kit, Front Side Door Upper (Door Side); Door Hinge; Hinge Kit, Door Hinge
- Position: Passenger Side

Buick Upper Hinge, Front Passenger Side Part Number: 25943923
$117.31 MSRP: $176.97You Save: $59.66 (34%)Ships in 1-3 Business DaysProduct Specifications- Other Name: Hinge Assembly-Front Side Door Upper; Door Hinge; Hinge, Door Hinge
- Position: Passenger Side
- Replaces: 15119440
Buick Upper Hinge, Front Passenger Side Part Number: 88937056
$94.92 MSRP: $136.99You Save: $42.07 (31%)Ships in 1-2 Business DaysProduct Specifications- Other Name: Hinge Kit, Front Side Door (Body Side); Door Hinge; Lower Hinge; Hinge Kit, Door Hinge
- Position: Passenger Side

Buick Lower Hinge, Front Part Number: 13505399
$80.99 MSRP: $122.17You Save: $41.18 (34%)Ships in 1-2 Business DaysProduct Specifications- Other Name: Hinge, Front Door Lower Hinge; Door Hinge; Upper Hinge; Hinge, Front Door Upper Hinge
- Position: Front Lower

Buick Lower Hinge, Front Driver Side Part Number: 13389030
$52.35 MSRP: $78.98You Save: $26.63 (34%)Ships in 1-3 Business DaysProduct Specifications- Other Name: Hinge Assembly-Front Side Door Lower (Left-Hand); Door Hinge; Hinge, Front Door Lower Hinge
- Position: Driver Side


Buick Lower Hinge, Front Passenger Side Part Number: 25709766
Product Specifications- Other Name: Hinge, Front Door Lower Hinge; Door Hinge
- Position: Passenger Side
- Replaces: 25695589, 25754599

Buick Lower Hinge, Front Driver Side Part Number: 25709767
$83.94 MSRP: $124.94You Save: $41.00 (33%)Product Specifications- Other Name: Hinge, Front Door Lower Hinge; Door Hinge
- Position: Driver Side
- Replaces: 25695590, 25754600, 25693460

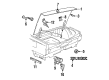
Buick Hinge, Driver Side Part Number: 14064325
Product Specifications- Other Name: Hinge, Hood Panel; Hinge Assembly, Hood Panel
- Position: Driver Side

Buick Hinge, Passenger Side Part Number: 14064326
Product Specifications- Other Name: Hinge Assembly, Hood-Right-Hand; Hinge Assembly, Hood Panel
- Position: Passenger Side

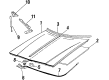
Buick Hinge, Rear Part Number: 12537265
Product Specifications- Other Name: Hinge Kit, Rear Compartment Lid And End Gate; Door Hinge; Hinge Kit, Rear Compartment Lid
- Position: Rear
- Replaces: 25612354, 25612355, 25602096, 25602097

Buick Lower Hinge, Front Driver Side Part Number: 20693419
Product Specifications- Other Name: Hinge, Front Door Lower Hinge; Door Hinge; Hinge
- Position: Driver Side
| Page 1 of 10 |Next >
1-20 of 192 Results
Buick Door Hinge
Choose OEM Door Hinge, you're making the optimal decision for superior quality and perfect performance. You can feel confident because each component goes through stringent quality checks. Every part is carefully built to comply with Buick's factory specifications. You'll enjoy a smooth, worry-free installation that fits just right. At ChevyPartsDeal.com, you'll find it easy to get top-quality OEM Buick Door Hinge. You can shop at highly competitive prices and protect your budget. All our genuine Buick parts include a dependable manufacturer's warranty. You'll also appreciate our straightforward return policy and swift delivery services for extra convenience.
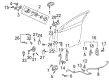
Buick Door Hinge maintains the straightness of doors and smooth closing to prevent sagging and misapplication. The brand was established in 1903 and has been developing ride comfort along roads without ceasing. It took quiet tuning to extremes before cabin silence became a buzzword, allowing conversations to remain normal at highway velocity. Space in the rear seat remains spacious, steering is smooth, and the suspension absorbs potholes without much fuss. Today Buick displays the Wildcat EV concept but has the same thought in mind, which is to mix familiar style with technology that actually assists the driver. The strategy is realistic and does not make flash to flash, thus the badge still promises good value and not hype. It has a consistent reputation based on actual road experience, not slick advertisements, and drivers feel the difference. Long journeys are less exhausting as the cabin is not noisy and the seats are not hard. The Door Hinge is made with hardened steel pins and brass bushings, which were selected due to their ability to shake off years of bangs and beatings. Check straps are implemented to prevent over-opening, preventing the unnecessary use of paint and covering of wiring inside the jamb where they belong. A well-fit component made of this kind maintains the latch and striker in line, hence the door closes properly and road noise remains out of the cabin, enhancing the serene Buick driver personality. Fit it once and the Door Hinge continues to perform its duty without squeaking or sagging, reducing the cost of repair.
Buick Door Hinge Parts and Q&A
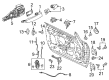
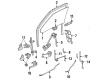
- Q: How to replace the front door hinge on Buick LaCrosse?A:The first step for front door hinge replacement involves using masking tape on the fender and door edges to prevent paint damage. Start by opening the door while supporting it and clean the hinge area before marking its position with a grease pencil. Begin by removing upper hinge bolts according to sequence 1-4 from the door side and proceed with removing upper hinge bolts from the hinge pillar side according to sequence 1-4-5 if the upper hinge is damaged. Start by removing the lower hinge bolts from the door side following a specific order (3 then 2) before continuing to remove these bolts from the hinge pillar side while following (3 then 2) order. Before adding the new hinge you must position it properly along the marks that exist on the door and hinge pillar. Insert the lower hinge bolts onto the hinge pillar side according to sequence (3, 2) before tightening them to 33 N.m (24 lb ft). Follow sequence (3, 2) to install the lower hinge bolts on the door side before tightening them to 33 N.m (24 lb ft). Begin by installing lower hinge bolts to the hinge pillar side using sequence (1, 4, 5) before tightening them to 33 N.m (24 lb ft). The remaining upper hinge bolts to the door side should be installed using sequence (1, 4) and then tightened to 33 N.m (24 lb ft). Check the door after removing its support while examining its functionality and removing the masking tape.
- Q: How to replace the front side door upper and lower door hinges on Buick Regal?A:The first procedure requires opening the front side door and supporting it while performing the replacement. Begin the process by eliminating the bolts that secure the intermediate door hinge and the hinge spring and by pushing the door outward away from the front pillar according to the conduit limits. Mark the position of the hinges on the door mounting surfaces after cleaning them with a grease pencil. First eliminate the bolts from the door side hinge before removing the door side hinge. A body side door hinge functions through four attaching bolts consisting of two 13 mm, one TORX(R) and one 10 mm bolt. Although the cone on the hinge's rear side can detach it does not affect the adjustment process. Mark the hinge placement on the body pillar surface after cleaning it. To access the body side hinge bolts through the front fender insulator owners need to remove the insulator while being careful not to adjust or remove the cone adjuster bolt for prevention of rattling. The body side hinge can be removed by extracting first the two 13 mm body side hinge bolts and the TORX(R) head body side hinge bolt. The new door side hinge must be aligned with previous installation marks before applying Locktite(R) Blue GM P/N 12345382, Canadian P/N 10953489 or its equivalent to door side hinge bolts. Install bolts while tightening them to 33 Nm (24 lb ft). Position the new body side hinge according to the original marks and secure its two 13 mm bolts to 33 Nm (24 lb ft), followed by installing the TORX(R) head body side hinge bolt to 10 Nm (89 lb in). Complete the installation of intermediate door hinge bolts by tightening them to 33 Nm (24 lb ft) before putting back the front fender insulator. The support for the door must be removed while performing door adjustment before closing it.


Related Buick Parts
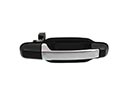 Buick Door Handle
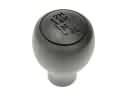 Buick Shift Knob
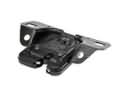 Buick Trunk Latch
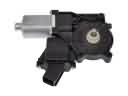 Buick Window Motor
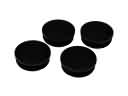 Buick Body Mount Hole Plug
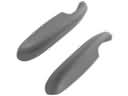 Buick Door Armrest
 Buick Door Lock Cylinder
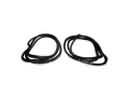 Buick Door Seal
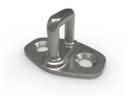 Buick Door Striker
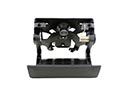 Buick Tailgate Handle
 Buick Tailgate Lock
 Buick Window Channel