ChevyParts
My Garage
My Account
Cart
OEM Buick A/C Clutch
Air Conditioning Clutch- Select Vehicle by Model
- Select Vehicle by VIN
Select Vehicle by Model
orMake
Model
Year
Select Vehicle by VIN
For the most accurate results, select vehicle by your VIN (Vehicle Identification Number).
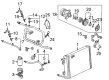
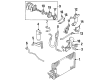
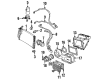
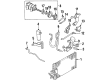
36 A/C Clutches found

Buick Pulley Part Number: 6552284
$140.68 MSRP: $252.35You Save: $111.67 (45%)Product Specifications- Other Name: Pulley-W/Rotor & Bearing (5.0") P.V.; A/C Compressor Clutch
- Replaced by: 06580047


Buick Coil Assembly Part Number: 89019185
Product Specifications- Other Name: Coil Assembly, A/C Clutch; A/C Compressor Clutch
- Replaces: 06552422, 6552422


Buick Coil Assembly Part Number: 6552649
Product Specifications- Other Name: Coil, A/C Compressor Clutch


Buick Rotor & Bearing Part Number: 2724722
Product Specifications- Other Name: Rotor, A/C Clutch; A/C Compressor Clutch; Rotor; Rotor, A/C Compressor (Internal Parts)
Buick Compressor Pulley Part Number: 6557503
Product Specifications- Other Name: R4 Pulley; A/C Compressor Clutch; Pulley
Buick Clutch Drive Part Number: 6551717
Product Specifications- Other Name: Clutch Drive Assembly; A/C Compressor Clutch; Clutch

Buick Clutch Part Number: 89018605
Product Specifications- Other Name: Clutch Kit, A/C; A/C Compressor Clutch
- Replaces: 10311311

Buick Clutch Kit Part Number: 84364333
$122.61 MSRP: $219.92You Save: $97.31 (45%)Product Specifications- Other Name: Clutch Kit, Air Conditioner Compressor Clutch; A/C Compressor Clutch
- Replaced by: 85641373

Buick Coil Assembly Part Number: 6550835
Product Specifications- Other Name: Clutch Coil/H; A/C Compressor Clutch
Buick Coil Part Number: 6552289
Product Specifications- Other Name: Coil, W/Housing Assembly; A/C Compressor Clutch
Buick Coil Assembly Part Number: 89019186
Product Specifications- Other Name: Coil, Air Conditioner Compressor Clutch Actuating; A/C Compressor Clutch
- Replaces: 06552423, 6552423

Buick Hub Assembly Part Number: 5914719
Product Specifications- Other Name: Clutch, A/C; A/C Compressor Clutch
Buick Clutch Drive, Front Part Number: 6552372
Product Specifications- Other Name: Clu Front Assembly; A/C Compressor Clutch; Clutch
- Position: Front
- Replaced by: 6581515
Buick Coil Assembly Part Number: 89019188
Product Specifications- Other Name: Coil Assembly, A/C Clutch; A/C Compressor Clutch
- Replaces: 06551997, 6551997, 6552155
Buick Clutch Coil Part Number: 3091128
Product Specifications- Other Name: Coil & Housing Assembly (High-Amp); A/C Compressor Clutch; Clutch Coil Assembly; Coil & Wire Assembly; Coil

Buick Clutch Part Number: 89018518
Product Specifications- Other Name: Clutch Kit, A/C; A/C Compressor Clutch; Clutch Kit, A/C Compressor Clutch
Buick Clutch Part Number: 10311310
Product Specifications- Other Name: Clutch Assembly-A/C; A/C Compressor Clutch; Clutch, A/C Compressor Clutch

Buick Compressor Pulley Part Number: 6580546
Product Specifications- Other Name: Pulley, A/C Compressor; A/C Compressor Clutch

Buick Clutch & Pulley Part Number: 84160278
$124.95 MSRP: $224.12You Save: $99.17 (45%)Product Specifications- Other Name: Clutch Kit, Air Conditioner Compressor Clutch; A/C Compressor Clutch; Clutch; Clutch Kit, A/C Compressor Clutch


Buick Clutch Assembly Part Number: 86807268
$246.59 MSRP: $442.34You Save: $195.75 (45%)Product Specifications- Other Name: Clutch Kit, Air Conditioner Compressor Clutch; Clutch; Clutch Kit, A/C Compressor Clutch
- Replaces: 15926084
| Page 1 of 2 |Next >
1-20 of 36 Results
Buick A/C Clutch
Choose OEM A/C Clutch, you're making the optimal decision for superior quality and perfect performance. You can feel confident because each component goes through stringent quality checks. Every part is carefully built to comply with Buick's factory specifications. You'll enjoy a smooth, worry-free installation that fits just right. At ChevyPartsDeal.com, you'll find it easy to get top-quality OEM Buick A/C Clutch. You can shop at highly competitive prices and protect your budget. All our genuine Buick parts include a dependable manufacturer's warranty. You'll also appreciate our straightforward return policy and swift delivery services for extra convenience.
The Buick A/C Clutch engages the compressor quickly and transforms engine power into cold cabin air. The badge has been pursuing smooth rides, quiet rides, and a cabin that stops the noise of the road since 1903 so that families arrive with calmness. Buick fulfills that pledge by applying soft-touch material on robust frames, reducing wind noise with ingenious seals, and fitting modern technology in without directing drivers to the manual. Its Wildcat concept was a hint of sculpted LED grilles and electric push, and it remains an indicator that the brand is continuing to experiment and not living in the rear view mirror. Glass that is of sound-deadening material, hydraulic suspension bushings, and continuously variable valve timing work together to level out gullies and dampen vibrations and allow the steering to be light enough to twist around in the parking lot but heavy enough to take the curves on the highway, making crossovers and sedans feel like grown-up cars on the road. To avoid loss of power to the belt between request and cold air, when the dash switch clicks, the A/C Clutch pulls a strong magnetic field which in milliseconds latches the pulley to the compressor shaft. The balanced drum is in a housing in which it spins; hence it reduces vibration and the radio is never hampered by the radio waves during summer traffic. Since the unit turns off when cooling demand decreases, it will use less fuel and the serpentine belt will not experience unnecessary tension, which in turn will prolong the life of parts. That balance of immediate attraction and immediate release allows all the drivetrains with the auspicious Buick badge to operate more efficiently, and the A/C Clutch continues keeping the vents icy for miles.
Buick A/C Clutch Parts and Q&A
- Q: How to replace the A/C Clutch assembly on Buick LaCrosse?A:Before replacing the compressor clutch assembly begin with accessory Drive Belt removal from the A/C Compressor according to the Drive Belt replacement procedures designed for engine types 3.8l (L26), 3.6l (LY7), or 5.3l (LS4). 3.8l (L26), 3.6l (LY7), or 5.3l (LS4). Start by removing the compressor and lower air deflector while removing three adjustable dowels from the j 37872 compressor clutch holding tool and installing three 5/16x1 inch bolts in their place. Remove the compressor clutch plate bolt after discarding it and proceed by attaching the j 37872 to firmly hold the compressor clutch plate during removal. The j 6083 snap ring pliers permits the removal of the compressor pulley snap ring as well as the compressor pulley and the compressor clutch coil snap ring followed by the compressor clutch coil. To prepare for installation work on the compressor clutch coil follow these steps: first use an m6x1.0 tap to clean the clutch plate bolt threads then blow away debris with compressed air before using the j 6083 to install both the clutch coil and its snap ring. Plug the compressor pulley and its snap ring into place before applying oil onto the clutch drive plate's 0.4 mm (0.016 in) air gap shim which then must be placed inside before installing the compressor clutch plate. As you rotate the drive plate verify that it doesn't scrape against the pulley then use the air gap measurement between pulley and drive plate to adjust the shims for a 0.3-0.6 mm (0.012-0.024 in) gap. Tighten the new clutch drive plate bolt to 12 n.m (106 lb in) while utilizing the j 37872 to hold the compressor clutch plate. The bolt requires colored adhesive to cover at least 5 threads. Expose the lower air deflector following installation of the accessory Drive Belt and specific engine type compressor reinstallation. Finish the work by conducting a leak test on fittings through the j 39400-a halogen leak detector.
- Q: How to replace the A/C Clutch assembly on Buick Enclave?A:A vehicle lift operation will be the initial step to begin replacing the air conditioning clutch assembly. The Drive Belt should come off first before you remove the clutch plate retaining bolt and the clutch plate assembly. Begin by removing the clutch hub/bearing snap ring followed by the clutch hub/bearing assembly. Following this step remove the clutch coil harness retainer. Begin the replacement process by dislodging the snap ring of the clutch coil and afterward extracting the clutch coil from the A/C Compressor. First install the clutch coil onto the A/C Compressor while securing it with snap ring . Repeat the following installation sequence: place the clutch hub/bearing assembly then fit the clutch hub/bearing snap ring. Install the clutch plate assembly avoiding drive plate drag against the pulley while rotating by adding small amounts of oil to the tightest air gap shim beforehand. Maintain a 0.35-0.65 mm (0.014-0.026 in) air gap between the pulley and drive plate by modifying the shim placement. After lowering the vehicle reinstall the Drive Belt then tighten the clutch plate retaining bolt to 18 nm (13 lb ft).


Related Buick Parts
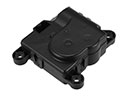 Buick Blend Door Actuator
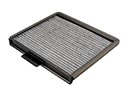 Buick Cabin Air Filter
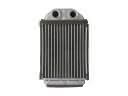 Buick Heater Core
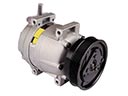 Buick A/C Compressor
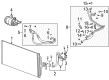
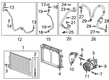
 Buick A/C Condenser
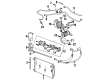
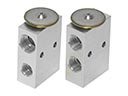 Buick A/C Expansion Valve
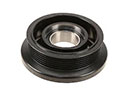 Buick A/C Idler Pulley
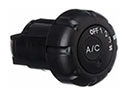 Buick A/C Switch
 Buick A/C System Valve Core
 Buick Air Temperature Sensor
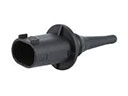 Buick Ambient Temperature Sensor
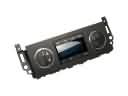 Buick HVAC Control Module