ChevyParts
My Garage
My Account
Cart
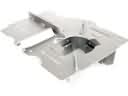
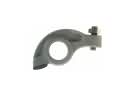
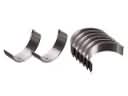
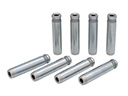
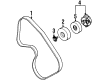
OEM Saturn Timing Belt Tensioner
Engine Timing Belt Tensioner- Select Vehicle by Model
- Select Vehicle by VIN
Select Vehicle by Model
orMake
Model
Year
Select Vehicle by VIN
For the most accurate results, select vehicle by your VIN (Vehicle Identification Number).
12 Timing Belt Tensioners found


Saturn Tensioner, Driver Side Part Number: 12608580
$48.73 MSRP: $85.04You Save: $36.31 (43%)Ships in 1-2 Business DaysProduct Specifications- Other Name: Tensioner Assembly-Timing Chain; Tensioner, Engine Timing
- Position: Driver Side
- Replaces: 12578209, 55352127, 24448509


Saturn Chain Guide Part Number: 12609261
$58.99 MSRP: $102.94You Save: $43.95 (43%)Ships in 1-2 Business DaysProduct Specifications- Other Name: Tensioner Assembly-Timing Chain; Timing Chain Tensioner; Timing Chain Guide; Tensioner; Tensioner, Engine Timing


Saturn Tensioner Part Number: 12609263
$60.32 MSRP: $105.20You Save: $44.88 (43%)Ships in 1-2 Business DaysProduct Specifications- Other Name: Tensioner Assembly-Camshaft Intermediate Drive Chain; Tensioner, Engine Timing


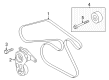
Saturn Serpentine Tensioner Part Number: 55574864
$83.84 MSRP: $146.30You Save: $62.46 (43%)Ships in 1-2 Business DaysProduct Specifications- Other Name: Tensioner, Engine Timing; Serpentine Belt Drive Kit; Belt Tensioner; Tensioner
- Replaces: 55570289, 55562217


Saturn Belt Tensioner, Green Line Part Number: 12663047
$216.24 MSRP: $377.36You Save: $161.12 (43%)Ships in 1-2 Business DaysProduct Specifications- Other Name: Tensioner Assembly-Drive Belt; Serpentine Belt Drive Kit
- Replaces: 12633829, 12618349, 12651405, 12650244, 12628030, 12655192


Saturn Damper Part Number: 12600695
$29.06 MSRP: $47.82You Save: $18.76 (40%)Ships in 1-2 Business DaysProduct Specifications- Other Name: Tensioner, Engine Timing; Timing Chain Tensioner; Belt Tensioner; Tensioner

Saturn Belt Tensioner Part Number: 12715120
$83.45 MSRP: $145.65You Save: $62.20 (43%)Ships in 1-3 Business DaysProduct Specifications- Other Name: Tensioner Assembly-Drive Belt
- Replaces: 12575509, 12626644

Saturn Tensioner Part Number: 21008215
$15.54 MSRP: $24.67You Save: $9.13 (38%)Ships in 1-2 Business DaysProduct Specifications- Other Name: Tensioner, Engine Timing


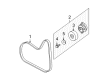
Saturn Serpentine Tensioner Part Number: 12634366
Product Specifications- Other Name: Tensioner Assembly-Drive Belt; Accessory Drive Belt Tensioner Assembly; Serpentine Belt Drive Kit; Belt Tensioner; Tensioner; Tensioner, Engine Cooling
- Replaces: 12582014

Saturn Tensioner Part Number: 21007444
Product Specifications- Other Name: Tensioner, Engine Timing

Saturn Timing Tensioner Part Number: 12581902
Product Specifications- Other Name: Tensioner, Engine Timing; Engine Timing Belt Tensioner; Tensioner

Saturn Belt Tensioner Part Number: 21007465
Product Specifications- Other Name: Tensioner Assembly, Drive Belt; Accessory Drive Belt Tensioner Assembly; Serpentine Belt Drive Kit; Serpentine Tensioner; Tensioner, Engine Cooling
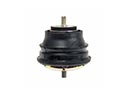
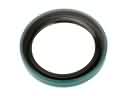
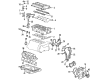
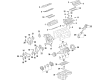
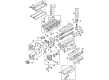
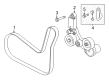
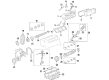
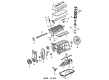
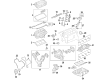
Saturn Timing Belt Tensioner
Choose OEM Timing Belt Tensioner, you're making the optimal decision for superior quality and perfect performance. You can feel confident because each component goes through stringent quality checks. Every part is carefully built to comply with Saturn's factory specifications. You'll enjoy a smooth, worry-free installation that fits just right. At ChevyPartsDeal.com, you'll find it easy to get top-quality OEM Saturn Timing Belt Tensioner. You can shop at highly competitive prices and protect your budget. All our genuine Saturn parts include a dependable manufacturer's warranty. You'll also appreciate our straightforward return policy and swift delivery services for extra convenience.
Saturn Timing Belt Tensioner keeps the timing of the engine, so that the timing is maintained at the right tension so that the engine does not spend a lot of money in having the valves and the pistons in contact with each other. Saturn created its niche in the car industry with body panels made of dent-resistant plastic that will bounce back when hit in the parking lot, lightweight engines that are produced by lost-foam casting and more fuel-efficient, and a paint process that will not fade away over the years of sun and salt which earned Saturn a loyal customer base that believes in long life of the cars and unique look. Drivers, such as the expression of this modern-day soul by the cabin and the exterior appearance, and how mundane parts such as Timing Belt Tensioner has been integrated into the whole design philosophy. Timing Belt Tensioner is a small spring or hydraulic object and is pushed against the timing belt to maintain constant tension between the camshaft and the crankshaft to ensure that they stay in gear during every rpm. The initial process involved in installation of new Saturn Timing Belt Tensioner is to park on even ground, disconnect battery, remove splash shields and timing covers and align factories timing marks. To raise the engine in case a mount lies in the way of the engine, grab the engine, remove the old belt and then push the belt off and loosen the tensioner. Wipe the mounting surface, install the new unit in the keyed position, tighten the bolts to requirements, loop the belt around the pulleys according to the diagram and apply some initial tension and hand rotate the crank two complete steps to check mark alignment.