ChevyParts
My Garage
My Account
Cart
OEM Saturn Light Socket
Light Bulb Socket- Select Vehicle by Model
- Select Vehicle by VIN
Select Vehicle by Model
orMake
Model
Year
Select Vehicle by VIN
For the most accurate results, select vehicle by your VIN (Vehicle Identification Number).
19 Light Sockets found


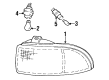
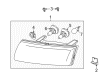
Saturn License Lamp, Rear Part Number: 13251936
$8.25 MSRP: $12.29You Save: $4.04 (33%)Ships in 1-3 Business DaysProduct Specifications- Other Name: Lamp, Rear License Lamp; License Plate Light; Socket; Socket, Rear License Lamp
- Position: Rear
- Replaces: 13139990, 90442396


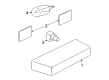
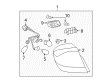
Saturn Socket & Wire Part Number: 12083007
$23.48 MSRP: $26.25You Save: $2.77 (11%)Ships in 1-2 Business DaysProduct Specifications- Other Name: Socket, Chassis/Body Marker/Hazard; Bulb Socket
- Replaces: 12112768

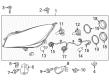
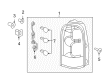
Saturn Socket & Wire Part Number: 88986416
$42.70 MSRP: $77.41You Save: $34.71 (45%)Ships in 1-3 Business DaysProduct Specifications- Other Name: Socket, Rear License Lamp; Tail Light Holders; Tail Light Socket; Headlight Socket; Bulb Socket
- Replaces: 12141388, 15305803

Saturn Socket, Front Part Number: 21023593
$3.17 MSRP: $4.96You Save: $1.79 (37%)Ships in 1-2 Business DaysProduct Specifications- Other Name: Socket Kit, Front Side Marker Lamp; Bulb Socket
- Position: Front

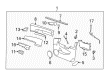
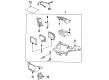
Saturn Trim Panel Retainer Part Number: 96468914
$7.28 MSRP: $11.40You Save: $4.12 (37%)Ships in 1-3 Business DaysProduct Specifications- Other Name: Socket, Courtesy/Dome/Reading Lamp


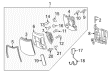
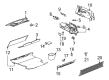
Saturn Socket Panel Part Number: 93183058
$22.29 MSRP: $30.30You Save: $8.01 (27%)Ships in 1-2 Business DaysProduct Specifications- Other Name: Socket, Tail Lamp
- Position: Passenger Side

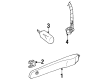
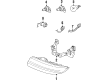
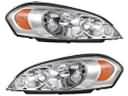
Saturn Socket Part Number: 22702944
$33.85 MSRP: $41.57You Save: $7.72 (19%)Ships in 1-2 Business DaysProduct Specifications- Other Name: Socket, Turn Signal Lamp; Headlight Socket; Bulb Socket; Socket,Turn Signal & Cornering Lamp


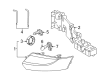
Saturn Socket Part Number: 12778689
$25.82 MSRP: $38.42You Save: $12.60 (33%)Product Specifications- Other Name: Socket, Capsule/Headlamp/Fog Lamp Switch; Headlight Socket; Bulb Socket; Socket,Turn Signal & Cornering Lamp


Saturn Bulb & Socket Part Number: 22710554
Product Specifications- Other Name: Socket, Chassis/Body Marker/Hazard; Socket, Rear License Lamp


Saturn Socket Panel Part Number: 93190308
Product Specifications- Other Name: Socket, Tail Lamp
- Position: Driver Side


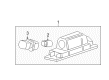
Saturn Wire Harness Part Number: 21020730
Product Specifications- Other Name: Harness Assembly, Headlamp Wiring; Headlight Wiring Harness; Harness, Capsule/Headlamp/Fog Lamp

Saturn Bulb & Socket Part Number: 25085970
Product Specifications- Other Name: Standard Parts; Tail Light Bulbs; Interior Lights; Car Bulbs
- Replaces: 10247751, 25015169

Saturn Socket Part Number: 15302794
Product Specifications- Other Name: Connector, Lamp-Turn Signal; Headlight Socket; Bulb Socket

Saturn Socket Part Number: 22691095
Product Specifications- Other Name: Socket, Turn Signal Lamp; Headlight Socket; Bulb Socket; Socket,Turn Signal & Cornering Lamp
Saturn Socket Panel Part Number: 93190309
Product Specifications- Other Name: Socket, Tail Lamp
- Position: Passenger Side
Saturn Socket Part Number: 21024044
Product Specifications- Other Name: Socket, Turn Signal & Cornering Lamp; Headlight Socket; Bulb Socket; Socket,Turn Signal & Cornering Lamp
Saturn Socket Panel Part Number: 93183057
Product Specifications- Other Name: Socket, Tail Lamp
- Position: Driver Side

Saturn Socket & Wire Part Number: 25775369
Product Specifications- Other Name: Harness Assembly-Tail Lamp Wiring; Harness, Tail Lamp

Saturn Socket & Wire Part Number: 89026860
Product Specifications- Other Name: Harness, Tail Lamp
Saturn Light Socket
Choose OEM Light Socket, you're making the optimal decision for superior quality and perfect performance. You can feel confident because each component goes through stringent quality checks. Every part is carefully built to comply with Saturn's factory specifications. You'll enjoy a smooth, worry-free installation that fits just right. At ChevyPartsDeal.com, you'll find it easy to get top-quality OEM Saturn Light Socket. You can shop at highly competitive prices and protect your budget. All our genuine Saturn parts include a dependable manufacturer's warranty. You'll also appreciate our straightforward return policy and swift delivery services for extra convenience.
Saturn Light Socket connects a bulb into the lamp version, provides constant power, and blocks vibration, water and dust to make the beam bright. Saturn was born as its own brand in General Motors and in 1991, it opened a factory of its own and introduced a no haggle selling policy that granted it instant distinction. The plastic panels that were dent resistant and bounced back when hit, the lost foam cast engine parts that lost weight, and the paint process that resisted rust and remained glossy were all favorite with buyers. These clever concepts helped a Saturn to appear new, consume less fuel, and save owners the cost of touch ups; this decision in turn spawned such a close group of people who had the gossip of swapping stories and decals. The business side even made a great impact on the shoppers, as definite pricing and attitude of customer first demonstrated that the innovation did not stop at mechanics but even very approach to people, which Saturn displayed. When fitting a Light Socket, park on level ground, turn off the ignition switch and take out the negative battery cable to avoid shorts. Pull behind the lamps, unscrew the top, turn the old socket counter clock wise and pull off the bulb and socket. Clean dirt, check the cavity seal and check the new Light Socket against the original to make sure the alignment tabs fit into the slots. To install, replace the Light Socket, screw it into place, click the harness connector, lay the wires of heat, check the lamp, and then screw the cover back on, then reattach the battery.
Related Saturn Parts
 Saturn Headlight
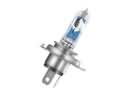 Saturn Headlight Bulb
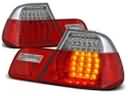 Saturn Tail Light
 Saturn Back Up Light
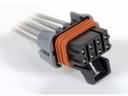 Saturn Chassis Wiring Harness Connector
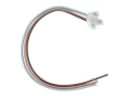 Saturn Door Lock Switch Connector
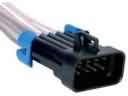 Saturn Engine Wiring Harness Connector
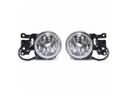 Saturn Fog Light
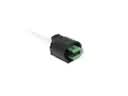 Saturn Forward Light Harness Connector
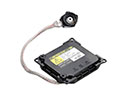 Saturn Hid Bulb Ballast
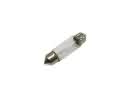 Saturn Interior Light Bulb
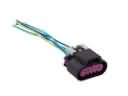 Saturn Tail Light Connector