ChevyParts
My Garage
My Account
Cart
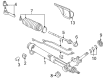
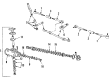
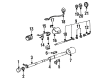
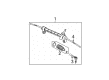
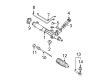
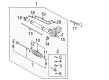
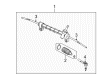
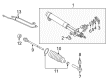
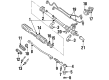
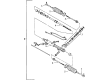
OEM Pontiac Rack And Pinion
Steering Rack And Pinion- Select Vehicle by Model
- Select Vehicle by VIN
Select Vehicle by Model
orMake
Model
Year
Select Vehicle by VIN
For the most accurate results, select vehicle by your VIN (Vehicle Identification Number).
90 Rack And Pinions found

Pontiac Gear Assembly Part Number: 26065032
$668.34 MSRP: $1056.33You Save: $387.99 (37%)Ships in 1-3 Business DaysProduct Specifications- Other Name: Gear Assembly-Steering
- Replaces: 26065144

Pontiac Steering Gear Part Number: 7848137
$413.31 MSRP: $586.37You Save: $173.06 (30%)

Pontiac Worm Gear Part Number: 7817528
Product Specifications- Other Name: Rack Kit-Piston & Nut Assembly; Steering Rack


Pontiac Steering Gear Part Number: 19133700
Product Specifications- Other Name: Gear Kit, Steering; Steering Tie Rod End; Gear Assembly
- Replaces: 89060251


Pontiac Gear Assembly Part Number: 19330435
Product Specifications- Other Name: Gear Kit, Steering (Remanufacture); Rack and Pinion Assembly; Rack & Pinion; Short Rack; Gear Kit, Steering
- Replaces: 26062311


Pontiac Steering Gear Part Number: 19330448
Product Specifications- Other Name: Gear Kit, Steering (Remanufacture)
- Replaces: 19169230, 26088606, 26098942, 26067451, 26099972

Pontiac Steering Gear Part Number: 25956925
Product Specifications- Other Name: Gear Kit-Steering; Gear Assembly; Gear Kit, Steering
- Replaces: 15802533, 15816430
Pontiac Gear Assembly Part Number: 26077996
Product Specifications- Other Name: Gear Kit, Steering (Remanufacture); Short Rack; Gear Kit, Steering
- Replaces: 26060047


Pontiac Steering Gear Part Number: 19330472
Product Specifications- Other Name: Gear Kit, Steering (Remanufacture); Gear Assembly; Gear Kit, Steering
- Replaces: 88955437

Pontiac Steering Gear Part Number: 19330436
Product Specifications- Other Name: Gear Kit, Steering (Remanufacture); Gear Assembly; Gear Kit, Steering
- Replaces: 26068964
Pontiac Steering Gear Part Number: 26003943
Product Specifications- Replaced by: 26044821
Pontiac Steering Gear Part Number: 26024870
Product Specifications- Replaced by: 26044821
Pontiac Steering Gear Part Number: 26009129
Product Specifications- Other Name: Gear Kit-Rack & Pinion Power Partial (Remanufacture)
- Replaced by: 26046152
Pontiac Steering Gear Part Number: 26009131
Product Specifications- Other Name: Gear Kit-Rack & Pinion Power Partial (Remanufacture)
- Replaced by: 26046154
Pontiac Steering Gear Part Number: 26024878
Pontiac Steering Gear Part Number: 26024873
Product Specifications- Replaced by: 26045878
Pontiac Steering Gear Part Number: 26045885
Product Specifications- Other Name: Gear Kit, Steering; Gear Assembly; Steering Gear Assembly

Pontiac Steering Gear Part Number: 26044828
Product Specifications- Other Name: Gear Kit, Steering (Partial) (Remanufacture); Gear Assembly; Gear Kit, Steering
- Replaces: 26034863

Pontiac Steering Gear Part Number: 26045889
Product Specifications- Other Name: Gear Kit, Steering
- Replaces: 26024881
Pontiac Steering Gear Part Number: 26044827
Product Specifications- Other Name: Gear Kit, Steering (Remanufacture); Gear Assembly
- Replaces: 26046224, 26046227
| Page 1 of 5 |Next >
1-20 of 90 Results
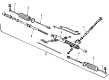
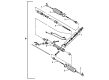
Pontiac Rack And Pinion
Choose OEM Rack And Pinion, you're making the optimal decision for superior quality and perfect performance. You can feel confident because each component goes through stringent quality checks. Every part is carefully built to comply with Pontiac's factory specifications. You'll enjoy a smooth, worry-free installation that fits just right. At ChevyPartsDeal.com, you'll find it easy to get top-quality OEM Pontiac Rack And Pinion. You can shop at highly competitive prices and protect your budget. All our genuine Pontiac parts include a dependable manufacturer's warranty. You'll also appreciate our straightforward return policy and swift delivery services for extra convenience.
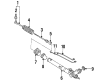
The Pontiac Rack And Pinion steering assembly unites a toothed bar to a small gear to convert your wheel rotations into straightforward movement of the front tires. True enthusiasts adore Pontiac because of the Wide-Track stance which holds the body flat in the turns, the powerful engines that accelerate willingly at any red light, and the cockpit that surrounds you with the dials that are angled to read easily. All switches are intentional, nothing precious, mere instruments of expediency. The flexible front subframe is combined with a well-tuned Rack And Pinion so that there is no drama in staying on track with feedback or returning the wheel to center. Pontiac is also rated on durability, with cast housings that are thick and the high-grade bushings that shake off potholes and winter salt. Changing the fluid frequently will ensure that the Rack And Pinion seals are soft in years. The perfect timing of the valve, supportive seats, and value suspension keep road trips comfortable without being too firm or too soft. When the day arrives that you need to change the Rack And Pinion in your Pontiac, then it is as easy as putting the car on the stands and removing the battery cable to ensure that electronics are not in danger. Unscrew the ends of the Pontiac tie rod, unclip the steering shaft coupler, and then loosen the mounting bolts and be careful to collect the fluid in a drain pan. Install the new unit, connect the hardware, reconnect lines, poking with fingers outer rods, centering the rack, filling with fluid, bleeding by turning lock to lock, tightening everything, and appointing a decent alignment.
Related Pontiac Parts
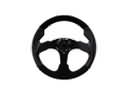 Pontiac Steering Wheel
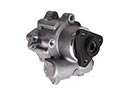 Pontiac Power Steering Pump
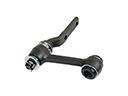 Pontiac Idler Arm
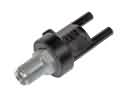 Pontiac Power Steering Control Valve
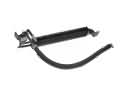 Pontiac Power Steering Cooler
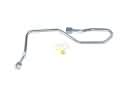 Pontiac Power Steering Hose
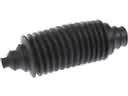 Pontiac Rack and Pinion Boot
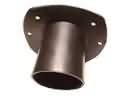 Pontiac Steering Column Seal
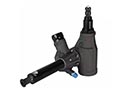 Pontiac Steering Gearbox
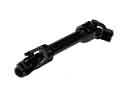 Pontiac Steering Shaft
 Pontiac Tie Rod Adjusting Sleeve
 Pontiac Tie Rod End