ChevyParts
My Garage
My Account
Cart
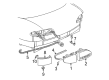
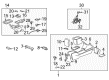
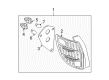
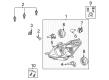
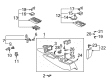
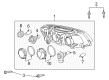
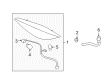
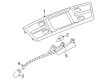
OEM Pontiac Light Socket
Light Bulb Socket- Select Vehicle by Model
- Select Vehicle by VIN
Select Vehicle by Model
orMake
Model
Year
Select Vehicle by VIN
For the most accurate results, select vehicle by your VIN (Vehicle Identification Number).
63 Light Sockets found


Pontiac Socket & Wire, Gray Part Number: 19260086
$61.45 MSRP: $113.27You Save: $51.82 (46%)Ships in 1-2 Business DaysProduct Specifications- Other Name: Connector Assembly, Wiring Harness W/Leads *Gray; Tail Light Holders; Tail Light Socket; Headlight Socket; Bulb Socket
- Replaces: 12159662, 88862200


Pontiac Socket Part Number: 15306194
$21.36 MSRP: $33.44You Save: $12.08 (37%)Ships in 1-2 Business DaysProduct Specifications- Other Name: Socket, Tail Lamp; Tail Light Holders; Tail Light Socket; Headlight Socket; Bulb Socket
- Replaces: 12141302


Pontiac Socket Part Number: 89025035
$7.01 MSRP: $10.44You Save: $3.43 (33%)Ships in 1-2 Business DaysProduct Specifications- Other Name: Socket, Chassis/Body Marker/Hazard; Tail Light Holders; Tail Light Socket; Bulb Socket; Socket, Tail Lamp
- Replaces: 16522273

Pontiac Socket Part Number: 89025036
$7.99 MSRP: $11.89You Save: $3.90 (33%)Ships in 1 Business DayProduct Specifications- Other Name: Socket Assembly, Tail Lamp; Tail Light Holders; Tail Light Socket; Bulb Socket; Socket, Back Up Lamp; Socket, Tail Lamp
- Replaces: 16519904


Pontiac Socket Part Number: 16530707
$9.95 MSRP: $14.80You Save: $4.85 (33%)Ships in 1-2 Business DaysProduct Specifications- Other Name: Socket, Tail Lamp; Tail Light Holders; Tail Light Socket; Socket,Turn Signal & Cornering Lamp


Pontiac Socket Part Number: 12141301
$43.00 MSRP: $64.00You Save: $21.00 (33%)Ships in 1-2 Business DaysProduct Specifications- Other Name: Socket, Back Up Lamp; Tail Light Holders; Tail Light Socket; Bulb Socket; Socket, Turn Signal Lamp; Socket, Tail Lamp


Pontiac Socket Part Number: 12141493
$68.67 MSRP: $102.20You Save: $33.53 (33%)Ships in 1-2 Business DaysProduct Specifications- Other Name: Socket, Tail Lamp; Tail Light Holders; Tail Light Socket; Bulb Socket
- Replaces: 15306080


Pontiac Socket & Wire Part Number: 12083007
$23.48 MSRP: $26.25You Save: $2.77 (11%)Ships in 1-2 Business DaysProduct Specifications- Other Name: Socket, Chassis/Body Marker/Hazard; Bulb Socket
- Replaces: 12112768

Pontiac Socket & Wire Part Number: 12083689
$48.73 MSRP: $100.18You Save: $51.45 (52%)Ships in 1-2 Business DaysProduct Specifications- Other Name: Socket, Stop & Tail Lamp; Tail Light Holders; Tail Light Socket; Headlight Socket; Bulb Socket

Pontiac Socket Part Number: 12125055
$29.53 MSRP: $59.30You Save: $29.77 (51%)Product Specifications- Other Name: Socket Assembly, Ashtray Lamp
- Replaces: 12159664


Pontiac Socket & Wire Part Number: 19352813
$3.75 MSRP: $5.58You Save: $1.83 (33%)Product Specifications- Other Name: Socket, Back Up Lamp; Tail Light Socket; Bulb Socket; Socket; Socket, Chassis/Body Marker/Hazard
- Replaces: 10372461, 19121046

Pontiac Bulb Socket, Amber Lens Part Number: 12013813
$22.98 MSRP: $34.21You Save: $11.23 (33%)Product Specifications- Other Name: Connector, Turn Signal & Cornering Lamp; Tail Light Holders; Tail Light Socket; Headlight Socket; Car Bulbs


Pontiac Socket & Wire, Rear Part Number: 6298886
Product Specifications- Other Name: Socket Assembly; Tail Light Holders; Tail Light Socket; Headlight Socket; Bulb Socket
- Position: Rear


Pontiac Socket Part Number: 88972570
Product Specifications- Other Name: Socket, Rear License Lamp


Pontiac Socket Part Number: 88972567
Product Specifications- Other Name: Socket, Back Up Lamp; Tail Light Holders; Tail Light Socket; Socket, Turn Signal Lamp


Pontiac Socket Part Number: 19204580
Product Specifications- Other Name: Socket, Turn Signal & Cornering Lamp; Headlight Socket; Bulb Socket; Socket,Turn Signal & Cornering Lamp


Pontiac Courtesy Lamp Part Number: 12125966
Product Specifications- Other Name: Connector, Chassis Electrical


Pontiac Socket Part Number: 92215652
Product Specifications- Other Name: Socket, Turn Signal Lamp; Headlight Socket; Bulb Socket; Socket,Turn Signal & Cornering Lamp


Pontiac Socket & Wire Part Number: 15263515
Product Specifications- Other Name: Harness Assembly-Tail Lamp Wiring; Harness, Tail Lamp

Pontiac Socket & Wire Part Number: 12083006
Product Specifications- Other Name: Socket, Back Up Lamp; Tail Light Holders; Tail Light Socket; Headlight Socket; Bulb Socket
| Page 1 of 4 |Next >
1-20 of 63 Results
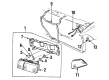
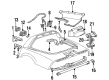
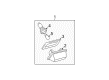
Pontiac Light Socket
Choose OEM Light Socket, you're making the optimal decision for superior quality and perfect performance. You can feel confident because each component goes through stringent quality checks. Every part is carefully built to comply with Pontiac's factory specifications. You'll enjoy a smooth, worry-free installation that fits just right. At ChevyPartsDeal.com, you'll find it easy to get top-quality OEM Pontiac Light Socket. You can shop at highly competitive prices and protect your budget. All our genuine Pontiac parts include a dependable manufacturer's warranty. You'll also appreciate our straightforward return policy and swift delivery services for extra convenience.
Pontiac Light Socket preserves all its tail lamp luminance and it has the same approach towards the design of the company that can be defined as spirited. Pontiac built a brand image of good stasis on the track, great manoeuvrability and people orientated design of their cars that brought Firebird and the Grand Am in an anchored and exhilarating position. Proprietors prefer swift steering, rapid lines, and interiors that are arranged smoothly to be manipulated and all these are points that enable Pontiac automobiles to make fun without losing trust. The fact that these are cars designed with night drives and road trips on the weekend, which need continuous lighting, makes it part of that same safety and functionality story, and a broken Light Socket will spoil it. The Pontiac Light Socket is a small connector but an important part which attaches the bulb and provides it with constant supply of power to shield against its vibration and moisture. The initial process to install a new Light Socket is ensuring that the battery is not short circuited by first parking in a flat surface and disabling the ignition key and unscrewing the battery. This is done by loosening the lamp cover (in the trunk or in the fender well) and turning counterclockwise and removing the old lamp cover. Clean the rubbish, test the gasket, and compare new component to tabs. Slide in the replacement as per the tabs and then turn clockwise until you will have a firm stop. Installation of the wiring harness is done by clicking the halves together then connecting the wires to the hot or sharp parts and then re attaching the battery and finally test the lamp after which the cover can be closed to provide a water tight finish.
Related Pontiac Parts
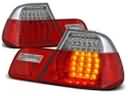 Pontiac Tail Light
 Pontiac Back Up Light
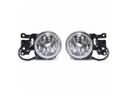 Pontiac Fog Light
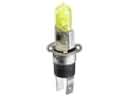 Pontiac Fog Light Bulb
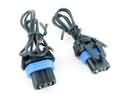 Pontiac Fog Light Connector
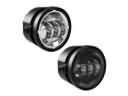 Pontiac Fog Light Lens
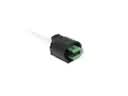 Pontiac Forward Light Harness Connector
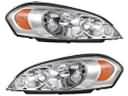 Pontiac Headlight
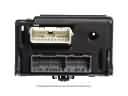 Pontiac Lighting Control Module
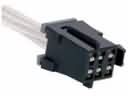 Pontiac Power Seat Connector
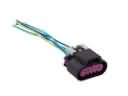 Pontiac Tail Light Connector
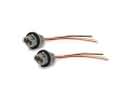 Pontiac Turn Signal Light Connector