ChevyParts
My Garage
My Account
Cart
OEM Oldsmobile Automatic Transmission Shift Indicator
Transmission Shift Control Selector Indicator- Select Vehicle by Model
- Select Vehicle by VIN
Select Vehicle by Model
orMake
Model
Year
Select Vehicle by VIN
For the most accurate results, select vehicle by your VIN (Vehicle Identification Number).
8 Automatic Transmission Shift Indicators found

Oldsmobile Gear Indicator Part Number: 22567726
$9.37 MSRP: $46.40You Save: $37.03 (80%)Ships in 1-2 Business DaysProduct Specifications- Other Name: Indicator, Transmission Shift Control Selector


Oldsmobile Shift Indicator Part Number: 22621763
Product Specifications- Other Name: Indicator Assembly-Automatic Transmission Control; Automatic Transmission Shift Indicator; Indicator, Transmission Shift Control Selector

Oldsmobile Indicator Part Number: 25610145
Product Specifications- Other Name: Len Auto Transmission; Dial, Transmission Shift Control Selector

Oldsmobile Shift Indicator Part Number: 22618360
Product Specifications- Other Name: Indicator Assembly-Automatic Transmission Control; Automatic Transmission Shift Indicator; Indicator, Transmission Shift Control Selector
Oldsmobile Gear Indicator Part Number: 22608227
Product Specifications- Other Name: Indicator Assembly-Automatic Transmission Control; Indicator, Transmission Shift Control Selector
- Replaces: 22654029
Oldsmobile Gear Indicator Part Number: 22582546
Product Specifications- Other Name: Indicator Assembly-Automatic Transmission Control; Indicator, Transmission Shift Control Selector
Oldsmobile Gear Indicator Part Number: 22579932
Product Specifications- Other Name: Indicator Assembly-Automatic Transmission Control; Indicator, Transmission Shift Control Selector

Oldsmobile Indicator Part Number: 15668735
Product Specifications- Other Name: Indicator Assembly-Transfer Case Shift; Indicator, Transfer Case Shift Control
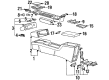
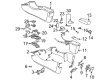
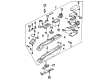
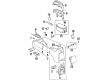
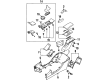
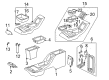
Oldsmobile Automatic Transmission Shift Indicator
Choose OEM Automatic Transmission Shift Indicator, you're making the optimal decision for superior quality and perfect performance. You can feel confident because each component goes through stringent quality checks. Every part is carefully built to comply with Oldsmobile's factory specifications. You'll enjoy a smooth, worry-free installation that fits just right. At ChevyPartsDeal.com, you'll find it easy to get top-quality OEM Oldsmobile Automatic Transmission Shift Indicator. You can shop at highly competitive prices and protect your budget. All our genuine Oldsmobile parts include a dependable manufacturer's warranty. You'll also appreciate our straightforward return policy and swift delivery services for extra convenience.
Oldsmobile Automatic Transmission Shift Indicator allows drivers to immediately view the gear of choice which enhances confidence and safety. Oldsmobile had a century of proven reputation of good power and easy travel. The company was established in 1897 and it was the first one to introduce a moving assembly line and eventually became part of General Motors, producing cars that millions of people could afford. Oldsmobile introduced the Hydra-Matic automatic transmission in 1940, which relieved the driver of the burden of operating the clutch, and established a trend that other manufacturers followed. The company also introduced quieter cabins with each passing decade, more powerful engines and new styling, thus the families had their faith in an Oldsmobile when driving long distances and even when driving to work. This development made the cabin seem modern, but approachable, and the bright gauge cluster which includes the Automatic Transmission Shift Indicator fits the tradition. Automatic Transmission Shift Indicator is a small pointer that displays P, R, N, D or manual ranges to ensure that the driver is certain of the choice made in a second. To install the Automatic Transmission Shift Indicator, basic tools and time are only required. A battery ground will be taken out first to ensure the safety of electronics. Raise the center trim or instrument bezel to expose the mounting point, slip the indicator unit into the mounting point with screws in place. Install the wire harness along the factory access points and attach connectors to the range sensor or the vehicle network and ensure that the cables are not subject to hot or moving objects. As the letters come on, refit all the trim, reattach the battery and as you go through each gear, cause the linkage to move to fit the letters perfectly.
Related Oldsmobile Parts
 Oldsmobile Emblem
 Oldsmobile Center Console
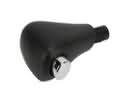 Oldsmobile Automatic Transmission Shift Levers
 Oldsmobile Automatic Transmission Shifter
 Oldsmobile Center Console Base
 Oldsmobile Center Console Latch
 Oldsmobile Cup Holder
 Oldsmobile Fender Splash Shield
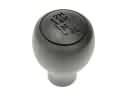 Oldsmobile Shift Knob
 Oldsmobile Shift Linkage Boot
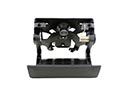 Oldsmobile Tailgate Handle
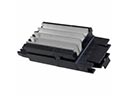 Oldsmobile Wiper Pulse Module