ChevyParts
My Garage
My Account
Cart
OEM GMC Envoy Brake Calipers
Caliper- Select Vehicle by Model
- Select Vehicle by VIN
Select Vehicle by Model
orMake
Model
Year
Select Vehicle by VIN
For the most accurate results, select vehicle by your VIN (Vehicle Identification Number).
7 Brake Calipers found


GMC Envoy Caliper Part Number: 21998527
$111.31 MSRP: $216.26You Save: $104.95 (49%)Ships in 1-2 Business Days
GMC Envoy Caliper Part Number: 21998526
$103.42 MSRP: $204.06You Save: $100.64 (50%)Ships in 1-2 Business Days


GMC Envoy Caliper Part Number: 89027178


GMC Envoy Caliper Part Number: 89027177


GMC Envoy Caliper Part Number: 88966985
GMC Envoy Caliper Part Number: 88966986

GMC Envoy Overhaul Kit Part Number: 88964425
GMC Envoy Brake Calipers
Want to cut long-term maintenance and repair costs? Choose OEM Brake Calipers. Those parts deliver top durability you can trust. On our site, you'll find a huge catalog of genuine GMC Envoy parts. Prices are unbeatable, so you can keep more in your pocket. Every OEM GMC Envoy Brake Calipers includes a manufacturer's warranty. You can also get an easy return policy that keeps buying risk free. Fast delivery, get your car on the road quickly. It's simple to search, compare, and order. Stop guessing about quality or fit. Order today and save with parts that last.
braking system Brake Caliperss in GMC Envoy car's function is to clamp the brake pads against the rotors, and to stop the motion of the car. The action is accomplished by hydraulic pressure exerted on the brake fluid each time the brake pedal is depressed; the caliper's pistons can be of plastic, aluminum or chrome plated steel. GMC Envoy models utilize two primary types of brake calipers: stationary and variable bearer types with the latter being split in floating and non-floating. Semi-floating calipers are screwed into position, have four or more pistons on each side of the rotor and are more effective than floating piston calipers but more expensive. Sliding calipers, or floating calipers, use only one piston to slide the caliper to either side of the rotor and apply pressure, which makes this kind of caliper less complicated, but more susceptible to flaws such as sticking. It is therefore important that these differences are well understood so that the maximum level of braking on the Envoy can be achieved at all times.
GMC Envoy Brake Calipers Parts and Q&A
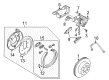
- Q: How to overhaul the rear brake calipers on GMC Envoy?A:To overhaul the rear brake caliper, start by draining all brake fluid from the caliper and pad the interior with clean shop towels. Be careful not push fingers in front of the Piston while pressing compressed air, as one can get a serious injury. Use only the necessary amount of air pressure to help ease the Piston out of the bore and avoid causing damage. Remove the Piston from the caliper bore as well as the boot and Piston seal without scratching the housing bore or use of metal tools. Then, remove the bleeder valve and cap, guide pins and sleeves from the anchor bracket. Clean the bleeder valve, bore of the caliper, caliper passages, the Piston and the lining contact surface on the anchor bracket using denatured alcohol, then dry all components and blow any excess brake fluid out of the passages using dry and filtered compressed air. Replace the Piston if there is scoring, corrosion, chrome plating damage, and pitting in the caliper bore, polishing light corrosion with crocus cloth if required. Upon replacing the bleeder valve cap, the bleeder valve should be tightened to 12nm 110 inch lbs. Then filter some new clean brake fluid through a paper tissue and lubricate the new Piston seal, caliper bore, and Piston, install the Piston seal making sure it is not twisted and then simply install the boot into the caliper housing bore by hand. Last but not least, insert the Piston into the caliper bore, using your hand to push it down to the bottom of the bore, and attach the boot on the Piston.
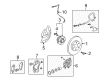
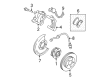
- Q: How to replace the front brake calipers on GMC Envoy?A:First, lifting and supporting the vehicle to replace the front brake caliper. Take off the tire and wheel assembly. Then, undo the brake hose fitting bolt and discard the brake hose fitting gaskets from the brake hose fitting sealing the brake hose fitting to avoid the loss of brake fluid and contamination. Then, work on brake caliper guide pin bolt then brake caliper guide pin bolt before removing the brake caliper. For installation: Install the brake caliper and loosely install brake caliper guide pin, bolts. Check the upper brake caliper guide pin bolt and the lower brake caliper guide pin bolt against the figure of 42 Nm (31 lb ft). Mount new brake hose fitting gaskets and fit the brake hose fitting bolt with the two new gaskets to the brake hose fitting. At the brake caliper inlet port, attach the brake hose assembly and tighten the fitting bolt to 40 Nm (30 lb ft). Apply the handbrake and bleed the system, and then install tire and wheel assembly before lowering the vehicle.


Related GMC Envoy Parts
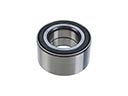 GMC Envoy Wheel Bearing
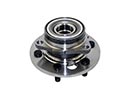 GMC Envoy Wheel Hub
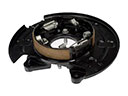 GMC Envoy Brake Backing Plate
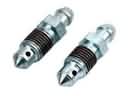 GMC Envoy Brake Bleeder Screw
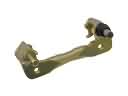 GMC Envoy Brake Caliper Bracket
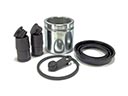 GMC Envoy Brake Caliper Repair Kit
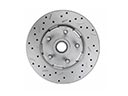 GMC Envoy Brake Disc
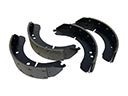 GMC Envoy Brake Shoe
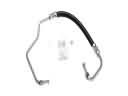 GMC Envoy Hydraulic Hose
 GMC Envoy Parking Brake Cable
 GMC Envoy Wheel Hub Bolt
 GMC Envoy Wheel Speed Sensor