ChevyParts
My Garage
My Account
Cart
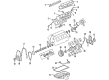
OEM Chevrolet Suburban 1500 Camshaft
Cam- Select Vehicle by Model
- Select Vehicle by VIN
Select Vehicle by Model
orMake
Model
Year
Select Vehicle by VIN
For the most accurate results, select vehicle by your VIN (Vehicle Identification Number).
4 Camshafts found


Chevrolet Suburban 1500 Camshaft Part Number: 12625436
$421.57 MSRP: $717.71You Save: $296.14 (42%)Ships in 1-2 Business Days


Chevrolet Suburban 1500 Camshaft Part Number: 12625439
$372.47 MSRP: $634.15You Save: $261.68 (42%)


Chevrolet Suburban 1500 Camshaft Part Number: 12561721
$507.99 MSRP: $836.81You Save: $328.82 (40%)Ships in 1-3 Business Days

Chevrolet Suburban 1500 Camshaft Part Number: 12625440
$440.54 MSRP: $699.43You Save: $258.89 (38%)Ships in 1-2 Business Days
Chevrolet Suburban 1500 Camshaft
Want to cut long-term maintenance and repair costs? Choose OEM Camshaft. Those parts deliver top durability you can trust. On our site, you'll find a huge catalog of genuine Chevrolet Suburban 1500 parts. Prices are unbeatable, so you can keep more in your pocket. Every OEM Chevrolet Suburban 1500 Camshaft includes a manufacturer's warranty. You can also get an easy return policy that keeps buying risk free. Fast delivery, get your car on the road quickly. It's simple to search, compare, and order. Stop guessing about quality or fit. Order today and save with parts that last.
Chevrolet Suburban 1500 Camshaft Parts and Q&A
- Q: How to replace the camshaft on Chevrolet Suburban 1500?A:Service position hood raising begins with hood hinge bolt removal followed by raising the hood until vertical position then tightening the bolts for service orientation. The following work steps include separating the radiator support and front cover and valve lifters and the Camshaft sensor bolt with sensor. Use a rotating motion on the Crankshaft to line up its marks with those on the Camshaft sprocket. After alignment, unscrew the sprocket bolt. After Timing Chain removal operators should avoid rotating the Crankshaft assembly because this action could cause damage to piston assemblies or valves. First remove the Camshaft sprocket before you relocate the Timing Chain. After this step remove the Camshaft retainer bolts as well as the retainer. The procedure demands careful Camshaft handling because it could damage Camshaft bearings. To extract the Camshaft, insert three m8 1.25 x 100 mm bolts (M8 1.25 x 4.0 inch) into the front bolt holes and use these bolts as handles to pull the Camshaft from the engine block before removing the bolts. Make cleaning and inspection of both the Camshaft components and bearings part of your maintenance process. When installing the Camshaft first apply clean engine oil to the journal and bearing surfaces before installing the Camshaft with these three bolts serving as handles but remove them after installation. Place the retainer plate so its gasket points toward the engine block. Clean the gasket surface before placing the plate. Then set the Camshaft retainer with its bolts and tighten them at a torque of 25 nm (18 ft. Lbs.). To continue with installation place the Camshaft sprocket then position the Timing Chain before tightening the Camshaft sprocket bolts to 35 nm (26 ft. Lbs.). Check the o-ring seal of the Camshaft sensor for any damage; clean engine oil must be applied to the Camshaft sensor prior to installation of the sensor along with its bolt while torque is set to 25 nm (18 ft. Lbs.). The next step involves the installation of valve lifters and then front cover and radiator support. The final step involves removing the hood hinge bolts from their service location before dropping the hood into its normal position followed by bolting and torquing the hinges to 25 nm (18 ft. Lbs.).

Related Chevrolet Suburban 1500 Parts
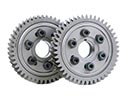 Chevrolet Suburban 1500 Cam Gear
 Chevrolet Suburban 1500 Crankshaft Pulley
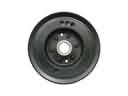 Chevrolet Suburban 1500 Harmonic Balancer
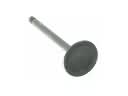 Chevrolet Suburban 1500 Intake Valve
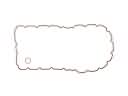 Chevrolet Suburban 1500 Oil Pan Gasket
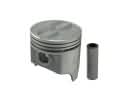 Chevrolet Suburban 1500 Piston
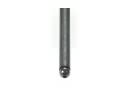 Chevrolet Suburban 1500 Pushrod
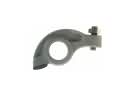 Chevrolet Suburban 1500 Rocker Arm
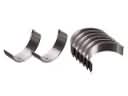 Chevrolet Suburban 1500 Rod Bearing
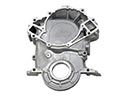 Chevrolet Suburban 1500 Timing Cover
 Chevrolet Suburban 1500 Valve Cover Grommet
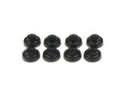 Chevrolet Suburban 1500 Valve Stem Seal