ChevyParts
My Garage
My Account
Cart
OEM Chevrolet Fuel Tank Vent Valve
- Select Vehicle by Model
- Select Vehicle by VIN
Select Vehicle by Model
orMake
Model
Year
Select Vehicle by VIN
For the most accurate results, select vehicle by your VIN (Vehicle Identification Number).
9 Fuel Tank Vent Valves found

Chevrolet Solenoid Valve Part Number: 10439027
$16.40 MSRP: $25.69You Save: $9.29 (37%)Ships in 1-3 Business DaysProduct Specifications- Other Name: Valve Assembly-Evaporator Emission Canister Vent Solenoid; Vapor Canister Vent Solenoid

Chevrolet Pressure Valve Part Number: 88972634
$84.63 MSRP: $171.87You Save: $87.24 (51%)Ships in 1-2 Business DaysProduct Specifications- Other Name: Valve, Evaporator Emission Pressure Control; Vapor Canister Vent Solenoid

Chevrolet Solenoid Valve Part Number: 84335530
$54.97 MSRP: $111.64You Save: $56.67 (51%)Ships in 1-2 Business DaysProduct Specifications- Other Name: Solenoid Assembly-Evaporator Emission Canister; Vapor Canister Vent Solenoid
- Replaces: 84499599, 22840967, 22783578, 84148815, 20981699


Chevrolet Solenoid Valve Part Number: 30016365
Product Specifications- Other Name: Valve, Fuel Tank Evaporator/Purge Control; Air Valve


Chevrolet Pressure Valve Part Number: 17089068
Product Specifications- Other Name: Valve Assembly-Fuel Vapor Pressure Control; Fuel Tank Vent Valve


Chevrolet Solenoid Valve Part Number: 96553405
$25.91 MSRP: $46.26You Save: $20.35 (44%)Product Specifications- Other Name: Valve, Fuel Tank Evaporator/Purge Control; Vapor Canister Vent Solenoid; Vent Control Solenoid; Valve

Chevrolet Vent Control Solenoid Part Number: 94860039
Product Specifications- Other Name: Valve, Evaporator Emission Pressure Control; Vapor Canister Vent Solenoid; Valve, Fuel Tank Evaporator/Purge Control

Chevrolet Control Valve Part Number: 17091151
Product Specifications- Other Name: Valve Assembly-Fuel Vapor Pressure Control

Chevrolet Purge Solenoid Part Number: 17087240
Product Specifications- Other Name: Valve Assembly-Fuel Vapor Pressure Control; Purge and Vent Solenoids; Canister Purge Valve
- Replaces: 17087178
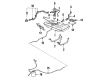
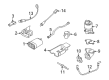
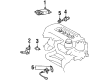
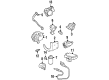
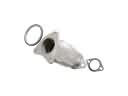
Chevrolet Fuel Tank Vent Valve
Choose OEM Fuel Tank Vent Valve, you're making the optimal decision for superior quality and perfect performance. You can feel confident because each component goes through stringent quality checks. Every part is carefully built to comply with Chevrolet's factory specifications. You'll enjoy a smooth, worry-free installation that fits just right. At ChevyPartsDeal.com, you'll find it easy to get top-quality OEM Chevrolet Fuel Tank Vent Valve. You can shop at highly competitive prices and protect your budget. All our genuine Chevrolet parts include a dependable manufacturer's warranty. You'll also appreciate our straightforward return policy and swift delivery services for extra convenience.
The Chevrolet Fuel Tank Vent Valve has been designed in such a way that it plans to vent the engine without a buildup of pressure and release of vapor fuel to the charcoal canister within the engine hence enabling the engine to operate smoothly and the air cleaner. Since 1911, Chevrolet has enjoyed an image of practical power and aggressive style and it has offered people a variety of cars, trucks and SUVs which are simultaneously comfortable during the daily commute and fun to drive. Chevy now further refines its engines that have higher mileage and faster response and even newer models even have Super Cruise hands-free driving that turns long trips into smooth road trips. Chevy produces anything rugged, smart infotainment, and huge parts network which means that the owner of the car is guaranteed that the car will prove to be tough and easy to maintain. A Fuel Tank Vent Valve is one of the components of the EVAP system that is a gateway that is both opened during refueling process and closed during refueling process to prevent leak of vapors and to ensure that the onboard computer passes the emissions tests. In order to repair the new valve, one is supposed to park at a flat area, set the parking brake and unattach the battery. The vehicle can be cooled by opening the fuel cap and sliding under the rear and locating the valve near the charcoal canister. Disassemble the electrical connector with a label and unscrew the vapor hoses and unscrew the connection holding clip or bolts and the old one. Install previously, compare seals, screw replacement in, fit on same side, and fasten in, and then reconnect wiring and hoses.
Related Chevrolet Parts
 Chevrolet Catalytic Converter
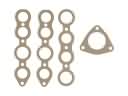 Chevrolet Exhaust Manifold
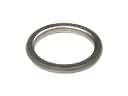 Chevrolet Exhaust Flange Gasket
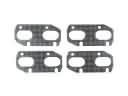 Chevrolet Exhaust Manifold Gasket
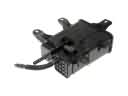 Chevrolet Vapor Canister
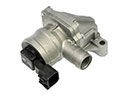 Chevrolet Air Inject Check Valve
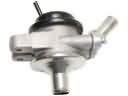 Chevrolet Diverter Valve
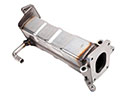 Chevrolet EGR Cooler
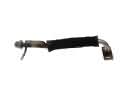 Chevrolet EGR Tube
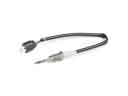 Chevrolet Exhaust Gas Temperature Sensor
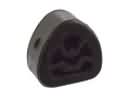 Chevrolet Muffler Hanger Straps
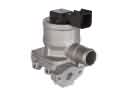 Chevrolet Secondary Air Injection Check Valve