ChevyParts
My Garage
My Account
Cart
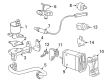
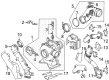
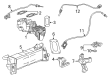
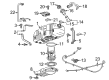
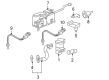
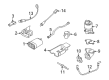
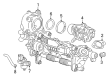
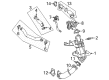
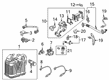
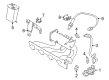
OEM Chevrolet EGR Valve Gasket
Engine EGR Valve Gasket- Select Vehicle by Model
- Select Vehicle by VIN
Select Vehicle by Model
orMake
Model
Year
Select Vehicle by VIN
For the most accurate results, select vehicle by your VIN (Vehicle Identification Number).
57 EGR Valve Gaskets found


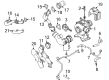
Chevrolet Valve Gasket Part Number: 21006754
$4.48 MSRP: $8.01You Save: $3.53 (45%)Ships in 1-3 Business DaysProduct Specifications- Other Name: Gasket, Emission System; Exhaust Gas Recirculation (EGR) Valve Gasket; EGR Valve Gasket


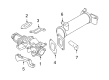
Chevrolet Cooler Gasket Part Number: 98065520
$6.04 MSRP: $10.78You Save: $4.74 (44%)Ships in 1-2 Business DaysProduct Specifications- Other Name: Gasket-EGR Valve Cooler; EGR Cooler Gasket; Outlet Pipe Gasket; Gasket, Emission System
- Position: Passenger Side


Chevrolet Cooler Gasket Part Number: 98070023
$6.15 MSRP: $10.98You Save: $4.83 (44%)Ships in 1-2 Business DaysProduct Specifications- Other Name: Gasket-EGR Valve Cooler; EGR Cooler Gasket; Gasket, Emission System


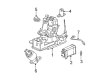
Chevrolet Valve Gasket Part Number: 12641663
$6.53 MSRP: $12.06You Save: $5.53 (46%)Ships in 1-2 Business DaysProduct Specifications- Other Name: Gasket, Emission Control System; EGR Valve Gasket


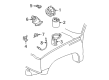
Chevrolet Valve Gasket Part Number: 24506939
$11.31 MSRP: $20.22You Save: $8.91 (45%)Ships in 1-2 Business DaysProduct Specifications- Other Name: Gasket-EGR Valve; EGR Valve Gasket; Gasket; Gasket, Emission System


Chevrolet Valve Gasket Part Number: 12567275
$10.81 MSRP: $19.27You Save: $8.46 (44%)Ships in 1 Business DayProduct Specifications- Other Name: Gasket-EGR Valve; EGR Valve Gasket; Gasket, Emission System
- Replaces: 24502904


Chevrolet Valve Gasket Part Number: 10077547
$6.22 MSRP: $11.10You Save: $4.88 (44%)Ships in 1-3 Business DaysProduct Specifications- Other Name: Gasket-EGR Valve; EGR Valve Gasket; EGR Tube Gasket; Gasket; Gasket, Emission System
- Replaces: 10129596, 14088262


Chevrolet Cooler Gasket Part Number: 98065521
$6.34 MSRP: $11.90You Save: $5.56 (47%)Ships in 1-2 Business DaysProduct Specifications- Other Name: Gasket-EGR Valve Cooler; EGR Cooler Gasket; Gasket, Emission System


Chevrolet EGR Pipe Gasket Part Number: 98065523
$5.75 MSRP: $10.80You Save: $5.05 (47%)Ships in 1-2 Business DaysProduct Specifications- Other Name: Gasket-EGR Pipe; EGR Tube Gasket; Gasket, Emission System


Chevrolet Valve Gasket Part Number: 97367013
$4.82 MSRP: $7.55You Save: $2.73 (37%)Ships in 1-3 Business DaysProduct Specifications- Other Name: Gasket-EGR Valve; EGR Valve Gasket; Gasket, Emission System


Chevrolet Valve Gasket Part Number: 97367014
$9.11 MSRP: $14.27You Save: $5.16 (37%)Ships in 1-3 Business DaysProduct Specifications- Other Name: Gasket-EGR Valve; EGR Valve Gasket; Gasket, Emission System


Chevrolet Valve Gasket Part Number: 97288795
$7.76 MSRP: $12.16You Save: $4.40 (37%)Ships in 1-3 Business DaysProduct Specifications- Other Name: Gasket Assembly, EGR Valve; EGR Valve Gasket; Gasket, Emission System

Chevrolet Valve Gasket Part Number: 10191427
$4.26 MSRP: $8.00You Save: $3.74 (47%)Ships in 1-3 Business DaysProduct Specifications- Other Name: Gasket-EGR Valve; EGR Valve Gasket; Gasket, Emission System

Chevrolet Valve Gasket Part Number: 12593632
$3.64 MSRP: $6.58You Save: $2.94 (45%)Ships in 1-3 Business DaysProduct Specifications- Other Name: Gasket-EGR Valve; EGR Valve Gasket; Gasket; Gasket, Emission System

Chevrolet Valve Gasket Part Number: 96495356
$4.87 MSRP: $8.82You Save: $3.95 (45%)Ships in 1-3 Business DaysProduct Specifications- Other Name: Gasket, Emission System; EGR Valve Gasket

Chevrolet EGR Valve Gasket Part Number: 55577389
$7.86 MSRP: $14.04You Save: $6.18 (45%)Ships in 1-2 Business DaysProduct Specifications- Other Name: Gasket, Emission System

Chevrolet Valve Gasket Part Number: 55508537
$0.66 MSRP: $1.08You Save: $0.42 (39%)Ships in 1-3 Business DaysProduct Specifications- Other Name: Gasket, Emission System; EGR Valve Gasket

Chevrolet Valve Gasket Part Number: 55581606
$9.86 MSRP: $15.66You Save: $5.80 (38%)Product Specifications- Other Name: Gasket-EGR Valve; EGR Valve Gasket; EGR Cooler Gasket; Gasket, Emission System


Chevrolet Gasket Part Number: 12642620
$4.99 MSRP: $7.91You Save: $2.92 (37%)Ships in 1-3 Business DaysProduct Specifications- Other Name: Gasket-EGR Valve; EGR Valve Gasket; Gasket, Emission System

Chevrolet EGR Pipe Gasket Part Number: 91172214
Product Specifications- Other Name: Gasket, Emission System
| Page 1 of 3 |Next >
1-20 of 57 Results
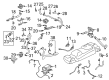
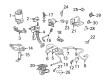
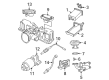
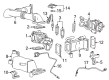
Chevrolet EGR Valve Gasket
Choose OEM EGR Valve Gasket, you're making the optimal decision for superior quality and perfect performance. You can feel confident because each component goes through stringent quality checks. Every part is carefully built to comply with Chevrolet's factory specifications. You'll enjoy a smooth, worry-free installation that fits just right. At ChevyPartsDeal.com, you'll find it easy to get top-quality OEM Chevrolet EGR Valve Gasket. You can shop at highly competitive prices and protect your budget. All our genuine Chevrolet parts include a dependable manufacturer's warranty. You'll also appreciate our straightforward return policy and swift delivery services for extra convenience.
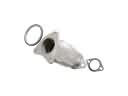
Chevrolet EGR Valve Gasket creates a heat-resistant seal which directs an accurate amount of exhaust back into the intake, reducing emissions and guarding power. Chevrolet was established in 1911 and has earned its reputation over time in the form of cars and trucks that are pragmatic but turn heads. The prices are pocket friendly. The current Chevy models have light but durable bodies, direct-injection engines, and intelligent driver technologies such as Super Cruise that can drive hands-free on pre-programmed highways, thus allowing the teenagers on their initial drive alone and parents on a family trip to feel at ease and secure. Chevy also sets the suspensions to a smooth ride without sacrificing the punch necessary to change lanes swiftly, and all the new cabins have user-intuitive displays and numerous charging ports. An EGR Valve Gasket is a thin heat resistant cover which prevents leakages at the valve flange so that there is correct recirculation of exhaust and correct sensor readings. Limited equipment and patience is all that it takes to replace the gasket in the house. Pull up level ground, ensure that the engine is cool, and disconnect the battery. Locate the EGR valve, which is near the intake manifold, disconnect the electrical and vacuum connection and then loosen the mounting bolts in a crisscross pattern. Lift the valve, remove the old gasket and scrub the mating surfaces with a plastic scraper and solvent until shiny. Install the new gasket in proper positioning, replace the valve, tighten the bolts, secure the lines, reconnect the battery, turn on the motor and hear hissing to ensure the integrity of the seal is complete.
Related Chevrolet Parts
 Chevrolet Catalytic Converter
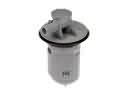 Chevrolet Fuel Tank Vent Valve
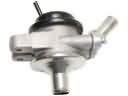 Chevrolet Diverter Valve
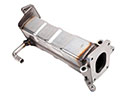 Chevrolet EGR Cooler
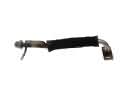 Chevrolet EGR Tube
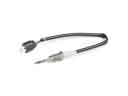 Chevrolet Exhaust Gas Temperature Sensor
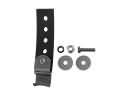 Chevrolet Exhaust Hanger
 Chevrolet Exhaust Pipe
 Chevrolet Muffler Hanger Straps
 Chevrolet PCV Valve Elbow
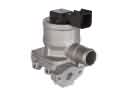 Chevrolet Secondary Air Injection Check Valve
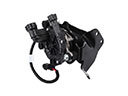 Chevrolet Secondary Air Injection Pump
Browse Chevrolet EGR Valve Gasket by Models
S10 Colorado Tahoe Cruze Malibu Camaro Equinox Impala Silverado 1500 Silverado 2500 HD Caprice Suburban Blazer Tracker Volt Cavalier Aveo Beretta C1500 C2500 C3500 Express 1500 Express 2500 Express 3500 G10 G20 G30 K1500 K2500 K3500 Lumina Metro Monte Carlo P30 S10 Blazer Silverado 2500 Uplander Venture Lumina APV Silverado 3500 Suburban 1500 Avalanche 1500 Avalanche 2500 Aveo5 C1500 Suburban C2500 Suburban K1500 Suburban K2500 Suburban Silverado 1500 HD Silverado 2500 HD Classic Silverado 3500 Classic Silverado 3500 HD Suburban 2500