ChevyParts
My Garage
My Account
Cart
OEM Chevrolet Equinox Brake Disc
Disc Rotor- Select Vehicle by Model
- Select Vehicle by VIN
Select Vehicle by Model
orMake
Model
Year
Select Vehicle by VIN
For the most accurate results, select vehicle by your VIN (Vehicle Identification Number).
9 Brake Discs found


Chevrolet Equinox Rotor Part Number: 13537160
$85.69 MSRP: $167.12You Save: $81.43 (49%)


Chevrolet Equinox Rotor, Front Part Number: 19203467
$105.48 MSRP: $188.36You Save: $82.88 (44%)Ships in 1-3 Business Days


Chevrolet Equinox Rotor, Front Part Number: 23118055
$87.79 MSRP: $174.63You Save: $86.84 (50%)Ships in 1-3 Business Days
Chevrolet Equinox Rotor, Front Part Number: 13518653
$98.53 MSRP: $195.99You Save: $97.46 (50%)
Chevrolet Equinox Rotor, Front Part Number: 20892949
$93.34 MSRP: $181.15You Save: $87.81 (49%)
Chevrolet Equinox Rotor, Rear Part Number: 20792027
$193.76 MSRP: $385.44You Save: $191.68 (50%)Ships in 1-2 Business Days
Chevrolet Equinox Rotor, Rear Part Number: 13544245
$73.74 MSRP: $146.69You Save: $72.95 (50%)Ships in 1 Business Day
Chevrolet Equinox Rotor, Front Part Number: 22666578


Chevrolet Equinox Rotor Part Number: 20892952
$110.04 MSRP: $203.60You Save: $93.56 (46%)Ships in 1-2 Business Days
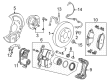
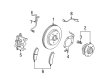
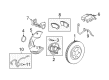
Chevrolet Equinox Brake Disc
Want to cut long-term maintenance and repair costs? Choose OEM Brake Disc. Those parts deliver top durability you can trust. On our site, you'll find a huge catalog of genuine Chevrolet Equinox parts. Prices are unbeatable, so you can keep more in your pocket. Every OEM Chevrolet Equinox Brake Disc includes a manufacturer's warranty. You can also get an easy return policy that keeps buying risk free. Fast delivery, get your car on the road quickly. It's simple to search, compare, and order. Stop guessing about quality or fit. Order today and save with parts that last.
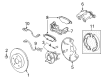
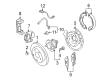
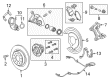
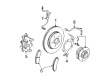
Chevrolet Equinox Brake Disc is part of the disc brake system and this component is main responsible for providing the desired friction that is required for the braking of vehicle. On the wheel hub there is the brake disc or rotor collaborates with brake pads and calipers. When brakes are applied, hydraulic pressure work on the caliper to press the pads on the rotor a process which slows down the Equinox. For the years of production, Chevrolet has incorporated several systems of brake discs namely, the solid and the vented rotors. Rots with air intake slots or cooling fins to expel heat more than non-vented rotors that are found in compact non-performance variants. First of all further design features as drilled or slotted discs enhance the thermal capacity as operating as acoustic components, even though the wear of the pad is affected due to this. It is, therefore, mandatory to always service and examine the brake disc to allow more effective use by Chevrolet Equinox.
Chevrolet Equinox Brake Disc Parts and Q&A
- Q: How to service and repair the Brake Disc on Chevrolet Equinox?A:To assist and repair the Brake Disc, start by using the Wheel Hub resurfacing kit (J 42450-A) to clean any rubble or erosion from the corresponding surface of the hub/axle flange. Next, clean off any rust or corrosion from the mating side of the Brake Disc and the mounting surface as well, using the rotor resurfacing kit (J 41013). Check both mating surfaces for the presence of any foreign particles and debris. Mount the Brake Disc to the brake lathe as it is directed by the manufacturer and ensure that all the attachments and adapters are clean. Securely position any vibration dampening attachments and then the lathe brake, slowly advance the cutting tools until they indicate the Brake Disc friction surfaces. In the disc, examine the witness mark. If its length is about three-fourthes and more on each side around the surface, the disc is properly mounted. If not, check by re-mounting the disc and following lathe manufacturer's instructions in refinish it. Inspect the disc thickness after each cut and when it is of the maximum thickness after refinishing, replace the disc. To get a non-directional finish, use the recommended speed setting, and apply the finish with the help of either a non-directional finishing tool on which is mounted 120 grit aluminum oxide sandpaper, or a sanding block of 150 grit aluminum oxide sandpaper. Clean each friction surface if necessary using denatured alcohol, an approved brake cleaner, and then remove the disc from the lathe. Finally measure the assembled lateral runout (LRO) of the Brake Disc to ensure maximum performance from disc brake will be done, and in the case of lro exceeding specification, adjust.
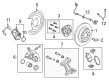
- Q: How to replace the front brake disc on Chevrolet Equinox?A:Before working on the front Brake Disc you must lift and support the vehicle while taking out the tire and wheel set. After removing bracket bolts you should connect the brake caliper to heavy mechanics wire for protection against hydraulic brake hose damage. Empty the brake assembly and then disconnect the Brake Disc bolt to pull off both parts. Use the j-42450-a wheel hub resurfacing kit to get rid of rust or corrosion from the hub-axle flange mating surface. Then use the j-41013 rotor resurfacing kit to clean the disc mating surface for installation. Mount the Brake Disc and fasten it through the Brake Disc bolt at 9 nm (80 lb in). Reinstall the brake caliper and bracket where it belongs. Tighten brake caliper bracket bolts to 190 newton meters (140 pounds feet) force. Plunge the tire and wheel back into place before polishing the Brake Pads and disc.


Related Chevrolet Equinox Parts
 Chevrolet Equinox ABS Sensor
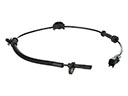 Chevrolet Equinox Wheel Speed Sensor
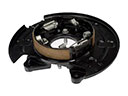 Chevrolet Equinox Brake Backing Plate
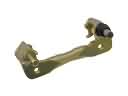 Chevrolet Equinox Brake Caliper Bracket
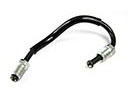 Chevrolet Equinox Brake Line
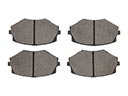 Chevrolet Equinox Brake Pad
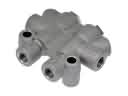 Chevrolet Equinox Brake Proportioning Valve
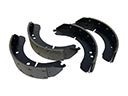 Chevrolet Equinox Brake Shoe
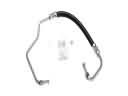 Chevrolet Equinox Hydraulic Hose
 Chevrolet Equinox Parking Brake Cable
 Chevrolet Equinox Wheel Cylinder
 Chevrolet Equinox Wheel Hub