ChevyParts
My Garage
My Account
Cart
OEM Chevrolet Cobalt Timing Chain Tensioner
Engine Timing Chain Tensioner- Select Vehicle by Model
- Select Vehicle by VIN
Select Vehicle by Model
orMake
Model
Year
Select Vehicle by VIN
For the most accurate results, select vehicle by your VIN (Vehicle Identification Number).
1 Timing Chain Tensioner found


Chevrolet Cobalt Tensioner, Driver Side Part Number: 12608580
$49.94 MSRP: $85.04You Save: $35.10 (42%)Ships in 1-2 Business Days
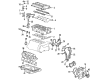
Chevrolet Cobalt Timing Chain Tensioner
Want to cut long-term maintenance and repair costs? Choose OEM Timing Chain Tensioner. Those parts deliver top durability you can trust. On our site, you'll find a huge catalog of genuine Chevrolet Cobalt parts. Prices are unbeatable, so you can keep more in your pocket. Every OEM Chevrolet Cobalt Timing Chain Tensioner includes a manufacturer's warranty. You can also get an easy return policy that keeps buying risk free. Fast delivery, get your car on the road quickly. It's simple to search, compare, and order. Stop guessing about quality or fit. Order today and save with parts that last.
Thus, the Chevrolet Cobalt Timing Chain Tensioner can be referred to as a vital part that contributes to the smooth and efficient functioning of the engine of the car of different models of Cobalt. Maintaining the right string tension in this aspect is crucial to the smooth running of the engine while at the same time boosting the reliability factor. For the Chevrolet Cobalt, which was manufactured from 2004, there are different types of Timing Chain Tensioners in relation to the available diverse engine types such as the 2.0L Turbo and the various Ecotec I4. These tensioners apply hydraulic or mechanical systems to change the tension as required so as to keep the timing chain in proper alignment; this is critical in expanding the lifespan of an engine. Chevrolet Cobalt Timing Chain Tensioner is one of the most reliable parts, which can affect the work of the car regardless of the generation: the first or the second. Owing to this functionality to work with Cobalt models, this tensioner has taken a competitive edge in the automotive market through its strength. Second, the Chevrolet Cobalt Timing Chain Tensioner helps to save more fuel on the enhancement of other parts' deterioration rates, thus saving more fuel and emitting fewer pollutants. It is as important as it is because it plays an essential role both in the engine's function as well as the car's basic safety due to the prevention of potential timing chain issues. To sum up the Chevrolet Cobalt Timing Chain Tensioner is an essential component of Cobalt's design, that enshrines steadiness and power in every movement.
Chevrolet Cobalt Timing Chain Tensioner Parts and Q&A
- Q: How to replace the timing chain tensioner on Chevrolet Cobalt?A:Before changing the Timing Chain Tensioner, you should disconnect the negative Battery Cable. Thereafter, remove the camshaft cover and the Timing Chain Tensioner, then the seal from tensioner after that. Check the Timing Chain Tensioner, o-ring seal, and washer for wear and damage; replace them as necessary. And measure the Timing Chain Tensioner assembly end to end; it should be supplied under a new tensioner when in the fully compressed non-active state, it measures 72mm (2.83 in) from end to end, while in an active state, it measures 85mm (3.35 in). And if the Timing Chain Tensioner does not remain in a compressed condition, remove the Piston assembly from the body of the Timing Chain Tensioner, instal the j45027 into a vise, and insert the notch end of the Piston assembly into the j45027. Convert the j 45027-1 to revolve the ratchet cylinder to the Piston. Check to ensure that the bore of the tensioner body is free of dirt and debris, as well as damage;. Clean any contaminations using a lint-free cloth and replace the tensioner in case it's damaged. Use the compressed Piston assembly to install it into the Timing Chain Tensioner body until it reaches the bottom of the bore without compressing it against the bottom. The tensioner should have a length of around 72mm(2.83m) end to end. If not, go back to the previous step. Make sure that all the dirt and debris are removed from the hole of the Cylinder Head where the Timing Chain Tensioner is threaded. Install to Timing Chain Tensioner assembly and tighten it to 75 n.m (55 lb ft). To spring the Timing Chain Tensioner, compress it 2mm (0.079hir. Rest in a rubber-nosed tool, running depth ahead on the shaft into the cam drive back to where the cam chain rests, and apply an acute pressure whereby slant upwards. Finally, you should install the camshaft cover, and reconnect the negative Battery Cable.

Related Chevrolet Cobalt Parts
 Chevrolet Cobalt Timing Chain
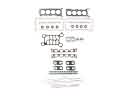 Chevrolet Cobalt Cylinder Head Gasket
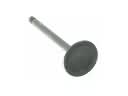 Chevrolet Cobalt Intake Valve
 Chevrolet Cobalt Lash Adjuster
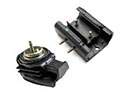 Chevrolet Cobalt Motor And Transmission Mount
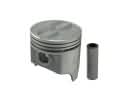 Chevrolet Cobalt Piston
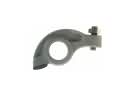 Chevrolet Cobalt Rocker Arm
 Chevrolet Cobalt Timing Chain Guide
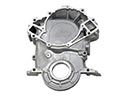 Chevrolet Cobalt Timing Cover
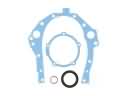 Chevrolet Cobalt Timing Cover Gasket
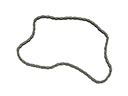
 Chevrolet Cobalt Valve Cover Grommet
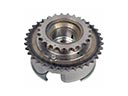 Chevrolet Cobalt Variable Timing Sprocket