ChevyParts
My Garage
My Account
Cart
OEM Chevrolet Cobalt CV Boot
Axle Boot- Select Vehicle by Model
- Select Vehicle by VIN
Select Vehicle by Model
orMake
Model
Year
Select Vehicle by VIN
For the most accurate results, select vehicle by your VIN (Vehicle Identification Number).
5 CV Boots found

Chevrolet Cobalt Outer Boot, Front Part Number: 10359415
$47.51 MSRP: $78.25You Save: $30.74 (40%)Ships in 1-2 Business DaysChevrolet Cobalt Outer Boot, Front Part Number: 19181205

Chevrolet Cobalt Inner Boot, Front Part Number: 19181204

Chevrolet Cobalt Outer Boot, Red Line, Front Part Number: 15779364
Chevrolet Cobalt Inner Boot, Front Part Number: 10359414
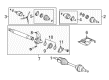
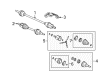
Chevrolet Cobalt CV Boot
Want to cut long-term maintenance and repair costs? Choose OEM CV Boot. Those parts deliver top durability you can trust. On our site, you'll find a huge catalog of genuine Chevrolet Cobalt parts. Prices are unbeatable, so you can keep more in your pocket. Every OEM Chevrolet Cobalt CV Boot includes a manufacturer's warranty. You can also get an easy return policy that keeps buying risk free. Fast delivery, get your car on the road quickly. It's simple to search, compare, and order. Stop guessing about quality or fit. Order today and save with parts that last.
The Chevrolet Cobalt CV Boot is somehow an assembly that protects the CV joint hence ensuring the joint relays power from the transaxle to the wheels. Cobalt vehicles uses several kinds of CV joints with a fixed kind located at the outboard end as well as the plunging form at the inboard side. Flexible rubber CV boot houses the lubricant for the CV joints and also protects or guards it from getting damaged by other elements, thus avoiding early failure of the joints. As for the checkpoint: it is necessary to control the state of the CV boot and check if it has any damages like cracks or tears to provide appropriate conditions for the operation of the CV joint in Chevrolet Cobalt cars.
Chevrolet Cobalt CV Boot Parts and Q&A
- Q: What Tools Are Required to Service and Repair the CV Boot and CV Joint on Chevrolet Cobalt?A:Essential tools needed to service and repair the Constant Velocity Joint Boot are J 41398 CV Puller, J 2619-01 Slide Hammer, J 35910 Drive Axle Seal Clamp Pliers and J 8039-A Snap Ring Pliers and DT-47732 Drive Axle Swage Ring Clamp. The Constant Velocity Joint Boot service and repair requires J 41398 CV Puller (J 41398) along with J 2619-01 Slide Hammer (J 2619-01), J 35910 Drive Axle Seal Clamp Pliers (J 35910), J 8039-A Snap Ring Pliers (J 8039-A), and DT-47732 Drive Axle Swage Ring Clamp (DT-47732). First use a hand grinder to cut away the large and small seal retaining clamps from the CV joint and shaft while protecting the housing and discard these clamps. The procedure involves pulling the CV joint seal off the CV joint race then moving it down along the shaft's length. Use a cleaner to remove grease from the CV joint inner race then measure the distance between the reference mark on the shaft and the CV joint inner race surface. Record this measurement. Use J 8039-A to remove any retaining ring which is currently present. Then use the vise to clamp the shaft so you can attach J 41398 to the outer race while J 2619-01 removes the CV joint from the shaft. First remove the retaining ring and CV joint seal then extract the chrome alloy balls from the CV joint cage and cleanse all components thoroughly. The ball grooves need grease during assembly then place the inner race into the cage followed by checking outer race alignment. Place chrome alloy balls inside the CV joint followed by greasing of the joint components then installing a new swage ring to the seal. After installing the CV joint seal onto the shaft you should add the large retaining clamp while placing an entirely new retaining ring on the same shaft. An arbor press should deploy the retaining ring onto the inner race at less than 1,779 N (4,000 lb) press force. To validate the alignment check the distance a second time before you install the boot and swage ring using tool DT-47732 while maintaining safe distances between components. Apply small increments of pressure to DT-47732 bolt assembly while distributing excess grease into the seal. Complete seal retaining clamp crimping process with J 35910 while maintaining correct gap dimensions.
- Q: How to Replace a CV Boot and CV Joint on a Wheel Drive Shaft for Inner on Chevrolet Cobalt?A:To service and repair the constant velocity joint boot, commence by clamping the wheel drive shaft bar using a soft jawed vise. Cut out and throw away the small seal clamp with side cutters, and pull off the large seal retaining clamp with the help of a flat-bladed tool and throw it away. Seperate seal from the tripot housing at large diameter and slide away from the joint along the axle shaft. Remove any leftover greases from the tripot spider face and the inner walls of the tripot holding, then take away the tripot holding from the spider and shaft. Unscrew the retaining ring from the groove on the wheel drive shaft bar, when followed by the removal of the spider assembly and the seal on the wheel drive shaft bar. Having thoroughly cleaned all parts with an appropriate solvent, making sure to remove every drop of grease and dirt, and having used compressed air to dry them. Check tripot joint components for any signs of abnormal wear and tear, cracks, or damage and replace any damaged piece if required. To assemble, mount the small seal clamp to the seal not crimped and transfer the inner seal up to the wheel drive shaft bar ensuring it's ensconced rightly into the seal groove. With the use of the j 35910 drive axle seal clamp pliers (J 35910), crimp the small seal clamp and also check clamp gap width which should not be more than 2.15 mm (0.85 in). Install tripot spider assembly to the wheel drive shaft bar seating onto the shoulder; then insert retaining ring into the groove of wheel drive shaft bar using appropriate pliers. Butter up. Do about half the amount of grease from the kit on the seal and the other half in the tripot housing. Mount the large clamp over the large diameter and then fasten the tripot housing to the trihot spider assembly on the wheel drive shaft bar. Insert the big diameter of the seal over the tripot housing with the lip of the seal sitting in the housing groove. Wrap the large seal retaining clamp around and close the seal using j 35910 drive axle seal clamp pliers (J 35910) and inspect the gap dimension on the clamp ear and close to 1.9mm (5/64 to closed to give space to a washer).sizetype: 1.491 /1.772 x 190/280. Finally, rotate the housing in a circular motion so that grease spreads in tripot joint.

Related Chevrolet Cobalt Parts
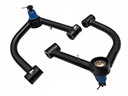 Chevrolet Cobalt Control Arm
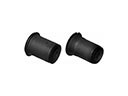 Chevrolet Cobalt Control Arm Bushing
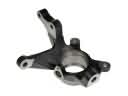 Chevrolet Cobalt Steering Knuckle
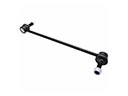 Chevrolet Cobalt Sway Bar Link
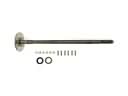 Chevrolet Cobalt Axle Shaft
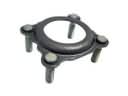 Chevrolet Cobalt Axle Shaft Retainer
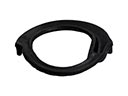 Chevrolet Cobalt Coil Spring Insulator
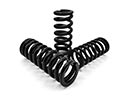 Chevrolet Cobalt Coil Springs
 Chevrolet Cobalt Control Arm Bracket
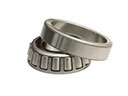 Chevrolet Cobalt Pinion Bearing
 Chevrolet Cobalt Shock And Strut Mount
 Chevrolet Cobalt Wheel Cover