ChevyParts
My Garage
My Account
Cart
OEM Cadillac XLR Transmission Oil Cooler Hose
- Select Vehicle by Model
- Select Vehicle by VIN
Select Vehicle by Model
orMake
Model
Year
Select Vehicle by VIN
For the most accurate results, select vehicle by your VIN (Vehicle Identification Number).
2 Transmission Oil Cooler Hoses found


Cadillac XLR Oil Cooler Pipe Part Number: 15885076

Cadillac XLR Oil Cooler Pipe, Upper Part Number: 15949599
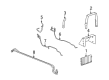
Cadillac XLR Transmission Oil Cooler Hose
Want to cut long-term maintenance and repair costs? Choose OEM Transmission Oil Cooler Hose. Those parts deliver top durability you can trust. On our site, you'll find a huge catalog of genuine Cadillac XLR parts. Prices are unbeatable, so you can keep more in your pocket. Every OEM Cadillac XLR Transmission Oil Cooler Hose includes a manufacturer's warranty. You can also get an easy return policy that keeps buying risk free. Fast delivery, get your car on the road quickly. It's simple to search, compare, and order. Stop guessing about quality or fit. Order today and save with parts that last.
Cadillac XLR Transmission Oil Cooler Hose Parts and Q&A
- Q: How to address issues with the Transmission Oil Cooler Hose on Cadillac XLR?A:The procedure for replacing the rear transmission fluid cooler pipe begins with proper vehicle elevation along with suitable support. Cut away the reinforcement panels that relate to the floor and tunnel areas. It is essential to cap or plug the open transmission fluid cooler pipes immediately because the front toc lines connect to rear toc lines near the engine Starter motor. This sealing prevents structural contamination. Drain the transmission oil cooler pipes at their rear connections by removing both lines from the inlet and outlet fittings. Secure the drain points with caps or plugs. The transmission housing gets its toc block fitting bolt removed before rotating the block fitting to disconnect the upper toc pipe. The transmission releases the upper and lower toc pipes for capping or plumbing their ends. Start by removing the forward toc pipe bracket bolt after which you must detach the forward toc pipe bracket followed by the rear toc pipe bracket bolt and its bracket before taking out the toc pipes from the vehicle. Users must first secure both toc pipes in location and after that should install the rear toc pipe bracket using a torque of 12 nm (9 lb ft). Screw in the forward toc pipe bracket bolt to 12 nm (9 lb ft). First detach the caps from toc pipes and transmission fittings before connecting both upper and lower toc pipes to the transmission while turning the toc block fitting until the upper toc pipe secures properly. Screw the toc block fitting bolt to the transmission housing then tighten it to 25 nm (18 lb ft). The toc pipes require unincapsulation before running the front toc inlet and outlet lines through to the rear toc inlet and outlet lines. Replace the floor panel tunnel panel reinforcement while lowering the vehicle before checking the transmission fluid level with an addition of fluid when needed.
- Q: How to replace the rear Transmission Oil Cooler Hose on Cadillac XLR?A:The first step to change the rear Transmission Oil Cooler (TOC) pipe requires appropriately elevating and supporting the vehicle. First separate the driveline tunnel closeout panel before cutting the front TOC inlet and outlet lines away from the rear TOC inlet and outlet lines and using caps or plugs to prevent contamination through the open TOC pipes. The TOC block fitting bolt should be removed from the transmission housing so the operator can rotate the block fitting to expose the upper TOC pipe. Disconnect both TOC pipes from the transmission while cap or plug the TOC pipes before releasing the transmission fittings. Extract the forward and rear TOC pipe bracket bolts together with their brackets before pulling out the TOC pipes from the vehicle. Install the TOC pipes into proper position before fastening the rear TOC pipe bracket bolt to 12 N.m (9 lb ft). Fasten the forward TOC pipe bracket together with its bolt after tightening them to 12 N.m (9 lb ft). Attach upper and lower TOC pipes to the transmission after removing their caps or plugs and rotatate the TOC block fitting to fasten the upper pipe. Fasten the TOC block fitting bolt to the transmission housing while torquing it to 25 N.m (18 lb ft). After restoring the driven front TOC inlet and outlet connections to the back inlets and outlets, install the driveline closeout panel before lowering the car and inspecting its transmission fluid level for necessary additions.


Related Cadillac XLR Parts
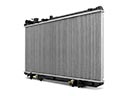 Cadillac XLR Radiator
 Cadillac XLR Automatic Transmission Oil Cooler Line
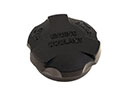 Cadillac XLR Coolant Reservoir Cap
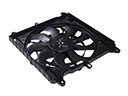 Cadillac XLR Cooling Fan Module
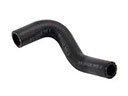 Cadillac XLR Cooling Hose
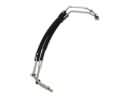 Cadillac XLR Oil Cooler Hose
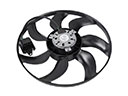 Cadillac XLR Radiator fan
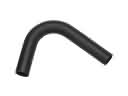 Cadillac XLR Radiator Hose
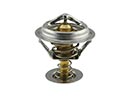 Cadillac XLR Thermostat
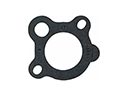 Cadillac XLR Thermostat Gasket
 Cadillac XLR Transmission Oil Cooler
 Cadillac XLR Water Pump