ChevyParts
My Garage
My Account
Cart
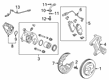
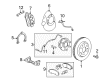
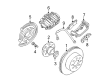
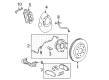
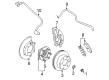
OEM Cadillac Escalade ESV Brake Disc
Disc Rotor- Select Vehicle by Model
- Select Vehicle by VIN
Select Vehicle by Model
orMake
Model
Year
Select Vehicle by VIN
For the most accurate results, select vehicle by your VIN (Vehicle Identification Number).
11 Brake Discs found


Cadillac Escalade ESV Rotor, Rear Part Number: 23195438
$134.01 MSRP: $262.60You Save: $128.59 (49%)


Cadillac Escalade ESV Rotor, Front Part Number: 23144340
$141.32 MSRP: $281.11You Save: $139.79 (50%)


Cadillac Escalade ESV Brake Rotor Part Number: 25757802
$114.96 MSRP: $225.31You Save: $110.35 (49%)Ships in 1-2 Business Days


Cadillac Escalade ESV Rotor, Front Part Number: 22950036
$121.44 MSRP: $241.61You Save: $120.17 (50%)Ships in 1-3 Business Days


Cadillac Escalade ESV Rotor, Front Part Number: 19210603
$94.27 MSRP: $187.54You Save: $93.27 (50%)Ships in 1-2 Business Days

Cadillac Escalade ESV Rotor Part Number: 87839222
$137.31 MSRP: $246.30You Save: $108.99 (45%)
Cadillac Escalade ESV Rotor, Rear Part Number: 13552815
$116.70 MSRP: $230.70You Save: $114.00 (50%)
Cadillac Escalade ESV Rotor Part Number: 13553983
$137.88 MSRP: $259.31You Save: $121.43 (47%)
Cadillac Escalade ESV Rotor, Rear Part Number: 87842411
$90.12 MSRP: $177.79You Save: $87.67 (50%)Ships in 1-2 Business Days

Cadillac Escalade ESV Rotor Part Number: 84879622
$246.00 MSRP: $475.86You Save: $229.86 (49%)Ships in 1-3 Business Days


Cadillac Escalade ESV Rotor, Rear Part Number: 22968231
Cadillac Escalade ESV Brake Disc
Want to cut long-term maintenance and repair costs? Choose OEM Brake Disc. Those parts deliver top durability you can trust. On our site, you'll find a huge catalog of genuine Cadillac Escalade ESV parts. Prices are unbeatable, so you can keep more in your pocket. Every OEM Cadillac Escalade ESV Brake Disc includes a manufacturer's warranty. You can also get an easy return policy that keeps buying risk free. Fast delivery, get your car on the road quickly. It's simple to search, compare, and order. Stop guessing about quality or fit. Order today and save with parts that last.
Cadillac Escalade ESV Brake Disc Parts and Q&A
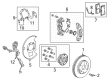
- Q: How to Service and Repair the Front Brake Disc Using the J41013 and J42450-A Kits on Cadillac Escalade ESV?A:The service and repair of brake discs requires the usage of J41013 Rotor Resurfacing Kit (J41013) and J42450-A Wheel Hub Resurfacing Kit (J42450-A). The brake system requires no disc brake disc refinishing during regular maintenance while new discs should be free of this practice. Refinishing operations must be rare since they only benefit discs which maintain sound thickness with additional conditions beyond permissible specifications. Clean the hub/axle flange along with the brake disc mating surfaces from any dust and rust by adopting the J42450-A method then proceed with the J41013 on the disc itself. The brake disc should be mounted to the brake lathe while maintaining cleanliness on all attachments. Bring the cutting tools to meet disc friction surfaces during lathe operation while checking the witness mark to verify correct mounting. The manufacturer guidelines for the lathe should be followed to restore the disc shape while checking the material reduction after every cutting iteration. Brake discs need replacement when refinishing results in a disc that surpasses the specified minimum thickness. For a non-directional finish select the recommended grit sandpaper available for the lathe equipment then remove dust from friction surfaces by using denatured alcohol or an approved brake cleaner. The LRO measurement of the assembled brake disc must be completed for performance verification. Necessary adjustments should be made if the measurement surpasses established specifications.
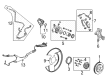
- Q: How to replace the front brake disc on a 2500 Series on Cadillac Escalade ESV?A:Vehicle maintenance starts with checking the brake master cylinder reservoir fluid before you move to change the front Brake Disc on a 2500 series vehicle. Lower the reservoir fluid to reach the midway point when it exceeds that level. First support your vehicle and then remove its tire and wheel assembly. Note all positions to install your original Brake Disc in relation to the hub. Use two big c-clamps to compress brake caliper pistons while upholding the caliper with heavy mechanic wire during this procedure to avoid breaking the brake hose. Use a socket wrench to remove the two Brake Caliper Bracket mounting bolts then lift the assembly apart from the caliper bracket. First eliminate the disc retaining push nuts and then strike the disc between wheel studs with a deadblow hammer to remove it from the hub if necessary. To separate non-separable discs wash them thoroughly while applying penetrating oil then secure the disc off with two m10 x 1.5 bolts. Use the j-42450-a - wheel hub resurfacing kit to clean the hub flange mating surface while making sure it stays completely free of debris. Position the disc before installing it and fasten back the brake caliper with its bracket assembly. Following cleaning of the caliper bracket mounting bolts threads apply threadlocker gm p/n 12345493 before torquing each bolt to 300 nm (221 lb ft). After reinstalling the tire and wheel assembly you should apply the brake pedal slowly until it reaches 2/3 of its full travel repeatedly until the pedal pressure becomes firm. Complete the process by placing clean brake fluid into the master cylinder and perform Brake Pad and disc burnishing for replacement or refinished discs.


Related Cadillac Escalade ESV Parts
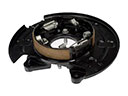 Cadillac Escalade ESV Brake Backing Plate
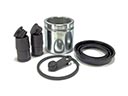 Cadillac Escalade ESV Brake Caliper Repair Kit
 Cadillac Escalade ESV Brake Calipers
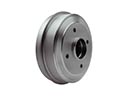 Cadillac Escalade ESV Brake Drum
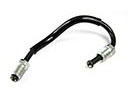 Cadillac Escalade ESV Brake Line
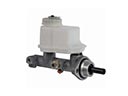 Cadillac Escalade ESV Brake Master Cylinder
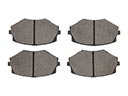 Cadillac Escalade ESV Brake Pad
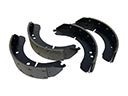 Cadillac Escalade ESV Brake Shoe
 Cadillac Escalade ESV Parking Brake Cable
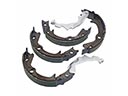 Cadillac Escalade ESV Parking Brake Shoe
 Cadillac Escalade ESV Wheel Bearing Dust Cap
 Cadillac Escalade ESV Wheel Hub Bolt