ChevyParts
My Garage
My Account
Cart
OEM Buick Variable Timing Adjuster Magnet
Engine Camshaft Magnet- Select Vehicle by Model
- Select Vehicle by VIN
Select Vehicle by Model
orMake
Model
Year
Select Vehicle by VIN
For the most accurate results, select vehicle by your VIN (Vehicle Identification Number).
1 Variable Timing Adjuster Magnet found

Buick Control Valve Solenoid Part Number: 55512049
$14.98 MSRP: $24.69You Save: $9.71 (40%)Ships in 1-3 Business DaysProduct Specifications- Other Name: Solenoid Assembly-Camshaft Position Actuator Valve; Variable Timing Oil Control Valve; Variable Timing Solenoid
- Replaces: 55486668
Buick Variable Timing Adjuster Magnet
Choose OEM Variable Timing Adjuster Magnet, you're making the optimal decision for superior quality and perfect performance. You can feel confident because each component goes through stringent quality checks. Every part is carefully built to comply with Buick's factory specifications. You'll enjoy a smooth, worry-free installation that fits just right. At ChevyPartsDeal.com, you'll find it easy to get top-quality OEM Buick Variable Timing Adjuster Magnet. You can shop at highly competitive prices and protect your budget. All our genuine Buick parts include a dependable manufacturer's warranty. You'll also appreciate our straightforward return policy and swift delivery services for extra convenience.
Buick Variable Timing Adjuster Magnet assists your engine to breathe at the correct time and create more power and reduce fuel consumption and tailpipe emissions. Since 1903 Buick has provided a smooth, quiet ride that makes the trip long an enjoyable one, and the quiet ride is further enhanced with the QuietTuning glass, delicate suspension, and soft touch cabins that also make talking easy at highway speeds. The brand combines vintage chrome and the new LED lighting, user friendly infotainment that reacts fast, and safety that envelops all the seats, with the bold Wildcat EV concept showing that the all electric future will explode with the style and responsibility. The owners like how every model handles the bumps, swerves and comes in a well-known savoir-faire that never screams but always makes a statement. It is a small electronic valve called the Variable Timing Adjuster Magnet, which redirects pressurized oil to the cam phaser so that valve timing may be retarded or advanced in milliseconds to provide increased low end torque and cleaner high rpm operation. Installation of the unit is not fast yet does not require any special tools. Unscrew the battery ground, confirm the replacement part and find the magnet on the cylinder head adjacent to the camshaft phaser. Unscrew its wiring, unscrew the retaining bolt and extract the old one. Clean the port using a wipe, apply light oil on the new O-ring, firmly insert the adjuster in place, position the tab, screw in the bolt to spec using a calibrated wrench. Once the connector has been reattached, cleared of all stored codes and the engine started, a final visual inspection confirms that the job is complete.
Related Buick Parts
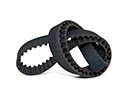 Buick Timing Belt
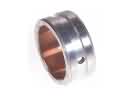 Buick Balance Shaft Bearing Set
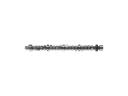 Buick Camshaft
 Buick Camshaft Bearing
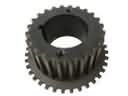 Buick Crankshaft Gear
 Buick Crankshaft Pulley
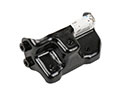 Buick Engine Mount Bracket
 Buick Exhaust Valve
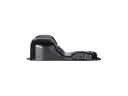 Buick Oil Pan
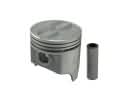 Buick Piston
 Buick Valve Cover Grommet
 Buick Valve Stem Oil Seal