ChevyParts
My Garage
My Account
Cart
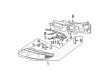
OEM Buick Dome Light Connector
Interior Dome Light Connector- Select Vehicle by Model
- Select Vehicle by VIN
Select Vehicle by Model
orMake
Model
Year
Select Vehicle by VIN
For the most accurate results, select vehicle by your VIN (Vehicle Identification Number).
11 Dome Light Connectors found


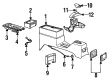
Buick Wire Harness, Black Part Number: 13586139
$32.51 MSRP: $61.06You Save: $28.55 (47%)Ships in 1-2 Business DaysProduct Specifications- Other Name: Connector Assembly, Wiring Harness W/Leads *Black; Headlight Connector; Door Jamb Switch; Lamp Switch Connector; Connector Kit; Connector
- Replaces: 21025422, 12101864


Buick Connector Wire Part Number: 13584278
$24.06 MSRP: $45.18You Save: $21.12 (47%)Ships in 1-2 Business DaysProduct Specifications- Other Name: Connector, Wiring Harness
- Replaces: 12085481, 22688558

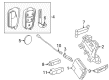
Buick Courtesy Lamp Part Number: 12167138
$18.65 MSRP: $28.14You Save: $9.49 (34%)Ships in 1-2 Business DaysProduct Specifications- Other Name: Socket; Interior Lights
- Replaces: 12007642

Buick Connector Retainer Part Number: 13586175
$5.82 MSRP: $9.13You Save: $3.31 (37%)Ships in 1-2 Business DaysProduct Specifications- Other Name: Connector Kit, Wiring Harness
- Replaces: 12059296, 12020833

Buick Socket & Wire, Gray, Rear Part Number: 8901283
$45.48 MSRP: $68.61You Save: $23.13 (34%)Ships in 1-2 Business DaysProduct Specifications- Other Name: Socket & Wire Assembly-Rear Side Marker Lamp (Wedge Bse W*Gray; Tail Light Holders; Tail Light Socket; Bulb Socket
- Position: Rear

Buick Control Module Part Number: 20803736
$109.44 MSRP: $198.09You Save: $88.65 (45%)Ships in 1-3 Business DaysProduct Specifications- Other Name: Receiver, Door Lock Remote Control Inside
- Replaces: 15857830, 15807815, 15946937, 25856131, 25896540, 25808836, 25857326

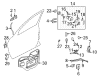
Buick Door Jamb Switch Part Number: 19329253
$36.20 MSRP: $115.74You Save: $79.54 (69%)Ships in 1-2 Business DaysProduct Specifications- Other Name: Connector Kit-Wiring Harness
- Replaces: 19115673, 15306397, 15306197, 19257375, 19303743, 88986450, 13584433


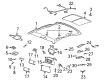
Buick Lamp Housing, Passenger Side Part Number: 25675800
Product Specifications- Other Name: Connector-Lamp-Reading Right-Hand; Connector, Courtesy/Dome/Reading Lamp
- Position: Passenger Side


Buick Lamp Housing Part Number: 25675798
Product Specifications- Other Name: Connector, Courtesy/Dome/Reading Lamp; Connector


Buick Connector Part Number: 15306009
$33.42 MSRP: $59.68You Save: $26.26 (44%)Product Specifications- Other Name: Connector, Generator; Headlight Connector
- Replaces: 12186568, 12085537
Buick Lamp Housing, Driver Side Part Number: 25675799
Product Specifications- Other Name: Connector, Courtesy/Dome/Reading Lamp
- Position: Driver Side
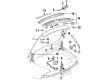
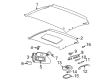
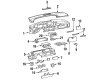
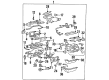
Buick Dome Light Connector
Choose OEM Dome Light Connector, you're making the optimal decision for superior quality and perfect performance. You can feel confident because each component goes through stringent quality checks. Every part is carefully built to comply with Buick's factory specifications. You'll enjoy a smooth, worry-free installation that fits just right. At ChevyPartsDeal.com, you'll find it easy to get top-quality OEM Buick Dome Light Connector. You can shop at highly competitive prices and protect your budget. All our genuine Buick parts include a dependable manufacturer's warranty. You'll also appreciate our straightforward return policy and swift delivery services for extra convenience.
The Buick Dome Light Connector attaches the wires of the overhead cabin lamp, making the power flow and distribution stable and it eliminates the irritating flicker on the road at night. Established in 1903, Buick soon developed a reputation of producing cars with a glide over rough roads, and has done so to this day with insulation by QuietTuning, laminated glass, plush supportive seats and balanced suspensions that allow the occupants to talk to one another at highway speeds without either party screaming. Its present product range features smooth bodylines with driver oriented technologies such as wireless smartphone screen projection, head up displays, and safety aids, and concept vehicles such as Wildcat EV hint at an electric-powered future of a flowing sheet metal carried by the marque. The long-distance journeys become seamless due to the comfortable seats, silent cabins, user friendliness infotainment, and design background with a friendly look. The interior cabin lighting is important and the plug that connects the overhead bulb to the harness is a Dome Light Connector which provides a voltage and service. Installation of the connector begins with safety therefore disconnection of the negative battery cable should come before you touch the headliner. The lens can be removed with a trim tool, then the screws or clips holding the bulb housing can be removed and the rest of the assembly can be lowered to reach the plug, observing the way the wires are run. Click the locking tab and slide the old connector off, strip a new quarter inch of insulation on the copper where it looks dull, match the colors of the wires, crimp new terminals or press a prewired connector until it clips, and testing is done again by connecting the power.
Related Buick Parts
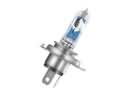 Buick Headlight Bulb
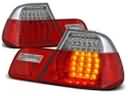 Buick Tail Light
 Buick Back Up Light
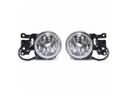 Buick Fog Light
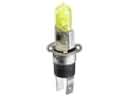 Buick Fog Light Bulb
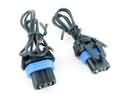 Buick Fog Light Connector
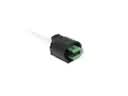 Buick Forward Light Harness Connector
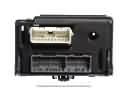 Buick Light Control Module
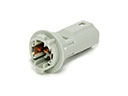 Buick Light Socket
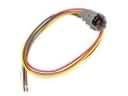 Buick Rear Light Harness Connector
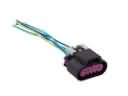 Buick Tail Light Connector
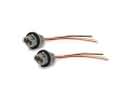 Buick Turn Signal Light Connector