ChevyParts
My Garage
My Account
Cart
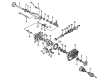
OEM 2004 GMC Safari Universal Joint
U-Joint- Select Vehicle by Model
- Select Vehicle by VIN
Select Vehicle by Model
orMake
Model
Year
Select Vehicle by VIN
For the most accurate results, select vehicle by your VIN (Vehicle Identification Number).
2 Universal Joints found


2004 GMC Safari Universal Joints Part Number: 89059111
$163.83 MSRP: $280.26You Save: $116.43 (42%)Ships in 1-2 Business DaysProduct Specifications- Other Name: Joint Kit, Front Axle Propeller Shaft Universal *Outside Snap
- Replaces: 12476231, 12471503, 12522048, 12472409, 12476230, 26049843, 88982758, 94772179, 88964507
- Item Weight: 2.00 Pounds
- Item Dimensions: 4.1 x 4.0 x 1.6 inches
- Condition: New
- Fitment Type: Direct Replacement
- SKU: 89059111
- Warranty: This genuine part is guaranteed by GM's factory warranty.


2004 GMC Safari Universal Joints Part Number: 23104840
$52.27 MSRP: $91.21You Save: $38.94 (43%)Product Specifications- Other Name: Joint Kit, Propeller Shaft Universal Joint; U Joint
- Replaces: 12471502, 26042371, 12479126
- Item Weight: 1.90 Pounds
- Item Dimensions: 5.9 x 5.4 x 2.9 inches
- Condition: New
- Fitment Type: Direct Replacement
- SKU: 23104840
- Warranty: This genuine part is guaranteed by GM's factory warranty.
2004 GMC Safari Universal Joint
With a comprehensive array of OEM 2004 GMC Safari Universal Joint, from fuel pumps to door handles, our website is a one-stop-shop for your needs. All our genuine 2004 GMC Safari Universal Joint are backed by the manufacturer's warranty and are offered at competitive prices in the market. Rest assured, you can shop with complete confidence.
2004 GMC Safari Universal Joint Parts and Q&A
- Q: What tools are required to service and repair the universal joint with an external snap ring on 2004 GMC Safari?A: The proper tools to maintain an external snap ring Universal Joint are a u-joint bearing separator part number j 9522-3 and u-joint bearing spacer remover part number j 9522-5. Place the propeller shaft on a press then set it horizontally for service. Indicate on the propeller shaft which ends need to connect to the transmission or transfer case and to the rear or front axle. Use pliers to grip the snap ring ends and remove it; when a ring does not come out freely hit gently on the bearing cup's end to release pressure. Apply the 30 mm (1 1/8 inch) socket at the lower yoke ear to hold the support position and press the lower bearing cup out of the yoke ear using the u-joint bearing separator tool j 9522-3. To get the remaining bearing cup out fully, lift the cross and position the u-joint bearing spacer remover (J 9522-5) between the seal and cup before proceeding with the presses. Press the opposite end of the shaft to push out the second bearing cup while removing the cross section and associated Universal Joint parts from the yoke. When replacing front universal joints at the rear axle you must extract the bearings from the Slip Yoke in the same way. Check for impurities in the bearing cup bores and groove area of the retaining ring before cleaning the grooves properly. Begin installation by inserting half of one bearing cup into the new journal before placing it in the yoke space. Lower the yoke ear and place the cross piece before pushing the bearing cup into the yoke until it reaches flush with the surface. Fit the opposite bearing cup into the second yoke ear while keeping trunnions straight. Push the yoke ear carefully to fit the bearing without trunnion hindrance while making the bearing retainer groove visible. Press the bearing retainer onto its proper location before using a dead blow hammer to loosen the yoke bearings slightly when needed. Finally, install the propeller shaft.
Related 2004 GMC Safari Parts
 2004 GMC Safari Differential
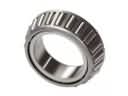 2004 GMC Safari Differential Bearing
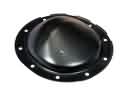 2004 GMC Safari Differential Cover
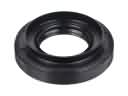 2004 GMC Safari Differential Seal
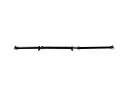 2004 GMC Safari Drive Shaft
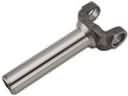 2004 GMC Safari Driveshaft Yokes
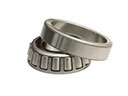 2004 GMC Safari Pinion Bearing
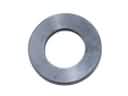 2004 GMC Safari Pinion Washer
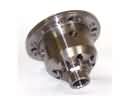
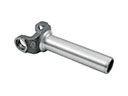 2004 GMC Safari Slip Yoke
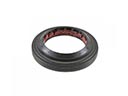 2004 GMC Safari Wheel Seal