ChevyParts
My Garage
My Account
Cart
OEM 2001 Chevrolet Corvette A/C Accumulator
Accumulator- Select Vehicle by Model
- Select Vehicle by VIN
Select Vehicle by Model
orMake
Model
Year
Select Vehicle by VIN
For the most accurate results, select vehicle by your VIN (Vehicle Identification Number).
1 A/C Accumulator found


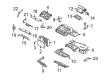
2001 Chevrolet Corvette Drier Part Number: 1132765
$28.04 MSRP: $51.28You Save: $23.24 (46%)Ships in 1-3 Business DaysProduct Specifications- Other Name: Accumulator Assembly A/C; Drier Desiccant Element; A/C Receiver Drier; A/C Accumulator; Accumulator; Accumulator, A/C Refrigerant
- Item Weight: 2.40 Pounds
- Item Dimensions: 7.4 x 6.3 x 11.2 inches
- Condition: New
- Fitment Type: Direct Replacement
- SKU: 1132765
- Warranty: This genuine part is guaranteed by GM's factory warranty.
2001 Chevrolet Corvette A/C Accumulator
With a comprehensive array of OEM 2001 Chevrolet Corvette A/C Accumulator, from fuel pumps to door handles, our website is a one-stop-shop for your needs. All our genuine 2001 Chevrolet Corvette A/C Accumulator are backed by the manufacturer's warranty and are offered at competitive prices in the market. Rest assured, you can shop with complete confidence.
2001 Chevrolet Corvette A/C Accumulator Parts and Q&A
- Q: How to replace the A/C Accumulator in the HVAC system on 2001 Chevrolet Corvette?A: To remove the part to be replaced in the hvac system, you can start by recovering the refrigerant and follow by removing the battery and its heat shield. Remove the nut holding the heater pipe bracket to the cowl to find room to get around the refrigerant lines. Unfasten the compressor hose to accumulator retaining bolt, make sure that you cap or tape open compressor hose and accumulator to avoid contamination. Pull the compressor hose from the accumulator, remove the o-ring and replace the hose end according to its new location. Unscrew the accumulator bracket mounting nuts while paying attention to the accumulator's orientation relative to hose and rear evaporator tube. Position the accumulator slightly again to reach the hose fitting, capping or taping the open accumulator hose as well. Use a back up wrench on the accumulator fitting and loosen the accumulator hose fitting and disconnect the hose discarding the o-ring. Pull out the accumulator from the car and unscrew the bracket clamp bolt to have it off from the bracket. Check for wear and damage of the accumulator bracket insulator and lower insulator, and in case of replacing the accumulator, drain and measure the oil from the disposed of unit during installation. Add 60ml (2 oz) additional oil than what was drained from the old accumulator, check and replace the insulators if necessary. Mount the new accumulator to the bracket and clamp the bolt just enough to permit some rotation. Remove the caps or the tape from the hoses and reinstall the accumulator and the bracket to the vehicle. Clean sealing surfaces of the accumulator hose and accumulator with lint-free cloth, and then lightly apply new o-ring seal with mineral base 525 viscosity refrigerant oil in such a way that it doesn't get into the refrigerant system. Push the o-ring over the accumulator hose all the way to the raised spot and install it on this hose to the accumulator, lining up with marked before removal. Secure the accumulator hose fitting to the accumulator using a back up wrench on the fitting which has to be tightened 41 n.m (30 lb ft). Install the accumulator and bracket by tightening the mounting nuts to 10 n.m (89 lb in) and the clamp bolt into the same specification. Refit the heater pipe bracket to the cowl and tighten using the retaining nut of 10 n.m (89 lb in) and reinstall the battery heat shield and battery. Finally, evacuate and charge the refrigerant system and conduct a leak test with the halogen leak detector (J 39400-A).
Related 2001 Chevrolet Corvette Parts
 2001 Chevrolet Corvette A/C Clutch
 2001 Chevrolet Corvette A/C Idler Pulley
 2001 Chevrolet Corvette A/C Orifice Tube
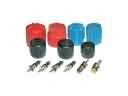 2001 Chevrolet Corvette A/C System Valve Core
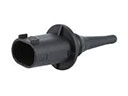 2001 Chevrolet Corvette Ambient Temperature Sensor
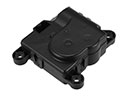 2001 Chevrolet Corvette Blend Door Actuator
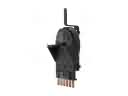 2001 Chevrolet Corvette Blower Control Switches
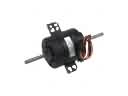 2001 Chevrolet Corvette Blower Motor
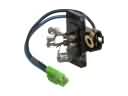 2001 Chevrolet Corvette Blower Motor Resistor
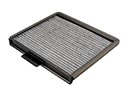 2001 Chevrolet Corvette Cabin Air Filter
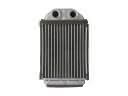 2001 Chevrolet Corvette Heater Core
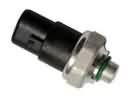 2001 Chevrolet Corvette HVAC Pressure Switch