ChevyParts
My Garage
My Account
Cart
OEM 2000 Chevrolet Venture Brake Master Cylinder
- Select Vehicle by Model
- Select Vehicle by VIN
Select Vehicle by Model
orMake
Model
Year
Select Vehicle by VIN
For the most accurate results, select vehicle by your VIN (Vehicle Identification Number).
2 Brake Master Cylinders found

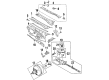
2000 Chevrolet Venture Master Cylinder Part Number: 18022002
Product Specifications- Other Name: Cylinder Kit, Brake Master; Overhaul Kit; Master Cylinder Repair Kit
- Item Weight: 0.50 Pounds
- Item Dimensions: 4.1 x 2.0 x 1.0 inches
- Condition: New
- Fitment Type: Direct Replacement
- SKU: 18022002
- Warranty: This genuine part is guaranteed by GM's factory warranty.

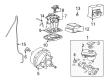
2000 Chevrolet Venture Master Cylinder Part Number: 19209260
Product Specifications- Other Name: Cylinder, Brake Master Cylinder; Brake Master Cylinder
- Replaces: 18060780, 18026277
- Item Weight: 2.60 Pounds
- Item Dimensions: 9.7 x 7.4 x 9.1 inches
- Condition: New
- Fitment Type: Direct Replacement
- SKU: 19209260
- Warranty: This genuine part is guaranteed by GM's factory warranty.
2000 Chevrolet Venture Brake Master Cylinder
With a comprehensive array of OEM 2000 Chevrolet Venture Brake Master Cylinder, from fuel pumps to door handles, our website is a one-stop-shop for your needs. All our genuine 2000 Chevrolet Venture Brake Master Cylinder are backed by the manufacturer's warranty and are offered at competitive prices in the market. Rest assured, you can shop with complete confidence.
2000 Chevrolet Venture Brake Master Cylinder Parts and Q&A
- Q: How to service and repair the Brake Master Cylinder on 2000 Chevrolet Venture?A: Don't connect the primary spring screw to the secondary Piston while disassembling the Brake Master Cylinder, keeping it safe and sound without going for any troubleshooting. Otherwise, it impacts in terms of function and safety, as it will undoubtedly lead to flaws which, in turn, can trigger a disaster. Reservoir cap and diaphragm can be inspected without having to remove the master cylinder from the motor vehicle. First, get rid of the master cylinder, then clean the reservoir cap befdore removing it with the diaphragm. Replace the following components if they are present: cuts, cracks, nicks, or deformation. Then, unbolt and remove the master cylinder reservoir and the retainer, holding down on the primary Piston, and be careful not to impair the Piston, bore, or retainer groove. Now, followings are to be done: lower pressure, non-lubricated air compress will be used to pass into the upper outlet port at the end of bore blind while choking the other outlet ports in order to erase the primary Piston, secondary Piston, spring and retainer of spring. Remove the seals and spring retainer from the secondary Piston and inspect the master cylinder; check for scoring or corrosion, replace it if there was any damage. Clean all components with clean, denatured alcohol and dry it out using non-lubricated compressed air. For assembly, install lubricated seals and spring retainer onto the secondary Piston, followed by the spring and secondary Piston into the cylinder bore, and lubricate with clean brake fluid. Then, attempt putting the lubricated primary Piston into the cylinder bore, compress it and attempt putting in the retainer. Replace the master cylinder reservoir, place the diaphragm in the reservoir cap, and in the final step, replace the cap onto the reservoir before resiting the master cylinder.
Related 2000 Chevrolet Venture Parts
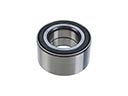 2000 Chevrolet Venture Wheel Bearing
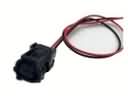 2000 Chevrolet Venture ABS Wheel Speed Sensor Connector
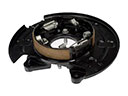 2000 Chevrolet Venture Brake Backing Plate
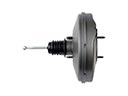 2000 Chevrolet Venture Brake Booster
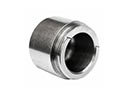 2000 Chevrolet Venture Brake Caliper Piston
 2000 Chevrolet Venture Brake Calipers
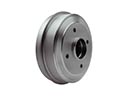 2000 Chevrolet Venture Brake Drum
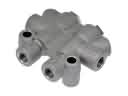 2000 Chevrolet Venture Brake Proportioning Valve
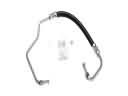 2000 Chevrolet Venture Hydraulic Hose
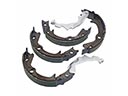 2000 Chevrolet Venture Parking Brake Shoe
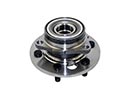 2000 Chevrolet Venture Wheel Hub
 2000 Chevrolet Venture Wheel Hub Bolt