ChevyParts
My Garage
My Account
Cart
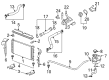
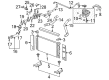
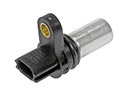
OEM Pontiac Montana Crankshaft Position Sensor
Engine Crankshaft Position Sensor- Select Vehicle by Model
- Select Vehicle by VIN
Select Vehicle by Model
orMake
Model
Year
Select Vehicle by VIN
For the most accurate results, select vehicle by your VIN (Vehicle Identification Number).
4 Crankshaft Position Sensors found


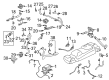
Pontiac Montana Crankshaft Position Sensor Part Number: 10456555
$36.47 MSRP: $75.93You Save: $39.46 (52%)

Pontiac Montana Crankshaft Position Sensor Part Number: 12567648
$63.32 MSRP: $202.37You Save: $139.05 (69%)Ships in 1-2 Business Days
Pontiac Montana Crankshaft Position Sensor Part Number: 12598208
$25.12 MSRP: $47.18You Save: $22.06 (47%)Ships in 1-2 Business Days
Pontiac Montana Crankshaft Position Sensor Part Number: 12574323
$40.82 MSRP: $82.89You Save: $42.07 (51%)Ships in 1-2 Business Days
Pontiac Montana Crankshaft Position Sensor
Want to cut long-term maintenance and repair costs? Choose OEM Crankshaft Position Sensor. Those parts deliver top durability you can trust. On our site, you'll find a huge catalog of genuine Pontiac Montana parts. Prices are unbeatable, so you can keep more in your pocket. Every OEM Pontiac Montana Crankshaft Position Sensor includes a manufacturer's warranty. You can also get an easy return policy that keeps buying risk free. Fast delivery, get your car on the road quickly. It's simple to search, compare, and order. Stop guessing about quality or fit. Order today and save with parts that last.
Pontiac Montana Crankshaft Position Sensor ensures precise ignition control for improved startup reliability and fuel efficiency. The Pontiac packed the Montana with family-friendly strengths including three roomy seating rows, sliding side doors for easy entry, smooth 4T65-E automatic shifts, and a choice of strong V6 engines, which give lively acceleration but keep running costs sensible. Pontiac engineers added front-wheel drive as standard, but available all-wheel drive allows the Montana to tackle slick roads with poise, and a stiff safety cage with dual airbags, ABS, and child locks scored well in crashes. Pontiac owners rave about the minivan's durable frame, quiet ride, and rigorous OEM parts quality that preserve long-term value, so the Montana is still a sensible choice for drivers who need space without foregoing comfort or confidence. The Crankshaft Position Sensor on this vehicle is located near the crank pulley and is applied to read the speed and angle of the crankshaft, then send this information to the engine computer to enable it to fire the plugs and deliver fuel at exactly the right moment, a feat important for smooth idling, strong power, and low emissions. Designed to be resistant to heat and vibration, the Crankshaft Position Sensor endures thousands of miles before service, and when faulty, a Crankshaft Position Sensor can be replaced in a short time. To install one, disconnect the battery, unbolt and remove the old unit, lightly oil the new sensor O-ring, seat and tighten it, reconnect the harness and battery, and verify operation using a scan tool.
Related Pontiac Montana Parts
 Pontiac Montana Camshaft Position Sensor
 Pontiac Montana Air Charge Temperature Sensor
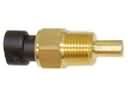 Pontiac Montana Coolant Temperature Sensor
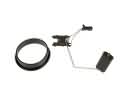 Pontiac Montana Fuel Level Sensor
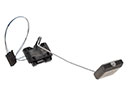 Pontiac Montana Fuel Tank Sending Unit
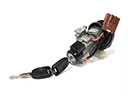 Pontiac Montana Igniter
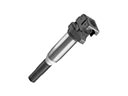 Pontiac Montana Ignition Coil
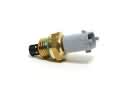 Pontiac Montana Intake Manifold Temperature Sensor
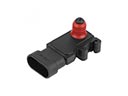 Pontiac Montana MAP Sensor
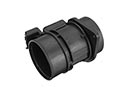 Pontiac Montana Mass Air Flow Sensor
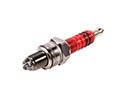 Pontiac Montana Spark Plug
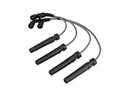 Pontiac Montana Spark Plug Wires