ChevyParts
My Garage
My Account
Cart
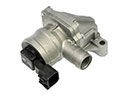
OEM Oldsmobile Vapor Pressure Sensor
Fuel Vapor Pressure Sensor- Select Vehicle by Model
- Select Vehicle by VIN
Select Vehicle by Model
orMake
Model
Year
Select Vehicle by VIN
For the most accurate results, select vehicle by your VIN (Vehicle Identification Number).
2 Vapor Pressure Sensors found


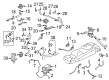
Oldsmobile Fuel Pressure Regulator, Passenger Side Part Number: 16238399
$49.19 MSRP: $103.58You Save: $54.39 (53%)Product Specifications- Other Name: Sensor, Fuel Tank Pressure; Fuel Tank Pressure Sensor; Fuel Pressure Sensor
- Position: Passenger Side
- Replaced by: 19540725
- Replaces: 09377680, 12206740, 16217059, 16196060, 22678829, 9377680, 12219388, 16257276


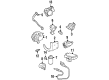
Oldsmobile Solenoid Switch Part Number: 24506192
Product Specifications- Other Name: Switch Kit, Fuel Vapor Canister Purge
Oldsmobile Vapor Pressure Sensor
Choose OEM Vapor Pressure Sensor, you're making the optimal decision for superior quality and perfect performance. You can feel confident because each component goes through stringent quality checks. Every part is carefully built to comply with Oldsmobile's factory specifications. You'll enjoy a smooth, worry-free installation that fits just right. At ChevyPartsDeal.com, you'll find it easy to get top-quality OEM Oldsmobile Vapor Pressure Sensor. You can shop at highly competitive prices and protect your budget. All our genuine Oldsmobile parts include a dependable manufacturer's warranty. You'll also appreciate our straightforward return policy and swift delivery services for extra convenience.
The Oldsmobile Vapor Pressure Sensor is applied to restrain fuel vapors to allow the car to operate with a cleaner engine. Oldsmobile started with the production of cars in 1897 and soon became unique with a moving line of production that saved money and made the car accessible to the common people. In 1940 Oldsmobile introduced the Hydra-Matic automatic transmission, which allowed the drivers to shift gears without using a clutch and made travelling more convenient. In all decades Oldsmobile concentrated on the silence of the cabins, powerful engines and the comfort that would stay long, as a result of which owners could feel secure when they were riding on highways or passing by the town. This glorious tradition of dependability continues to shine every time one of these cars puts on the track. The Vapor Pressure Sensor is a very small switch placed in the EVAP fuel system, which gauges the pressure in the tank and system information is sent to the ECU and helps prevent the leakage of fuel which wastes fuel and increases emissions. The replacement of the Vapor Pressure Sensor is quite easy. Park on flat surface, brake switch on and remove the fuel pressure by loosening the cap a few seconds. Unplug the battery, creep under the vehicle and find the sensor on the fuel tank or EVAP container. Label and then disconnect the connector and vapor lines, unscrew or unclip, twist and pull off the old unit. Check the O-ring, place a small amount of oil on it, press the new sensor firmly until it clips into place, reassemble the hardware, reconnect lines and the plug, connect the battery, clear codes, and finally give it a brief road test to ensure that the Vapor Pressure Sensor is reporting consistent readings.
Related Oldsmobile Parts
 Oldsmobile Air Inject Check Valve
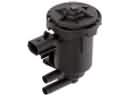 Oldsmobile Canister Purge Valves
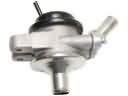 Oldsmobile Diverter Valve
 Oldsmobile EGR Filter
 Oldsmobile EGR Tube
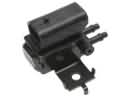 Oldsmobile EGR Vacuum Solenoid
 Oldsmobile EGR Valve Gasket
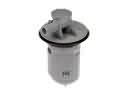 Oldsmobile Fuel Tank Vent Valve
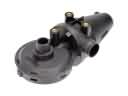 Oldsmobile PCV Valve
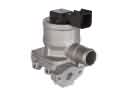 Oldsmobile Secondary Air Injection Check Valve
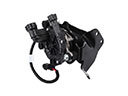 Oldsmobile Secondary Air Injection Pump
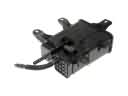 Oldsmobile Vapor Canister